Guide d’installation WPILib
This guide is intended for Java and C++ teams. LabVIEW teams can skip to Installation de LabVIEW pour FRC (LabVIEW uniquement). Python teams can skip to Guide d’installation de Python. Additionally, the below tutorial shows Windows 10, but the steps are identical for all operating systems. Notes differentiating operating systems will be shown.
Prérequis
- Supported Operating Systems and Architectures:
Windows 10 & 11, 64 bit only. 32 bit and Arm are not supported
Ubuntu 22.04, 64 bit. Other Linux distributions with glibc >= 2.34 may work, but are unsupported
macOS 11 or higher, both Intel and Arm for Java. C++ requires macOS 12 or higher with Xcode 14.
Avertissement
The following OSes are no longer supported: macOS 10.15, Ubuntu 18.04 & 20.04, Windows 7, Windows 8.1, and any 32-bit Windows.
WPILib est conçu pour s’installer dans différents dossiers correspondant à différentes années, de sorte qu’il n’est pas nécessaire de désinstaller une version précédente avant d’installer la version WPILib de l’année en cours.
Downloading
WPILib Installer
Release Notes
This is an update release of WPILib for the 2024 season. This release has a number of quality-of-life bugfixes.
Upgrading from earlier 2024 releases is easy: simply download and run the new installer and it will update your current installation. If you already have the 2024 WPILib vscode installed, it will detect it and you can simply click "next" for that installation step. After installation, vscode will prompt you when opening your robot project whether you want to upgrade it to this version. Note that using the installer is required to get the new version of desktop tools such as Shuffleboard. This release is compatible with both 2024_v2 releases of the RoboRIO image. Mac note: if upgrading from 2024.1.1, it is necessary to manually remove the 2024.1.1 version of AdvantageScope before running the installer in order for the new version to be installed.
Note: After updating to 2024.3.2, the deploy process will deploy an updated JRE to your robot on first deploy. This means the first deploy will take a little longer than usual.
The documentation for WPILib is located at https://docs.wpilib.org/ (if you have trouble accessing this location, https://frcdocs.wpi.edu/en/stable/ is an alternate location with the same content).
If you're new to FRC, start with Getting Started.
System Requirements: WPILib requires 64-bit Windows 10 or 11, Ubuntu 22.04, or macOS 12 or higher. C++ teams should note that Visual Studio 2022 17.9 is required for desktop builds. Mac users will need to have the Xcode Command Line Tools installed before running the installer. This can be done by running xcode-select --install in the Terminal.
If you're returning from a previous season, check out what's new for 2024. You will need a new RoboRIO image for 2024; this is available via the FRC 2024 Game Tools. Follow the WPILib installation guide to install WPILib.
If you're starting from a 2023 robot project, you will need to import your project to create a 2024 project. The import process is important, as it will make a few automated corrections for some breaking changes that happened in 2024. It is also necessary to import vendor libraries again, since last year’s vendor libraries must be updated to be compatible with this year’s projects.
A complete list of known issues with this release can be found here.
WPILib is developed by a small team of volunteers and the FIRST community.
Downloads
For 2024, we have changed the location for WPILib downloads due to GitHub file size limitations. Please use the links below to download the installer package for your platform.
- WPILib 2024.3.2 - Windows (2.2 GB)
- WPILib 2024.3.2 - Mac (Arm) (1.9 GB)
- WPILib 2024.3.2 - Mac (Intel) (2.1 GB)
- WPILib 2024.3.2 - Linux (x64) (2.5 GB)
- WPILib 2024.3.2 - Linux (arm64) (2.3 GB)
What's Changed since 2024.3.1
Several changes were made to address reports of robot code not immediately restarting following an uncaught exception or native crash:
- "wpi::Now() not initialized" error is now fatal and immediately crashes by @ThadHouse in https://github.com/wpilibsuite/allwpilib/pull/6417
- An uncaught Java exception now immediately exits by @PeterJohnson in https://github.com/wpilibsuite/allwpilib/pull/6420
- JRE updated to not report memory allocation info, as this can hang by @PeterJohnson in https://github.com/wpilibsuite/frc-openjdk-roborio/pull/15
- JRE error log reporting timeout shortened from 120 seconds to 2 seconds by @PeterJohnson in https://github.com/wpilibsuite/frc-openjdk-roborio/pull/16
SysId
- Fix position feedback latency compensation by @brettle in https://github.com/wpilibsuite/allwpilib/pull/6392
- Fix arm characterization crash by @calcmogul in https://github.com/wpilibsuite/allwpilib/pull/6422
- Fix crash on negative feedforward gains by @calcmogul in https://github.com/wpilibsuite/allwpilib/pull/6425
- Fix wrong position Kd with unnormalized time by @brettle in https://github.com/wpilibsuite/allwpilib/pull/6433
Tools
- AdvantageScope updated to 3.2.1 by @jwbonner in https://github.com/wpilibsuite/WPILibInstaller-Avalonia/pull/403
Math
- Add structured data support for DifferentialDriveWheelPositions by @DeltaDizzy in https://github.com/wpilibsuite/allwpilib/pull/6412
- LinearSystemId: Don't throw if Kv = 0 by @calcmogul in https://github.com/wpilibsuite/allwpilib/pull/6424
Simulation GUI
- Use shift key to enable docking features by @PeterJohnson in https://github.com/wpilibsuite/allwpilib/pull/6429
Documentation
- [wpiunits] Fix Distance class javadocs to state the correct dimension by @DeltaDizzy in https://github.com/wpilibsuite/allwpilib/pull/6363
- Add docs for features not supported on PDH (NFC) by @sciencewhiz in https://github.com/wpilibsuite/allwpilib/pull/6436
Examples
- Remove unused private variables by @calcmogul in https://github.com/wpilibsuite/allwpilib/pull/6403
Full Changelog: https://github.com/wpilibsuite/allwpilib/compare/v2024.3.1...v2024.3.2
MD5 Hashes
9a6bae26d00083398ebdb430b5133591  WPILib_Linux-2024.3.2.tar.gz
36c77d22fa3600c840944637c244d06b  WPILib_LinuxArm64-2024.3.2.tar.gz
9d54e02fb6c049558ddb4520249beb46  WPILib_Windows-2024.3.2.iso
e6eee31dd4fb3b10676ed3841c0f7634  WPILib_macOS-Intel-2024.3.2.dmg
9e326f2ecf90db7549ecd4ffbb840999  WPILib_macOS-Arm64-2024.3.2.dmg
SHA256 Hashes
2e3d669c4100acf64808069848c8218d5e66204304986114e726ef5c564a3de7  WPILib_Linux-2024.3.2.tar.gz
ad776cc4ce7267bec05ed4f6fe3698cd1a2291460a2ab220fe2936d8582b4777  WPILib_LinuxArm64-2024.3.2.tar.gz
ff73a846153016e588f73dd147790bf4a496019d65efa3daf2b06faef2f822bc  WPILib_Windows-2024.3.2.iso
ca551ee4e44ed1135b5caa0d70920ce29fd06f260099cb85da976081e66a7aac  WPILib_macOS-Intel-2024.3.2.dmg
1af409d3d05debb20120ab494f5d21f482ce270768f41221db2714c97e8db135  WPILib_macOS-Arm64-2024.3.2.dmg
You can download the latest release of the installer from GitHub.
Once on the GitHub releases page, scroll to the Downloads section.
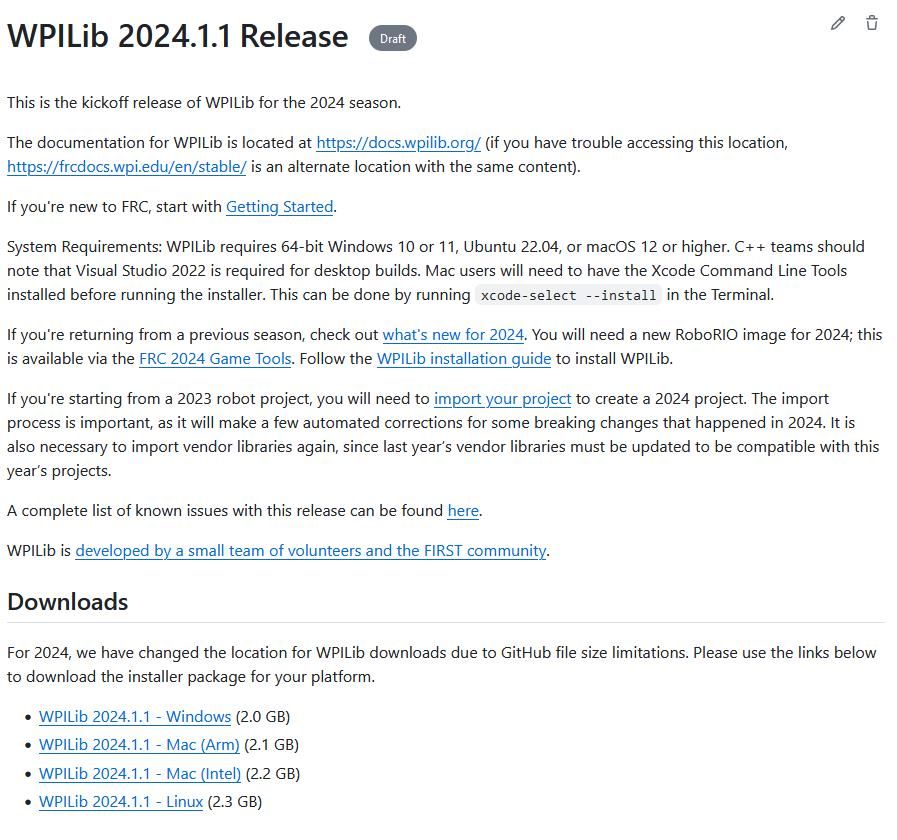
Then click on the correct binary for your OS and architecture to begin the download.
Extraction de l’installateur
Lorsque vous téléchargez l’installateur WPILib, celui-ci est distribué sous la forme d’un fichier d’image de disque .iso pour Windows, .tar.gz pour Linux, et distribué sous la forme de DMG pour MacOS.
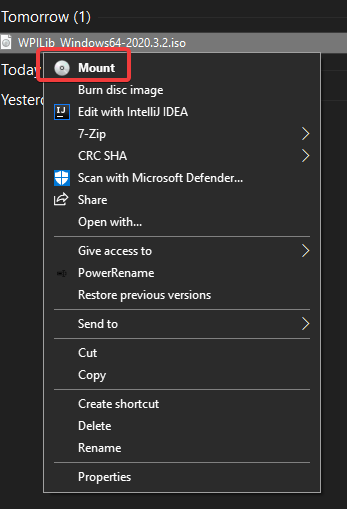
Windows 10+ users can right click on the downloaded disk image and select Mount to open it. Then launch WPILibInstaller.exe.
Note
Other installed programs may associate with iso files and the mount option may not appear. If that software does not give the option to mount or extract the iso file, then follow the directions below.
You can use 7-zip to extract the disk image by right-clicking, selecting 7-Zip and selecting Extract to…. Windows 11 users may need to select Show more options at the bottom of the context menu.
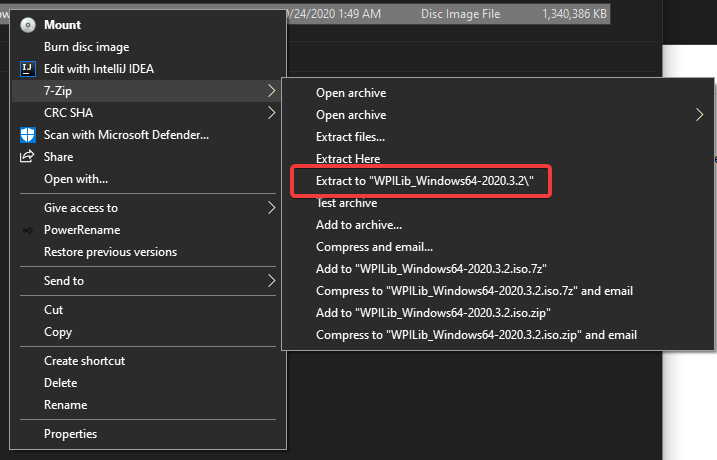
After opening the .iso file, launch the installer by opening WPILibInstaller.exe.
Note
After launching the installer, Windows may display a window titled « Windows protected your PC ». Click More info, then select Run anyway to run the installer.
For this release, macOS users will need to have the Xcode Command Line Tools installed before running the installer; we are working on removing this requirement in a future release. This can be done by running xcode-select --install in the Terminal.
Important
When upgrading from a 2024 beta release or 2024.1.1, it’s necessary to manually delete AdvantageScope before running the installer. Navigate to ~/wpilib/2024/tools and delete AdvantageScope.
Les utilisateurs du système macOS peuvent cliquer deux fois sur le DMG téléchargé, puis sélectionnez WPILibInstaller pour lancer l’application.
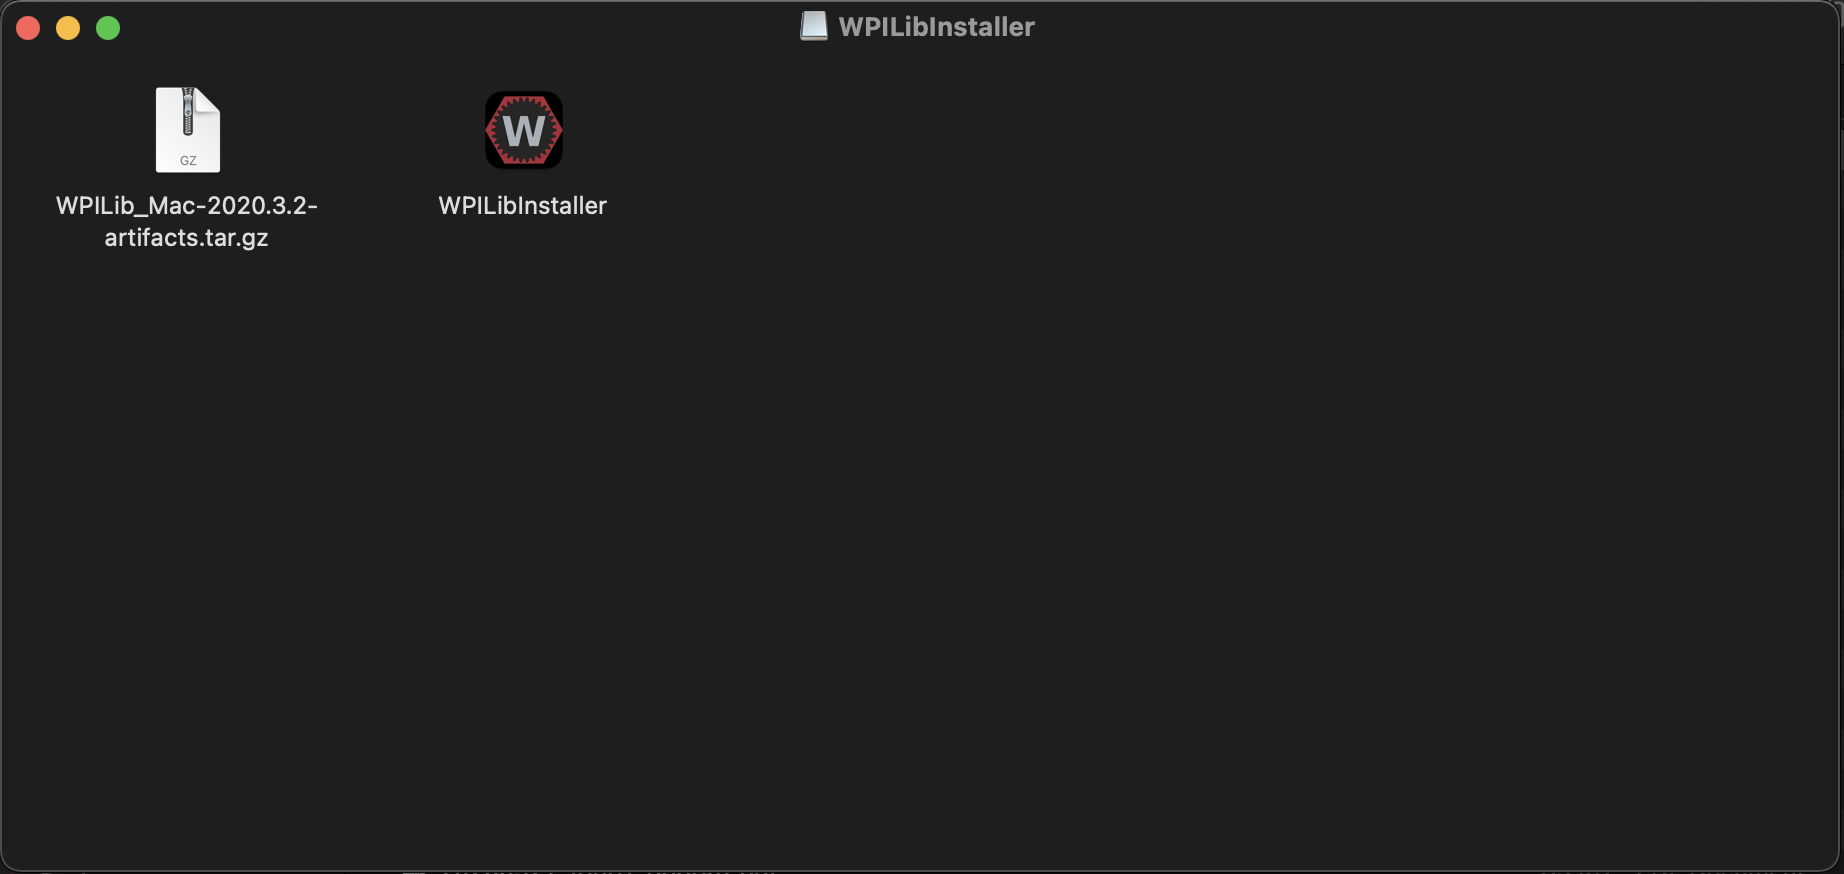
Les utilisateurs de Linux devraient extraire le .tar.gz téléchargé, puis lancer WPILibInstaller. Ubuntu traite les fichiers exécutables dans l’explorateur de fichiers comme des libairies partagées, de sorte qu’en les double-cliquant, on ne les exécutera pas. À la place, exécutez les commandes suivantes dans un terminal avec <version> remplacé par la version que vous êtes en train d’installer.
$ tar -xf WPILib_Linux-<version>.tar.gz
$ cd WPILib_Linux-<version>/
$ ./WPILibInstaller
Exécution de l’installateur
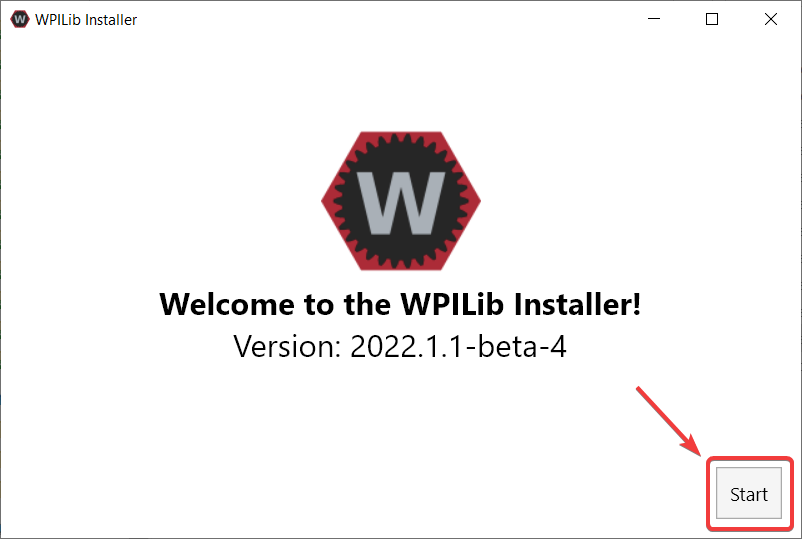
Lors de l’ouverture de l’installateur, l’écran ci-dessous vous sera présenté. Procédez et appuyez sur Start.
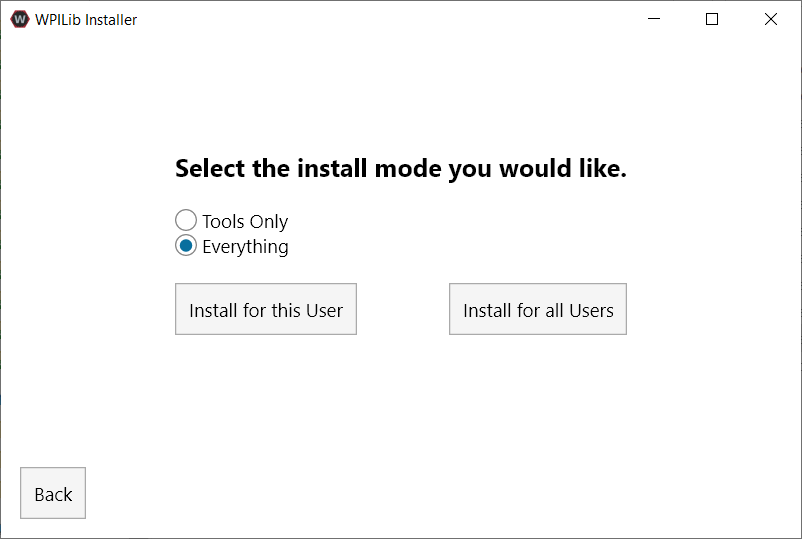
Cela présente une liste d’options incluses avec l’installation de WPILib.
Tools Only installs just the WPILib tools (Pathweaver, Shuffleboard, RobotBuilder, SysId, Glass, and OutlineViewer) and JDK.
Everything installe l’environnement de développement complet (VS Code, extensions, toutes les dépendances), les outils WPILib et le JDK.
Vous remarquerez deux boutons, Install for this User et Install for all Users. Install for this User ne l’installe que sur le compte utilisateur actuel et ne nécessite pas de privilèges d’administrateur. Cependant, Install for all Users installe les outils pour tous les comptes système et nécessitera un accès administrateur. Install for all Users n’est pas une option pour macOS et Linux.
Note
Si vous sélectionnez Install for all Users, Windows vous demandera un accès administrateur via le contrôle de compte d’utilisateur pendant l’installation.
Sélectionnez l’option qui vous convient et l’écran d’installation suivant vous sera présenté.
Cet écran suivant concerne le téléchargement de VS Code. Malheureusement, pour des raisons de licence, VS Code ne peut pas être intégré dans l’installateur.
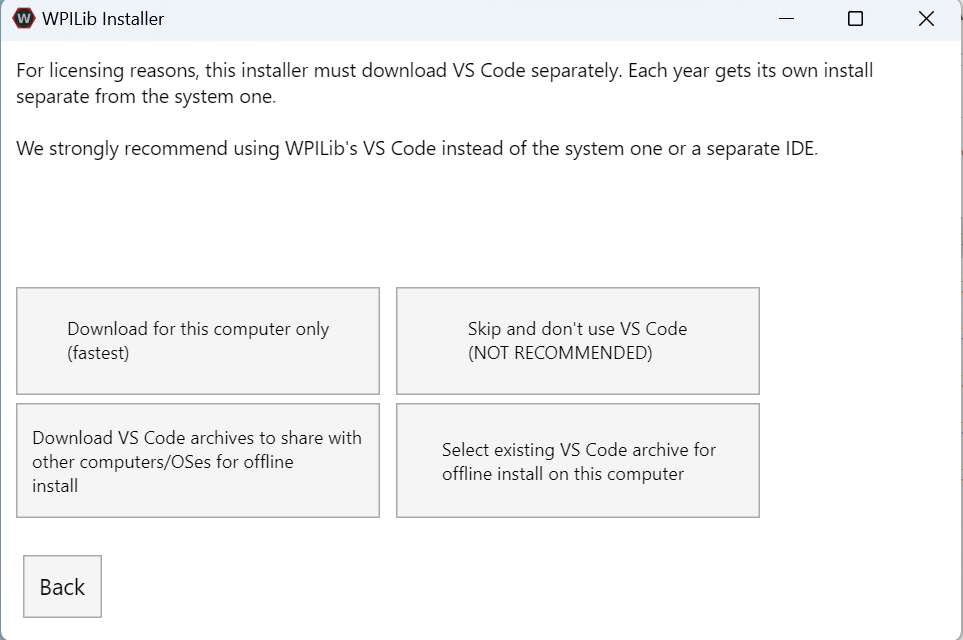
Télécharger pour cet ordinateur uniquement
Cette option télécharge VS Code uniquement pour la plate-forme actuelle, ce qui correspond également au plus petit téléchargement.
Ignorer et ne pas utiliser VS Code
Ignore l’installation de VS Code. Cette option est utile pour les installations ou les configurations avancées. Généralement pas recommandé.
Select existing VS Code archive for offline install on this computer
La sélection de cette option fera apparaître une invitation vous permettant de sélectionner un fichier zip préexistant de VS Code qui a été téléchargé précédemment par le programme d’installation. Cette option ne vous permet pas de sélectionner une copie déjà installée de VS Code sur votre machine.
Create VS Code archives to share with other computers/OSes for offline install
Cette option télécharge et enregistre une copie de VS Code pour toutes les plates-formes, ce qui est utile pour partager la copie du programme d’installation.
Go ahead and select Download for this computer only. This will begin the download process and can take a bit depending on internet connectivity (it’s ~100MB). Once the download is done, select Next. You should be presented with a screen that looks similar to the one below.
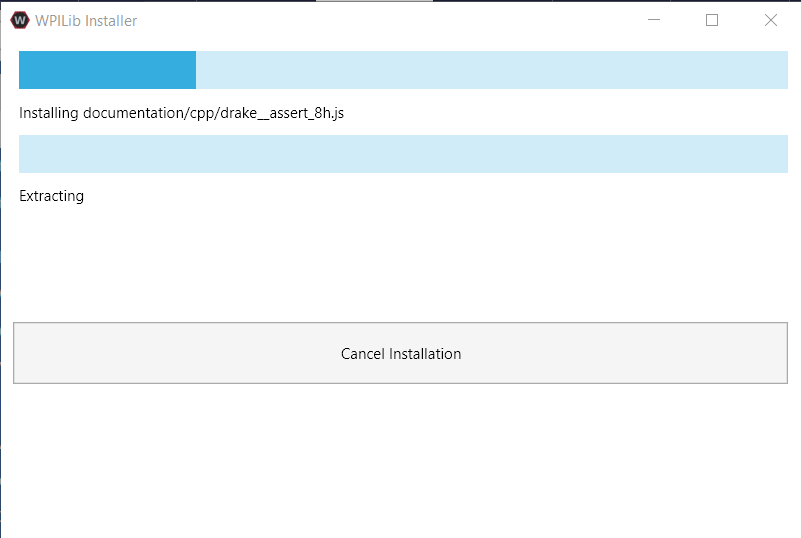
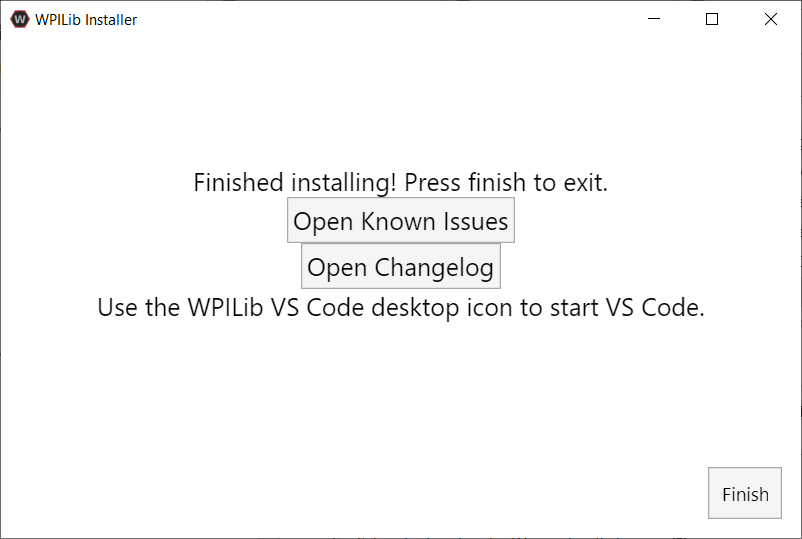
Une fois l’installation terminée, l’écran de fin d’installation vous sera présenté.
Important
WPILib installe une version distincte de VS Code. Il n’utilise pas une installation déjà existante. Chaque année a sa propre copie des outils ajoutés avec l’année. IE: WPILib VS Code 2022. Veuillez lancer le VS Code WPILib non une copie installée du système!
Félicitations, l’environnement de développement et les outils WPILib sont maintenant installés sur votre ordinateur! Appuyez sur Terminer pour quitter le programme d’installation.
Après l’installation
Certains systèmes d’exploitation nécessitent une dernière action pour terminer l’installation.
Après l’installation, l’installateur ouvre le dossier WPILib VS Code. Faites glisser l’application VS Code sur le dock. Éjectez l’image WPILibInstaller du bureau.
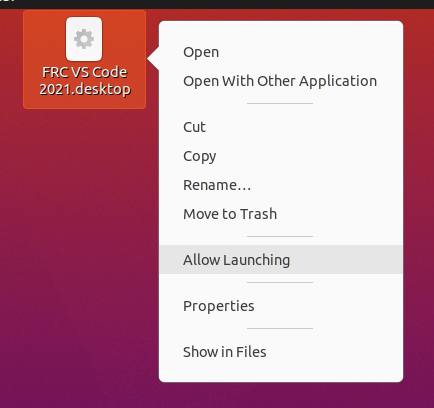
Certaines versions de Linux (par exemple Ubuntu 20.04) vous obligent à donner au raccourci de bureau la possibilité de démarrer. Cliquez à droite sur l’icône de bureau et sélectionnez Allow Launching.
Note
Installing desktop tools and rebooting will create a folder on the desktop called YYYY WPILib Tools, where YYYY is the current year. Desktop tool shortcuts are not available on Linux and macOS.
Installation C++ supplémentaire pour la simulation
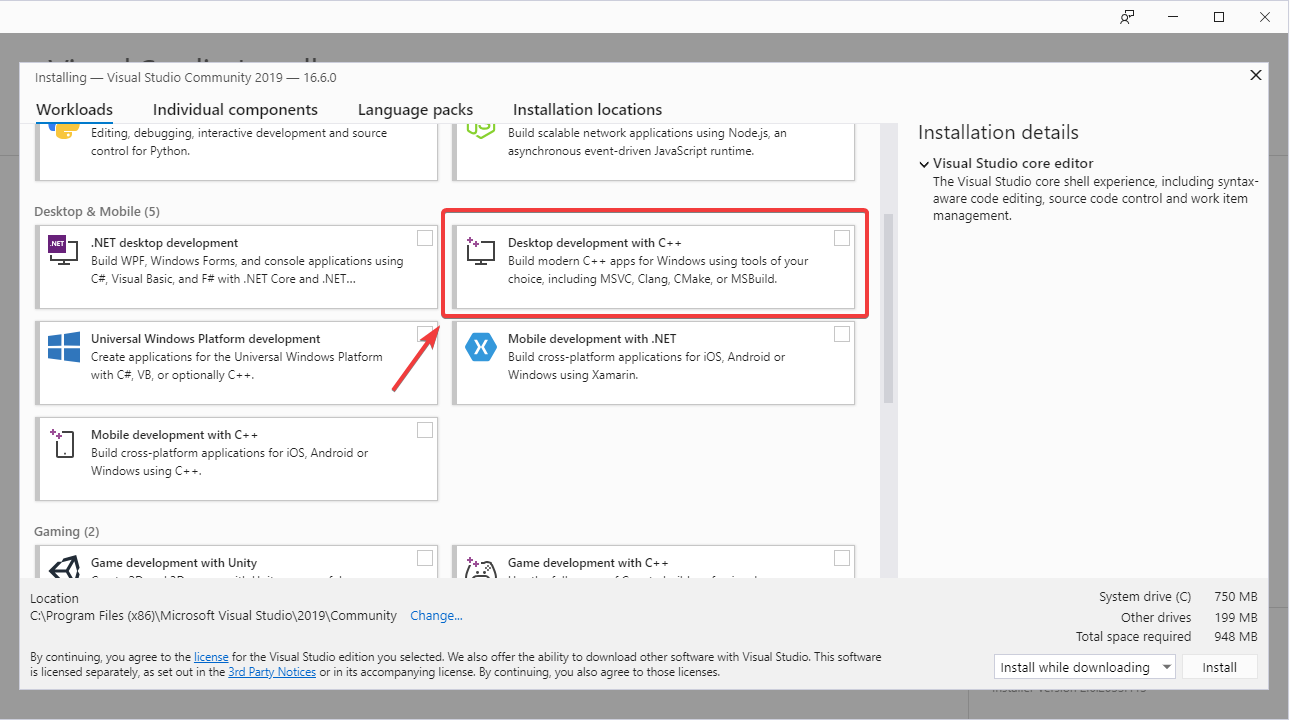
C++ robot simulation requires that a native compiler to be installed. For Windows, this would be Visual Studio 2022 version 17.9 or later (not VS Code), macOS requires Xcode 14 or later, and Linux (Ubuntu) requires the build-essential package.
Assurez-vous que l’option Desktop Development with C++ est cochée dans le programme d’installation de Visual Studio pour la prise en charge de la simulation.
Qu’est-ce qui a été installé?
Le programme d’installation hors ligne installe les composants suivants:
Visual Studio Code - L’IDE pris en charge à partir de 2019 et en montant pour le développement du code robot. L’installateur hors ligne définit une copie distincte de VS Code pour le développement WPILib, même si vous avez déjà VS Code sur votre ordinateur. Cela est possible car certains des paramètres pour la configuration et le bon fonctionnement de la WPILib peuvent briser les flux de travail existants si vous utilisez VS Code pour d’autres projets.
C++ Compiler - Les chaînes de compilation pour la création du code C++ pour le roboRIO
Gradle - La version spécifique de Gradle utilisée pour la création/déploiement du code robot C++ ou Java
Java JDK/JRE - Une version spécifique de Java JDK/JRE qui est utilisée pour construire le code robot Java et pour exécuter l’un des outils basés sur Java (Dashboard, etc.). Celle-ci cohabite avec les installations JDK déjà existantes et n’écrase pas la variable JAVA_HOME
WPILib Tools - SmartDashboard, Shuffleboard, RobotBuilder, OutlineViewer, PathWeaver, Glass, SysId, Data Log Tool, roboRIO Team Number Setter, AdvantageScope
WPILib Dependencies - OpenCV, etc.
VS Code Extensions - WPILib and Java/C++/Python extensions for robot code development in VS Code
Documentation - Offline copies of this frc-docs documentation and Java/C++/Python APIs
Désinstallation
WPILib est conçu pour être installé dans différents dossiers pendant différentes années, de sorte qu’il n’est pas nécessaire de désinstaller une version précédente avant d’installer le WPILib de cette année courante. Cependant, les instructions suivantes peuvent être utilisées pour désinstaller WPILib si vous le souhaitez.
Delete the appropriate wpilib folder (
c:\Users\Public\wpilib\YYYYwhereYYYYis the year to uninstall)Supprimez les icônes du bureau dans
C:\Users\Public\Public Desktop
Delete the appropriate wpilib folder (
~/wpilib/YYYYwhereYYYYis the year to uninstall)
Delete the appropriate wpilib folder (
~/wpilib/YYYYwhereYYYYis the year to uninstall). egrm -rf ~/wpilib/YYYY
Dépannage
En cas de défaillance de l’installateur, signalez le problème dans le dépôt de l’installateur. Un lien est disponible ici. L’installateur doit signaler un message relatif à la cause de l’erreur, s’il vous plaît l’inclure dans la description de votre problème.