Trabajar con Contornos
Después de reducir y eliminar el ruido con operaciones morfológicas, ahora está listo para usar el método findContours de OpenCV. Este método le permite generar contornos basados en tu imagen binaria.
Encontrar y filtrar Contornos
_, contours, _ = cv2.findContours(binary_img, cv2.RETR_EXTERNAL, cv2.CHAIN_APPROX_SIMPLE)
In cases where there is only one vision target, you can just take the largest contour and assume that is the target you are looking for. When there is more than one vision target, you can use size, shape, fullness, and other properties to filter unwanted contours out.
if len(contours) > 0:
   largest = contours[0]
   for contour in contours:
      if cv2.contourArea(contour) > cv2.contourArea(largest):
         largest = contour

   #
   # Contour processing code
   #
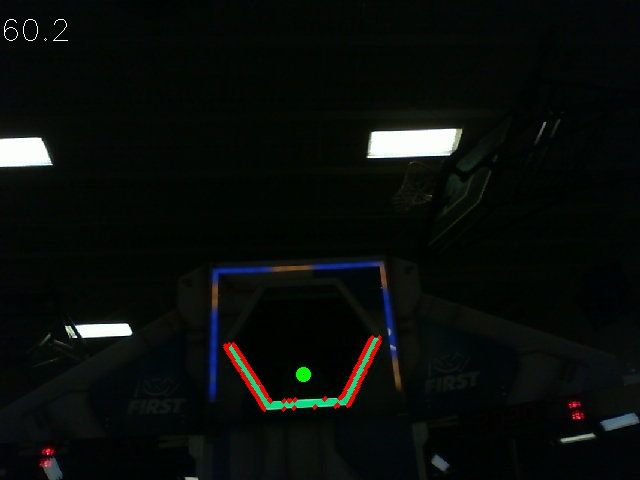
Si dibuja el contorno que acaba de encontrar, debería verse más o menos así:

Extracción de información de Contornos
Ahora que ha encontrado los contorno(s) que desea, ahora desea obtener información sobre estos como el centro, las esquinas y la rotación.
Centro
rect = cv2.minAreaRect(contour)
center, _, _ = rect
center_x, center_y = center
Esquinas
corners = cv2.convexHull(contour)
corners = cv2.approxPolyDP(corners, 0.1 * cv2.arcLength(contour), True)
Rotación
_, _, rotation = cv2.fitEllipse(contour)
Para obtener más información sobre cómo puede usar estos valores, consulte Medidas
Publicar a NetworkTables
Puede usar NetworkTables para enviar estas propiedades a la Driver Station y RoboRIO. Se podría realizar un procesamiento adicional en la Raspberry Pi o en el propio RoboRIO.
import ntcore

nt = ntcore.NetworkTableInstance.getDefault().getTable('vision')

#
# Initialization code here
#

while True:

   #
   # Image processing code here
   #

   nt.putNumber('center_x', center_x)
   nt.putNumber('center_y', center_y)