Crear un Plugin
Vista general
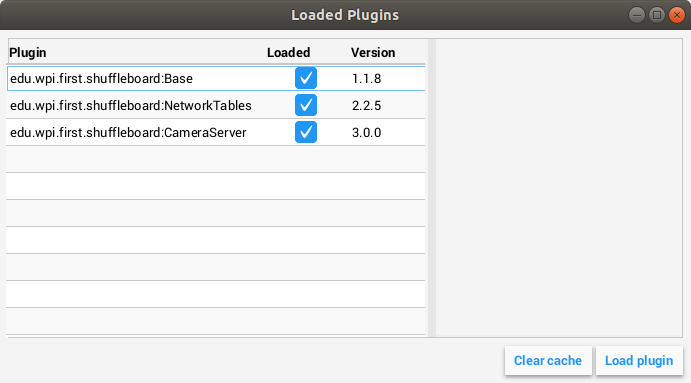
Plugins provide the ability to create custom widgets, layouts, data sources/types, and custom themes. Shuffleboard provides the following built-in plugins.
NetworkTables Plugin: conecta los datos publicados en NetworkTables
Base Plugin: Muestra tipos personalizados de datos FRC® en widgets personalizados
CameraServer Plugin: Muestra transmisiones desde la CamaraServer.
Truco
Puede encontrar un ejemplo de complemento de Shuffleboard personalizado que crea un tipo de datos personalizado y un widget simple para mostrarlo aquí.
Crear un Plugin Personalizado
Para definir un complemento, la clase de complemento debe ser una subclase de edu.wpi.first.shuffleboard.api.Plugin o una de sus subclases. Un ejemplo de una clase de complemento sería el siguiente.
import edu.wpi.first.shuffleboard.api.plugin.Description;
import edu.wpi.first.shuffleboard.api.plugin.Plugin;

@Description(group = "com.example", name = "MyPlugin", version = "1.2.3", summary = "An example plugin")
public class MyPlugin extends Plugin {

}
Explicaciones adicionales sobre cómo utilizar estos atributos, incluyendo versiones numéricas pueden encontrarse aquí.
Note que la anotación @Description es necesaria para notificar al cargador de plugin sobre las propiedades de la clase plugin personalizada. Las clases plugin pueden tener un constructor predeterminado, pero no pueden tener ningún argumento.
Construir un Plugin
The easiest way to build plugins is to utlize the example-plugins folder in the shufflebloard source tree. Clone Shuffleboard with git clone https://github.com/wpilibsuite/shuffleboard.git, and checkout the version that corresponds to the WPILib version you have installed (e.g. 2023.2.1). git checkout v2023.2.1
Put your plugin in the example-plugins\PLUGIN-NAME directory.
Copy the custom-data-and-widget.gradle from example-plugins\custom-data-and-widget and rename to match your plugin name.
Edit settings.gradle in the shuffleboard root directory to add include "example-plugins:PLUGIN-NAME"
Los plugin pueden tener dependencias con otros plugin y bibliotecas, sin embargo, deben estar incluidos correctamente en el maven o en el archivo gradle build. Cuando un plugin depende de otro es una buena práctica definir esas dependencias para que el plugin no cargue cuando las dependencias no lo hagan. Esto puede realizarse utilizando la anotación @Requires como se muestra a continuación:
@Requires(group = "com.example", name = "Good Plugin", minVersion = "1.2.3")
@Requires(group = "edu.wpi.first.shuffleboard", name = "Base", minVersion = "1.0.0")
@Description(group = "com.example", name = "MyPlugin", version = "1.2.3", summary = "An example plugin")
public class MyPlugin extends Plugin {

}
La minVersion especifica la versión mínima permitida del plugin que puede cargarse. Por ejemplo, si la minVersion es 1.4.5 y el plugin con la versión 1.4.7 se carga, se permitirá hacerlo. Sin embargo, si la versión fuese 1.2.4, entonces no se permitirá desde que es menos que la minVersion.
Desplegar un Plugin a Shuffleboard
In order to load a plugin in Shuffleboard, you will need to generate a jar file of the plugin and put it in the ~/Shuffleboard/plugins folder. This can be done automatically
by running from the shuffleboard root gradlew :example-plugins:PLUGIN-NAME:installPlugin
Después de desplegar, Shuffleboard almacenará la dirección del plugin para que cargue automáticamente la siguiente vez que se cargue Shuffleboard. Tal vez sea necesario seleccionar Clear Cache en el menú de plugin para remover o volver a cargar un plugin en Shuffleboard.
Agregar Manualmente un Plugin
The other way to add a plugin to Shuffleboard is to compile it to a jar file and add it from Shuffleboard. The jar file is located in example-plugins\PLUGIN-NAME\build\libs after running gradlew build in the shuffleboard root
Open Shuffleboard, click on the file tab in the top left, and choose Plugins from the drop down menu.

Desde la ventana de plugin, escoja el botón “Cargar plugin” en la esquina inferior derecha, y seleccione su archivo jar.