Introducción a la Simulación del Robot
A veces un equipo puede querer probar su código sin tener un robot disponible. WPILib proporciona a los equipos la capacidad de simular varias características del robot usando simples comandos gradle.
El uso del Simulador de Escritorio requiere que el Soporte de Escritorio esté habilitado. Esto se puede hacer marcando la casilla «Enable Desktop Support Checkbox» o Activar Soporte de Escritorio al crear su proyecto del robot o ejecutando «WPILib: Change Desktop Support Enabled Setting» desde la paleta de comandos de Visual Studio Code.
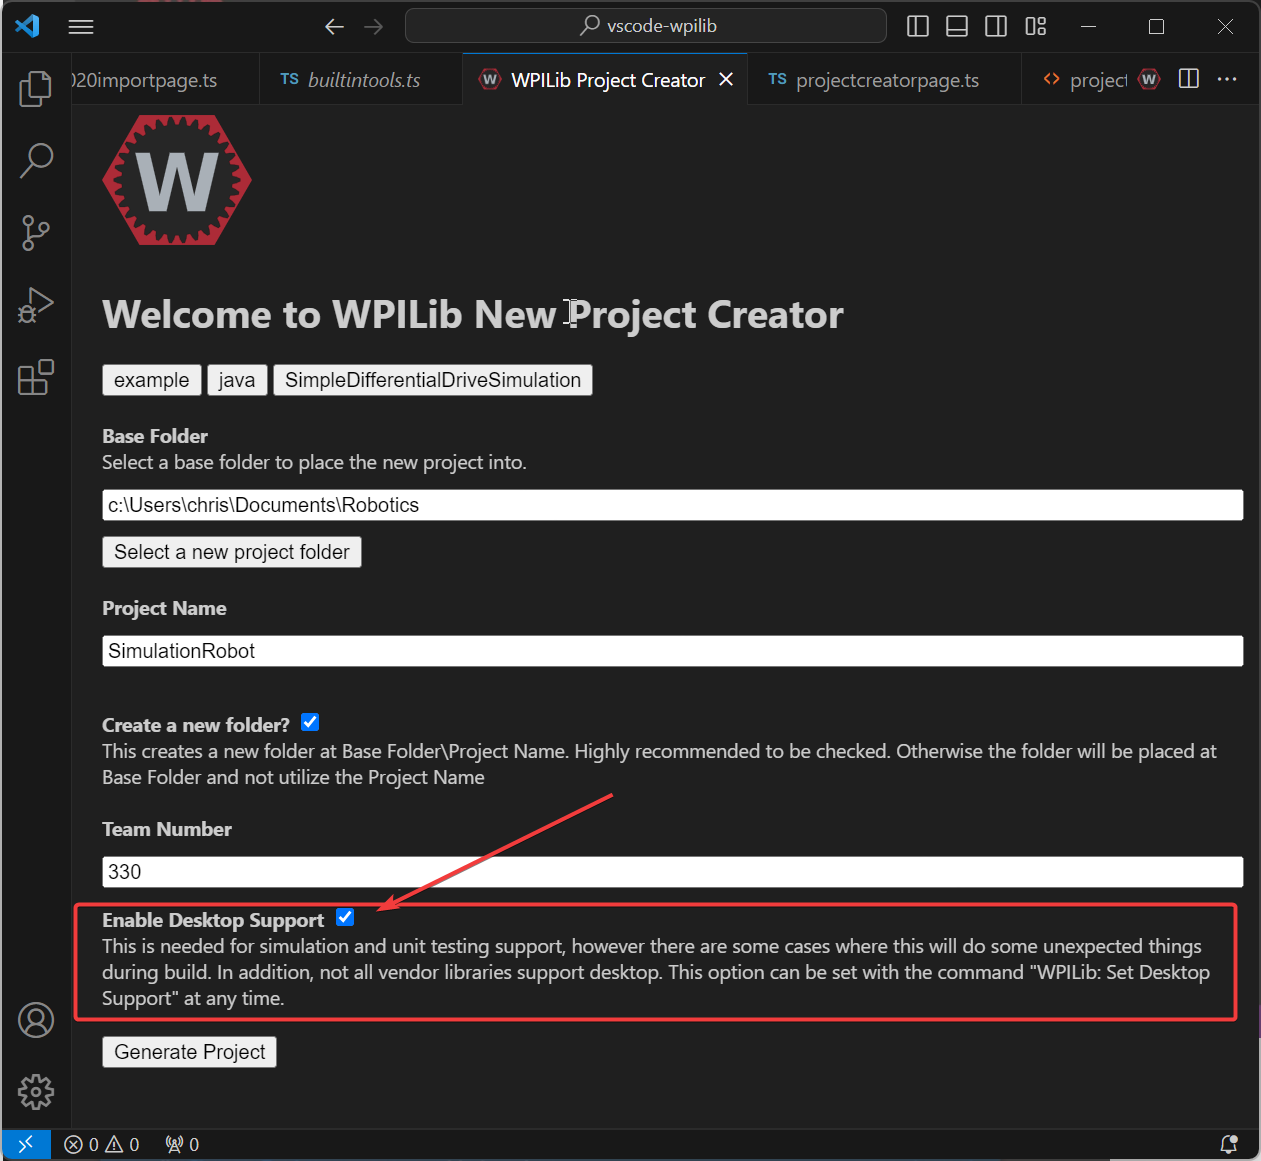

El soporte de escritorio también puede ser habilitado de forma manual editando su archivo build.gradle ubicado en la raíz del proyecto de su robot. Simplemente cambie includeDesktopSupport = false por includeDesktopSupport = true
Importante
Es importante señalar que la habilitación del soporte de escritorio/simulación puede tener consecuencias imprevistas. No todos los proveedores soportan esta opción, y el código que utiliza sus bibliotecas puede incluso bloquearse al intentar ejecutar la simulación.
If at any point in time you want to disable Desktop Support, simply re-run the «WPILib: Change Desktop Support Enabled Setting» from the command palette or change includeDesktopSupport to false in build.gradle.
Nota
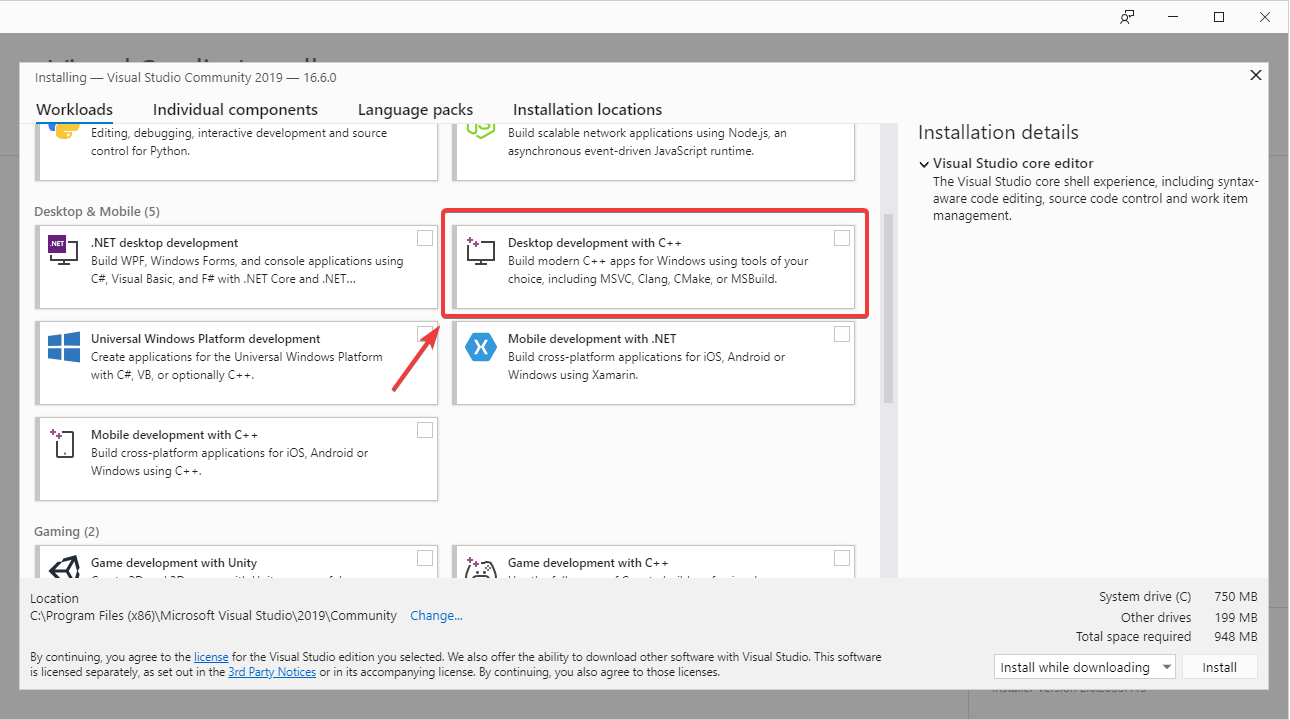
C++ robot simulation requires that a native compiler to be installed. For Windows, this would be Visual Studio 2022 version 17.9 or later (not VS Code), macOS requires Xcode 14 or later, and Linux (Ubuntu) requires the build-essential package.
Ensure the Desktop Development with C++ option is checked in the Visual Studio installer for simulation support.
Running Robot Simulation
La simulación básica del robot puede ser ejecutada usando Visual Studio Code. Esto puede ser hecho sin usar ningún comando usando la paleta de comandos de Visual Studio Code.

La salida de información de la consola en Visual Studio Code debería verse como la siguiente. Sin embargo, los equipos probablemente querrán probar su código en vez de sólo ejecutar la simulación. Esto se puede hacer usando WPILib’s Simulation GUI.
********** Robot program starting **********
Default disabledInit() method... Override me!
Default disabledPeriodic() method... Override me!
Default robotPeriodic() method... Override me!
Importante
Simulation can also be run outside of VS Code using ./gradlew simulateJava for Java or ./gradlew simulateNative for C++.
Nota
Some vendors support attaching hardware to your PC and using the hardware in desktop simulation (e.g. CANivore). See vendor documentation for more information about the command WPILib: Hardware Sim Robot Code.
GUI simulation support is installed by default when you install RobotPy.
There is a robotpy subcommand that you can execute to run your code in simulation:
py -3 -m robotpy sim
python3 -m robotpy sim
python3 -m robotpy sim
Ejecución de Dashboards del robot
Shuffleboard, SmartDashboard, Glass, and AdvantageScope can be used with WPILib simulation when they are configured to connect to the local computer (i.e. localhost).
Shuffleboard
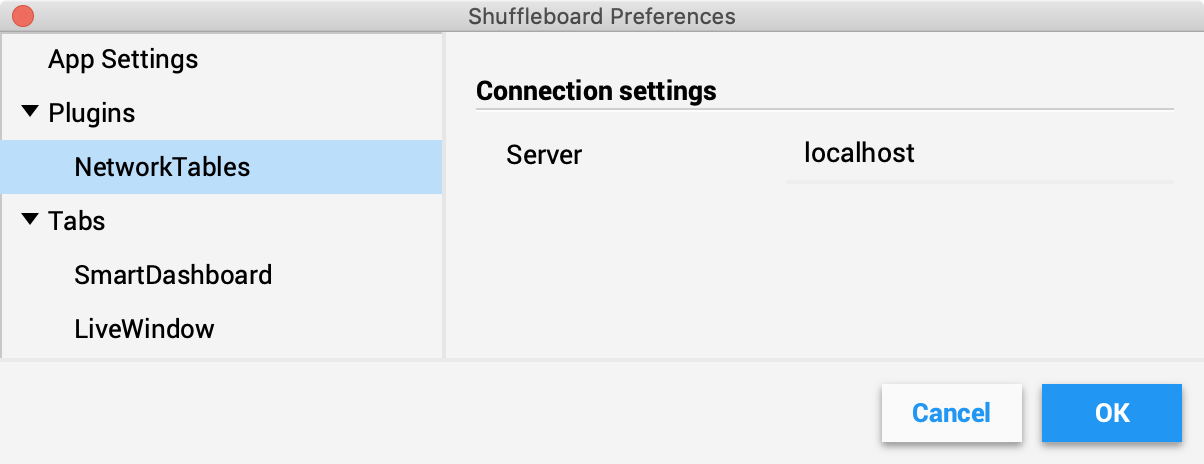
Shuffleboard is automatically configured to look for a NetworkTables instance from the robotRIO but not from other sources. To connect to a simulation, open Shuffleboard preferences from the File menu and select NetworkTables under Plugins on the left navigation bar. In the Server field, type in the IP address or hostname of the NetworkTables host. For a standard simulation configuration, use localhost.
SmartDashboard
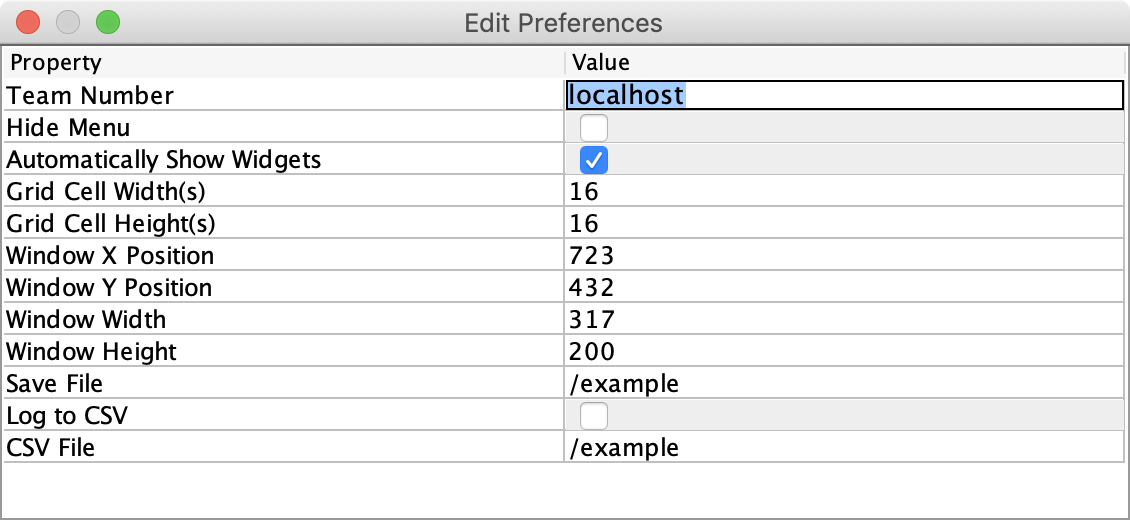
SmartDashboard is automatically configured to look for a NetworkTables instance from the roboRIO, but not from other sources. To connect to a simulation, open SmartDashboard preferences under the File menu and in the Team Number field, enter the IP address or hostname of the NetworkTables host. For a standard simulation configuration, use localhost.
Glass
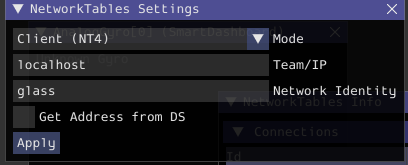
Glass is automatically configured to look for a NetworkTables instance from the roboRIO, but not from other sources. To connect to a simulation, open NetworkTables Settings under the NetworkTables menu and in the Team/IP field, enter the IP address or hostname of the NetworkTables host. For a standard simulation configuration, use localhost.
AdvantageScope
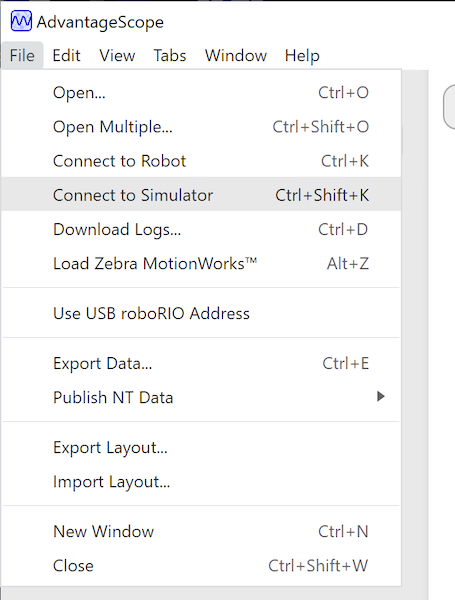
No configuration is required to connect to a NetworkTables instance running on the local computer. To connect to a simulation, click Connect to Simulator under the File menu or press Ctrl+Shift+K.
