Guía de Instalación WPILib
This guide is intended for Java and C++ teams. LabVIEW teams can skip to Instalación LabVIEW para FRC (únicamente LabVIEW). Python teams can skip to Python Installation Guide. Additionally, the below tutorial shows Windows 10, but the steps are identical for all operating systems. Notes differentiating operating systems will be shown.
Prerrequisitos
- Supported Operating Systems and Architectures:
Windows 10 & 11, 64 bit only. 32 bit and Arm are not supported
Ubuntu 22.04, 64 bit. Other Linux distributions with glibc >= 2.34 may work, but are unsupported
macOS 11 or higher, both Intel and Arm for Java. C++ requires macOS 12 or higher with Xcode 14.
Advertencia
The following OSes are no longer supported: macOS 10.15, Ubuntu 18.04 & 20.04, Windows 7, Windows 8.1, and any 32-bit Windows.
WPILib is designed to install to different folders for different years, so that it is not necessary to uninstall a previous version before installing this year’s WPILib.
Downloading
WPILib Installer
Release Notes
This is an update release of WPILib for the 2024 season. This release has a number of quality-of-life bugfixes.
Upgrading from earlier 2024 releases is easy: simply download and run the new installer and it will update your current installation. If you already have the 2024 WPILib vscode installed, it will detect it and you can simply click "next" for that installation step. After installation, vscode will prompt you when opening your robot project whether you want to upgrade it to this version. Note that using the installer is required to get the new version of desktop tools such as Shuffleboard. This release is compatible with both 2024_v2 releases of the RoboRIO image. Mac note: if upgrading from 2024.1.1, it is necessary to manually remove the 2024.1.1 version of AdvantageScope before running the installer in order for the new version to be installed.
Note: After updating to 2024.3.2, the deploy process will deploy an updated JRE to your robot on first deploy. This means the first deploy will take a little longer than usual.
The documentation for WPILib is located at https://docs.wpilib.org/ (if you have trouble accessing this location, https://frcdocs.wpi.edu/en/stable/ is an alternate location with the same content).
If you're new to FRC, start with Getting Started.
System Requirements: WPILib requires 64-bit Windows 10 or 11, Ubuntu 22.04, or macOS 12 or higher. C++ teams should note that Visual Studio 2022 17.9 is required for desktop builds. Mac users will need to have the Xcode Command Line Tools installed before running the installer. This can be done by running xcode-select --install in the Terminal.
If you're returning from a previous season, check out what's new for 2024. You will need a new RoboRIO image for 2024; this is available via the FRC 2024 Game Tools. Follow the WPILib installation guide to install WPILib.
If you're starting from a 2023 robot project, you will need to import your project to create a 2024 project. The import process is important, as it will make a few automated corrections for some breaking changes that happened in 2024. It is also necessary to import vendor libraries again, since last year’s vendor libraries must be updated to be compatible with this year’s projects.
A complete list of known issues with this release can be found here.
WPILib is developed by a small team of volunteers and the FIRST community.
Downloads
For 2024, we have changed the location for WPILib downloads due to GitHub file size limitations. Please use the links below to download the installer package for your platform.
- WPILib 2024.3.2 - Windows (2.2 GB)
- WPILib 2024.3.2 - Mac (Arm) (1.9 GB)
- WPILib 2024.3.2 - Mac (Intel) (2.1 GB)
- WPILib 2024.3.2 - Linux (x64) (2.5 GB)
- WPILib 2024.3.2 - Linux (arm64) (2.3 GB)
What's Changed since 2024.3.1
Several changes were made to address reports of robot code not immediately restarting following an uncaught exception or native crash:
- "wpi::Now() not initialized" error is now fatal and immediately crashes by @ThadHouse in https://github.com/wpilibsuite/allwpilib/pull/6417
- An uncaught Java exception now immediately exits by @PeterJohnson in https://github.com/wpilibsuite/allwpilib/pull/6420
- JRE updated to not report memory allocation info, as this can hang by @PeterJohnson in https://github.com/wpilibsuite/frc-openjdk-roborio/pull/15
- JRE error log reporting timeout shortened from 120 seconds to 2 seconds by @PeterJohnson in https://github.com/wpilibsuite/frc-openjdk-roborio/pull/16
SysId
- Fix position feedback latency compensation by @brettle in https://github.com/wpilibsuite/allwpilib/pull/6392
- Fix arm characterization crash by @calcmogul in https://github.com/wpilibsuite/allwpilib/pull/6422
- Fix crash on negative feedforward gains by @calcmogul in https://github.com/wpilibsuite/allwpilib/pull/6425
- Fix wrong position Kd with unnormalized time by @brettle in https://github.com/wpilibsuite/allwpilib/pull/6433
Tools
- AdvantageScope updated to 3.2.1 by @jwbonner in https://github.com/wpilibsuite/WPILibInstaller-Avalonia/pull/403
Math
- Add structured data support for DifferentialDriveWheelPositions by @DeltaDizzy in https://github.com/wpilibsuite/allwpilib/pull/6412
- LinearSystemId: Don't throw if Kv = 0 by @calcmogul in https://github.com/wpilibsuite/allwpilib/pull/6424
Simulation GUI
- Use shift key to enable docking features by @PeterJohnson in https://github.com/wpilibsuite/allwpilib/pull/6429
Documentation
- [wpiunits] Fix Distance class javadocs to state the correct dimension by @DeltaDizzy in https://github.com/wpilibsuite/allwpilib/pull/6363
- Add docs for features not supported on PDH (NFC) by @sciencewhiz in https://github.com/wpilibsuite/allwpilib/pull/6436
Examples
- Remove unused private variables by @calcmogul in https://github.com/wpilibsuite/allwpilib/pull/6403
Full Changelog: https://github.com/wpilibsuite/allwpilib/compare/v2024.3.1...v2024.3.2
MD5 Hashes
9a6bae26d00083398ebdb430b5133591  WPILib_Linux-2024.3.2.tar.gz
36c77d22fa3600c840944637c244d06b  WPILib_LinuxArm64-2024.3.2.tar.gz
9d54e02fb6c049558ddb4520249beb46  WPILib_Windows-2024.3.2.iso
e6eee31dd4fb3b10676ed3841c0f7634  WPILib_macOS-Intel-2024.3.2.dmg
9e326f2ecf90db7549ecd4ffbb840999  WPILib_macOS-Arm64-2024.3.2.dmg
SHA256 Hashes
2e3d669c4100acf64808069848c8218d5e66204304986114e726ef5c564a3de7  WPILib_Linux-2024.3.2.tar.gz
ad776cc4ce7267bec05ed4f6fe3698cd1a2291460a2ab220fe2936d8582b4777  WPILib_LinuxArm64-2024.3.2.tar.gz
ff73a846153016e588f73dd147790bf4a496019d65efa3daf2b06faef2f822bc  WPILib_Windows-2024.3.2.iso
ca551ee4e44ed1135b5caa0d70920ce29fd06f260099cb85da976081e66a7aac  WPILib_macOS-Intel-2024.3.2.dmg
1af409d3d05debb20120ab494f5d21f482ce270768f41221db2714c97e8db135  WPILib_macOS-Arm64-2024.3.2.dmg
You can download the latest release of the installer from GitHub.
Once on the GitHub releases page, scroll to the Downloads section.
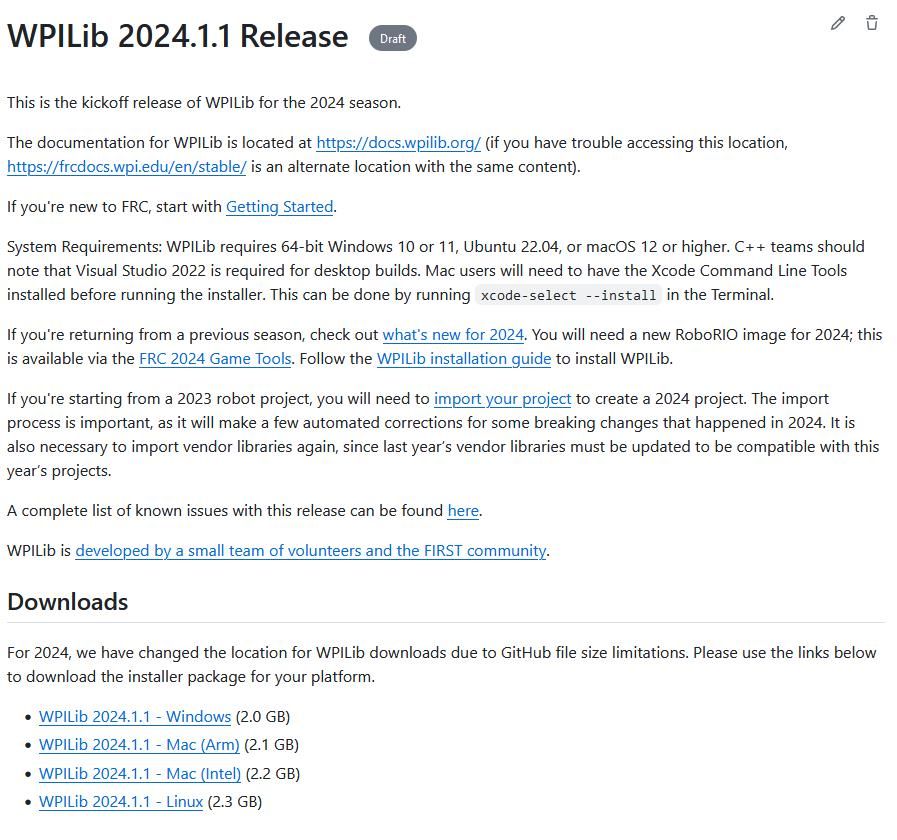
Then click on the correct binary for your OS and architecture to begin the download.
Extrayendo el Instalador
Cuando descarga el instalador de WPILib, este está distribuido como un archivo de imagen de disco .iso para Windows, .tar.gz para Linux, y distribuido como DMG para MacOS.
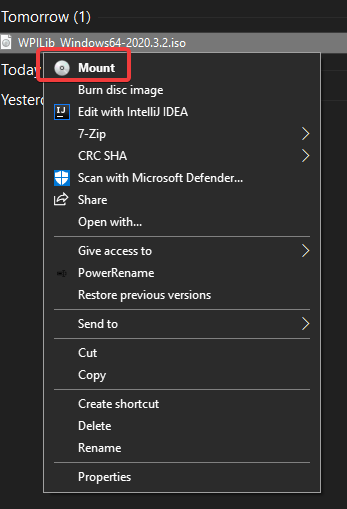
Windows 10+ users can right click on the downloaded disk image and select Mount to open it. Then launch WPILibInstaller.exe.
Nota
Other installed programs may associate with iso files and the mount option may not appear. If that software does not give the option to mount or extract the iso file, then follow the directions below.
You can use 7-zip to extract the disk image by right-clicking, selecting 7-Zip and selecting Extract to…. Windows 11 users may need to select Show more options at the bottom of the context menu.
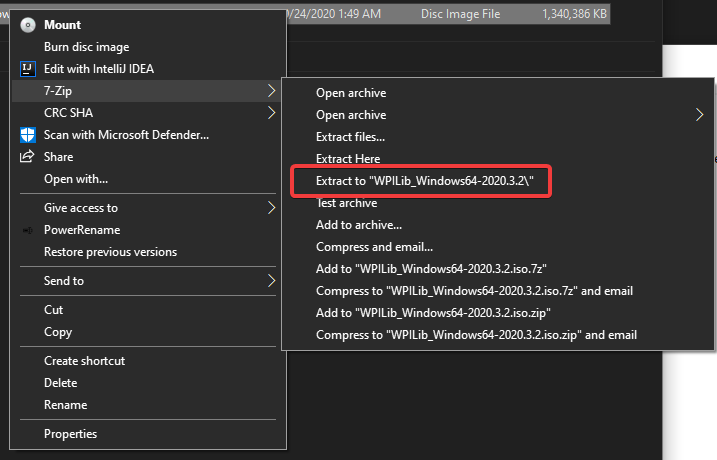
After opening the .iso file, launch the installer by opening WPILibInstaller.exe.
Nota
After launching the installer, Windows may display a window titled «Windows protected your PC». Click More info, then select Run anyway to run the installer.
For this release, macOS users will need to have the Xcode Command Line Tools installed before running the installer; we are working on removing this requirement in a future release. This can be done by running xcode-select --install in the Terminal.
Importante
When upgrading from a 2024 beta release or 2024.1.1, it’s necessary to manually delete AdvantageScope before running the installer. Navigate to ~/wpilib/2024/tools and delete AdvantageScope.
Los usuarios de macOS pueden dar doble clic en el DMG descargado y seleccionar WPILibInstaller para abrir la aplicación.
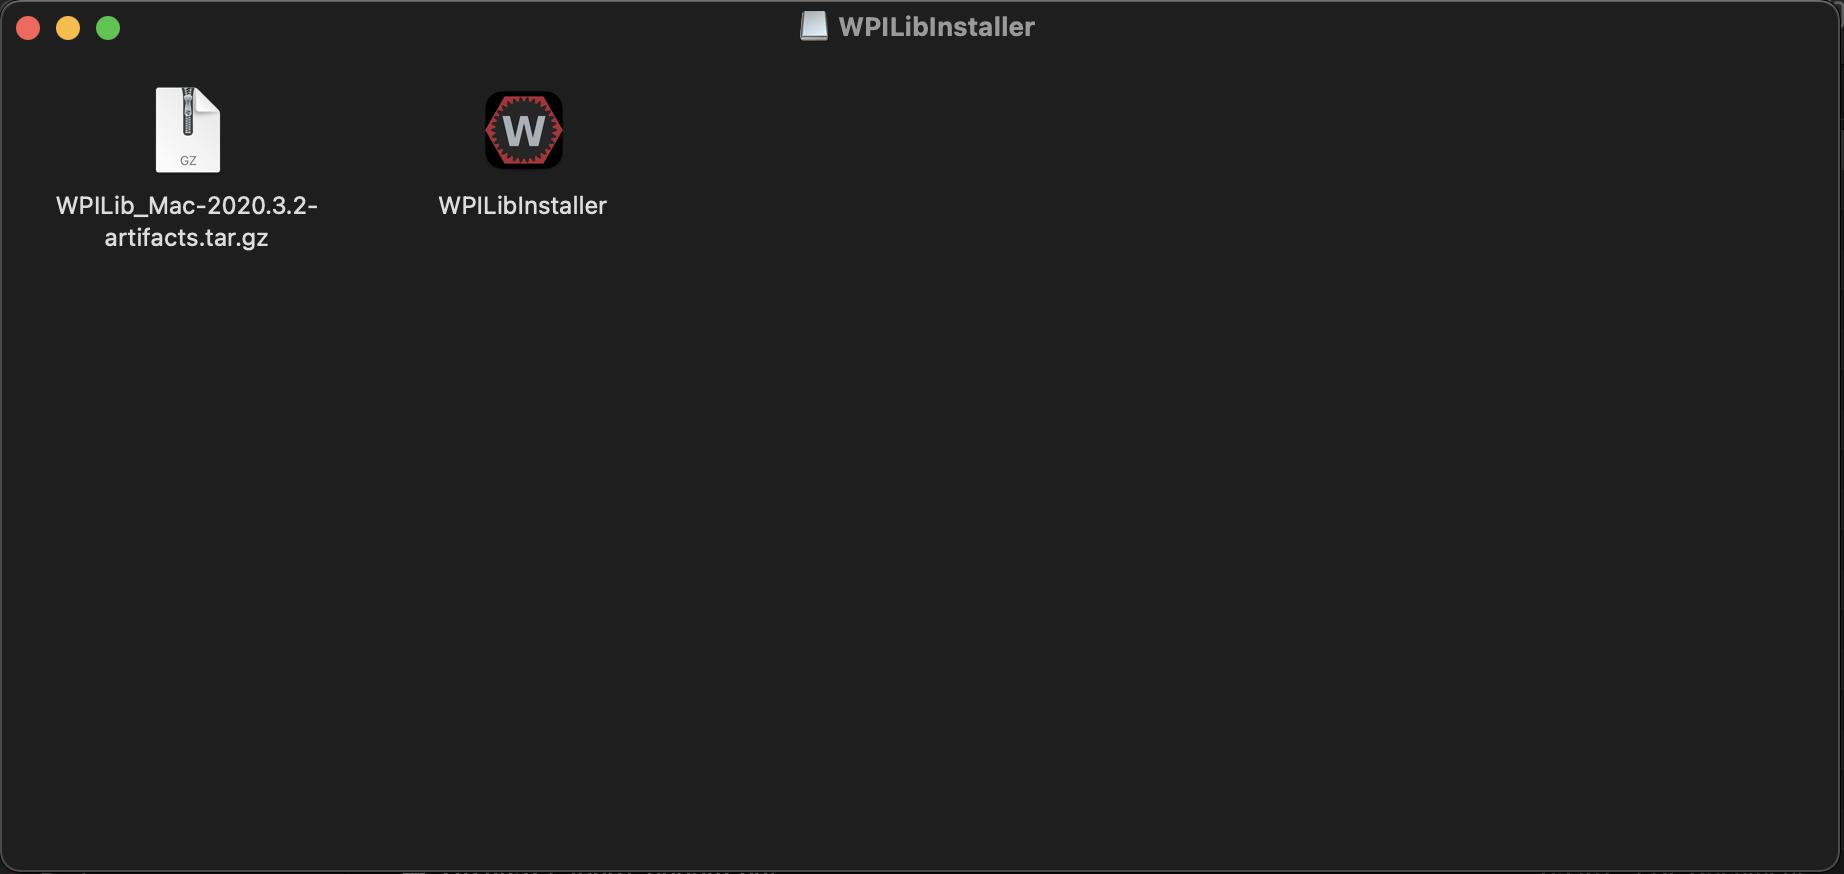
Los usuarios de Linux deben extraer el archivo .tar.gz descargado y luego ejecutar WPILibInstaller. Ubuntu trata los ejecutables en el explorador de archivos como bibliotecas compartidas, por lo que hacer doble clic no los ejecutará. Ejecute los siguientes comandos en una terminal en lugar de <version> reemplazado por la versión que está instalando.
$ tar -xf WPILib_Linux-<version>.tar.gz
$ cd WPILib_Linux-<version>/
$ ./WPILibInstaller
Corriendo el Instalador
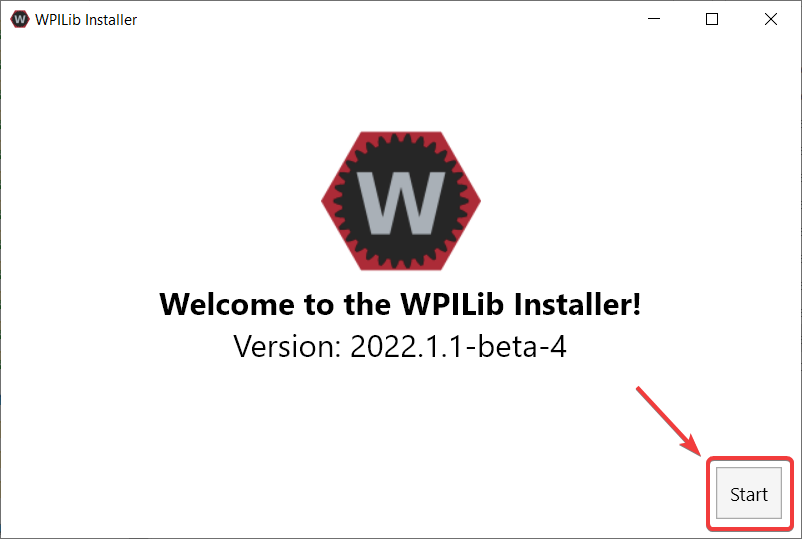
Al abrir el instalador, se le presentará la siguiente pantalla. Presione Start.
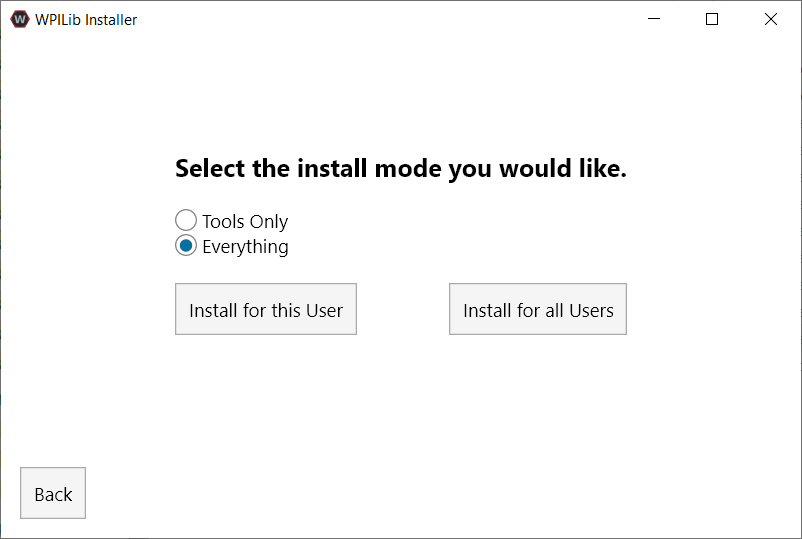
This showcases a list of options included with the WPILib installation.
Tools Only installs just the WPILib tools (Pathweaver, Shuffleboard, RobotBuilder, SysId, Glass, and OutlineViewer) and JDK.
Everything installs the full development environment (VS Code, extensions, all dependencies), WPILib tools, and JDK.
Notará dos botones, Install for this User y Install for all Users. Install for this User solo se instala en la cuenta de usuario actual, y no requiere privilegios de administrador. Sin embargo, Install for all Users instala las herramientas para todas las cuentas del sistema y requerirá acceso de administrador. Install for all Users no es una opción para macOS y Linux.
Nota
If you select Install for all Users, Windows will prompt for administrator access through UAC during installation.
Seleccione la opción que sea adecuada para usted y se le presentará la siguiente pantalla de instalación.
La siguiente pantalla implica la descarga de VS Code. Desafortunadamente, debido a razones de licencia, VS Code no se puede incluir con el instalador.
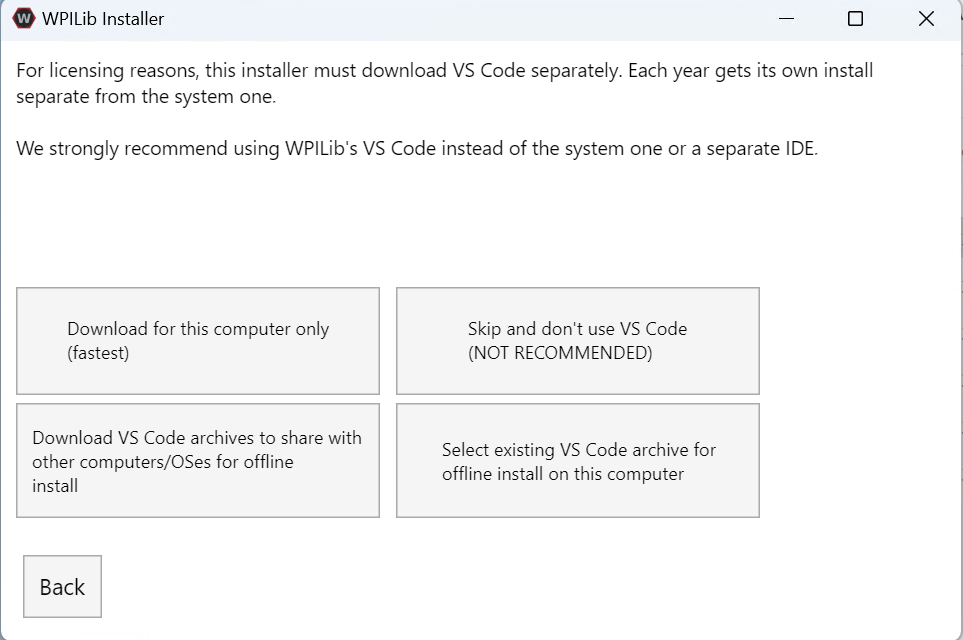
Download for this computer only
Esto descarga VS Code solo para la plataforma actual, que es también la descarga más pequeña.
Skip and don’t use VS Code
Omitir la instalación de VS Code. Útil para instalaciones o configuraciones avanzadas. Generalmente no es recomendado.
Select existing VS Code archive for offline install on this computer
Al seleccionar esta opción, aparecerá un mensaje que le permitirá seleccionar un archivo zip preexistente de VS Code que ha sido descargado previamente por el instalador. Esta opción no le permite seleccionar una copia ya instalada de VS Code en su máquina.
Create VS Code archives to share with other computers/OSes for offline install
Esta opción descarga y guarda una copia de VS Code para todas las plataformas, que es útil para compartir la copia del instalador.
Go ahead and select Download for this computer only. This will begin the download process and can take a bit depending on internet connectivity (it’s ~100MB). Once the download is done, select Next. You should be presented with a screen that looks similar to the one below.
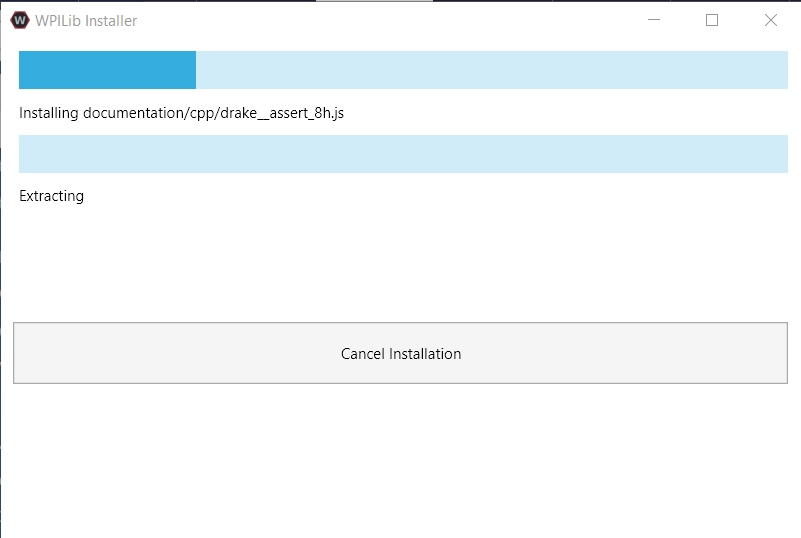
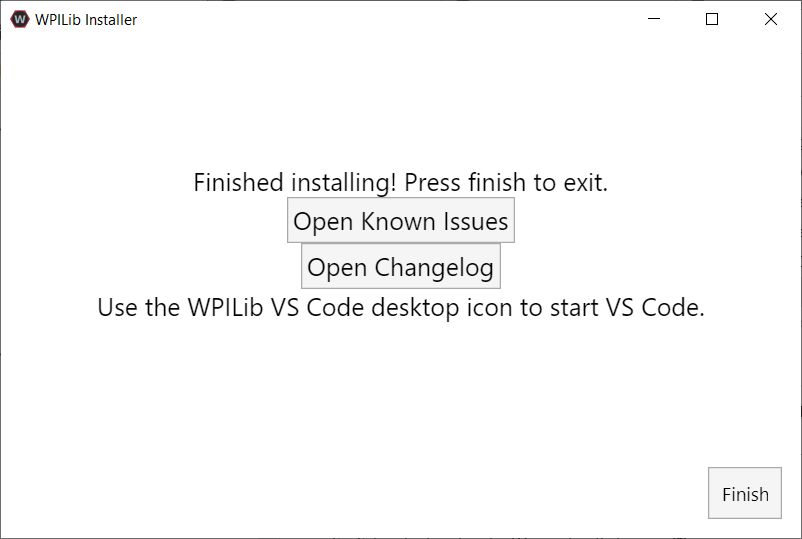
Una vez completada la instalación, se le presentará la pantalla finalizada.
Importante
WPILib installs a separate version of VS Code. It does not use an already existing installation. Each year has it’s own copy of the tools appended with the year. IE: WPILib VS Code 2022. Please launch the WPILib VS Code and not a system installed copy!
¡Felicitaciones, el entorno de desarrollo y las herramientas de WPILib ya están instalados en su computadora! Presione Finalizar para salir del instalador.
Post-Instalación
Algunos sistemas operativos requieren acciones finales para completar la instalación.
Después de la instalación, el instalador abre la carpeta WPILib VS Code. Arrastre la aplicación VS Code al dock. Expulsar la imagen de WPILibInstaller del escritorio.
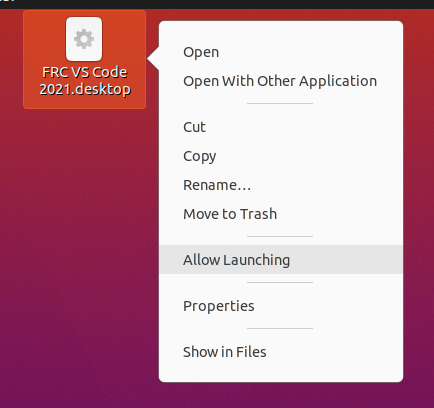
Algunas versiones de Linux (por ejemplo, Ubuntu 20.04) requieren que le des al acceso directo del escritorio la capacidad de iniciarse. Haga clic derecho en el icono del escritorio y seleccione Permitir lanzamiento.
Nota
Installing desktop tools and rebooting will create a folder on the desktop called YYYY WPILib Tools, where YYYY is the current year. Desktop tool shortcuts are not available on Linux and macOS.
Additional C++ Installation for Simulation
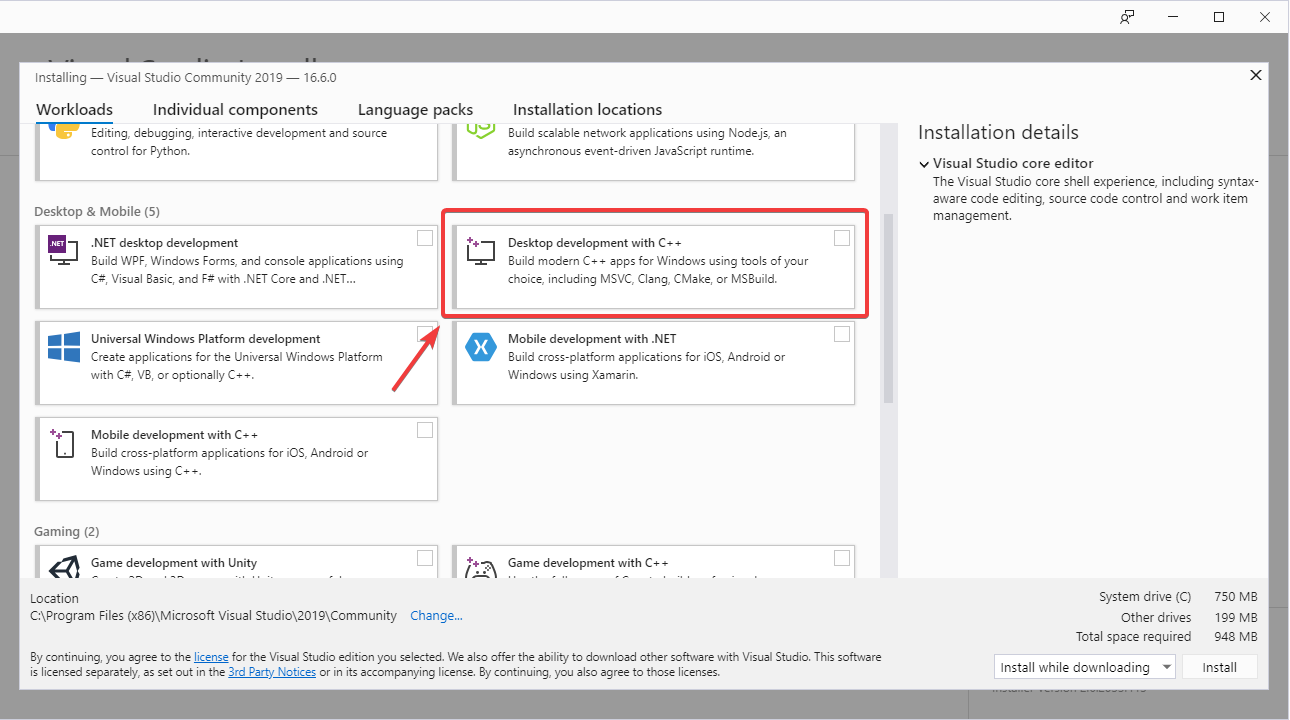
C++ robot simulation requires that a native compiler to be installed. For Windows, this would be Visual Studio 2022 version 17.9 or later (not VS Code), macOS requires Xcode 14 or later, and Linux (Ubuntu) requires the build-essential package.
Ensure the Desktop Development with C++ option is checked in the Visual Studio installer for simulation support.
¿Qué se instaló?
El instalador sin conexión instala los siguientes componentes:
Visual Studio Code - El IDE compatible para 2019 y el desarrollo de código de robot posterior. El instalador fuera de línea configura una copia separada de VS Code para el desarrollo de WPILib, incluso si ya tiene VS Code en su máquina. Esto se hace porque algunas de las configuraciones que hacen que la configuración de WPILib funcione pueden romper los flujos de trabajo existentes si usa VS Code para otros proyectos.
C++ Compiler - Las cadenas de herramientas para construir código de C++ para la roboRIO
Gradle - La versión específica de Gradle usada para construir/desplegar código de robot C++ o Java
Java JDK/JRE - Una versión específica de Java JDK/JRE que se utiliza para crear código de robot Java y para ejecutar cualquiera de las herramientas basadas en Java (Dashboards, etc.). Esto existe al lado de cualquier instalación de JDK existente y no sobrescribe la variable JAVA_HOME
WPILib Tools - SmartDashboard, Shuffleboard, RobotBuilder, OutlineViewer, PathWeaver, Glass, SysId, Data Log Tool, roboRIO Team Number Setter, AdvantageScope
WPILib Dependencies - OpenCV, etc.
VS Code Extensions - WPILib and Java/C++/Python extensions for robot code development in VS Code
Documentation - Offline copies of this frc-docs documentation and Java/C++/Python APIs
Desinstalando
WPILib está diseñado para poderse instalar en diferentes carpetas durante diferentes años, así que no es necesario desinstalar una versión previa antes de instalar WPILib de este año. No obstante, las siguientes instrucciones pueden usarse para desinstalar WPILib si es que se desea.
Delete the appropriate wpilib folder (
c:\Users\Public\wpilib\YYYYwhereYYYYis the year to uninstall)Elimine los iconos del escritorio en
C:\Users\Public\Public Desktop
Delete the appropriate wpilib folder (
~/wpilib/YYYYwhereYYYYis the year to uninstall)
Delete the appropriate wpilib folder (
~/wpilib/YYYYwhereYYYYis the year to uninstall). egrm -rf ~/wpilib/YYYY
Solución de problemas
En caso de que el instalador falle, abra un problema en el repositorio del instalador. Un enlace está disponible aquí <https://github.com/wpilibsuite/wpilibinstaller-avalonia> __. El instalador debe dar un mensaje sobre la causa del error, por favor inclúyalo en la descripción de su problema.