Uso de las clases de WPILib para conducir su robot
WPILib incluye muchas clases para ayudar a que su robot conduzca más rápido.
Chasis estándar
Robots con chasis diferencial
Estas bases de transmisión suelen tener dos o más ruedas en línea u omnidireccionales por lado (p. Ej., 6WD u 8WD) y también pueden conocerse como «skid-steer», «tank drive» o «West Coast Drive». La transmisión del kit de piezas es un ejemplo de transmisión diferencial. Estas transmisiones son capaces de conducir hacia adelante / hacia atrás y puede girar conduciendo los dos lados en direcciones opuestas causando que las ruedas patinen de lado. Estas transmisiones no son capaces de moverse de manera lateral.
Chasis mecanum
Chasis Mecanum es un método de conducción que utiliza ruedas especialmente diseñadas que permiten al robot conducir en cualquier dirección sin cambiar la orientación del robot. Un robot con una transmisión convencional (todas las ruedas apuntando en la misma dirección) debe girar en la dirección que se necesita conducir. Un robot mecanum puede moverse en cualquier dirección sin girar primero y se llama impulso holonómico. Las ruedas (que se muestran en este robot) tienen rodillos que causan las fuerzas de conducir para ser aplicado en un ángulo de 45 grados en lugar de en línea recta como en el caso de un accionamiento convencional.
Cuando se ve desde la parte superior, los rodillos de una transmisión mecanum deben formar un patrón de «X». Esto da como resultado los vectores de fuerza (al conducir la rueda hacia adelante) en las dos ruedas delanteras apuntando hacia adelante y hacia adentro y las dos ruedas traseras apuntando hacia adelante y hacia afuera. Girando las ruedas en diferentes direcciones, varios componentes de los vectores de fuerza se cancelan, lo que resulta en el movimiento deseado del robot. Un gráfico rápido de diferentes movimientos se proporciona a continuación, extraer los vectores de fuerza para cada uno de estos movimientos puede ayudar en entender cómo funcionan estas transmisiones. Variando las velocidades de las ruedas, además a la dirección, los movimientos se pueden combinar dando como resultado la traslación en cualquier dirección y rotación, simultáneamente.
Convenciones de clase de conducción
Inversión motora
It is the responsibility of the user to manage proper inversions for their drivetrain. Users can invert motors by calling setInverted()/SetInverted() on their motor objects. Typically for differential drive trains, one side must be inverted to avoid spinning in circles, since the forward direction of each side of the tank drive is opposite of each other.
PWMSparkMax m_motorRight = new PWMSparkMax(0);

public Robot() {
   m_motorRight.setInverted(true);
}
frc::PWMSparkMax m_motorLeft{0};
public:
 Robot::Robot() {
   m_motorRight.SetInverted(true);
 }
def robotInit(self):
    self.motorRight = wpilib.PWMSparkMax(0)
    self.motorRight.setInverted(True)
Cuadrar las entradas
Al conducir robots, a menudo es deseable manipular las entradas del joystick de modo que el robot tiene un control más fino a bajas velocidades mientras sigue usando el rango de salida completo. Una forma de lograr esto es al cuadrar la entrada del joystick y luego volver a aplicar el signo. Por defecto la Differential Drive class cuadrará las entradas. Si esto no se desea (por ejemplo, si pasa valores desde un PID Controller), utilice uno de los métodos de accionamiento con el parámetro squaredInputs y configúrelo en falso.
Deadband de entrada
Por defecto, la clase de Differential Drive aplica una banda muerta/deadband de entrada de 0.02. Esto significa que la entrada los valores con una magnitud inferior a 0.02 (después de cualquier cuadrado como se describe anteriormente) se establecerán en 0. En la mayoría de los casos, estas entradas pequeñas resultan del centrado imperfecto del joystick y no son suficientes para provocar el movimiento de la transmisión, la banda muerta ayuda a reducir el calentamiento innecesario del motor que puede resultar de aplicar estos pequeños valores a la transmisión. Para cambiar la banda muerta, use el método setDeadband().
Salida máxima
A veces, los drivers sienten que su tren motriz conduce demasiado rápido y quieren limitar la salida. Esto se puede lograr con el método setMaxOutput(). Esta salida máxima se multiplica por el resultado de las funciones de accionamiento anteriores, como entradas cuadradas y de banda muerta.
Motor Safety
Motor Safety es un mecanismo en WPILib que toma el concepto de un perro guardián/watchdog y lo rompe a un perro guardián/watchdog (temporizador de seguridad del motor) para cada actuador individual. Tenga en cuenta que este mecanismo de protección es adicional al System Watchdog que es controlado por la red Código de comunicaciones y FPGA y deshabilitará todas las salidas del actuador si no recibe un paquete de datos válido para 125 ms.
The purpose of the Motor Safety mechanism is the same as the purpose of a watchdog timer, to disable mechanisms which may cause harm to themselves, people, or property if the code locks up and does not properly update the actuator output. Motor Safety breaks this concept out on a per actuator basis so that you can appropriately determine where it is necessary and where it is not. Examples of mechanisms that should have motor safety enabled are systems like drive trains and arms. If these systems get latched on a particular value they could cause damage to their environment or themselves. An example of a mechanism that may not need motor safety is a spinning flywheel for a shooter. If this mechanism gets latched on a particular value it will simply continue spinning until the robot is disabled. By default Motor Safety is enabled for DifferentialDrive and MecanumDrive objects and disabled for all other motor controllers and servos.
La característica de Seguridad del Motor opera manteniendo un temporizador que rastrea cuánto tiempo ha pasado desde que el método feed() ha sido llamado para ese actuador. El código en la clase Driver Station inicia una comparación de estos temporizadores con los valores de tiempo de espera para cualquier actuador con la seguridad activada cada 5 paquetes recibidos (100ms nominal). Los métodos set() de cada clase de controlador de motor y los métodos set() y setAngle() de la clase servo llaman a feed() para indicar que la salida del actuador ha sido actualizada.
The Motor Safety interface of motor controllers can be interacted with by the user using the following methods:
m_motorRight.setSafetyEnabled(true);
m_motorRight.setSafetyEnabled(false);
m_motorRight.setExpiration(.1);
m_motorRight.feed()
m_motorRight->SetSafetyEnabled(true);
m_motorRight->SetSafetyEnabled(false);
m_motorRight->SetExpiration(.1);
m_motorRight->Feed();
m_motorRight.setSafetyEnabled(True)
m_motorRight.setSafetyEnabled(False)
m_motorRight.setExpiration(.1)
m_motorRight.feed()
By default all Drive objects enable Motor Safety. Depending on the mechanism and the structure of your program, you may wish to configure the timeout length of the motor safety (in seconds). The timeout length is configured on a per actuator basis and is not a global setting. The default (and minimum useful) value is 100ms.
Convenciones del Eje
The drive classes use the NWU axes convention (North-West-Up as external reference in the world frame). The positive X axis points ahead, the positive Y axis points left, and the positive Z axis points up. We use NWU here because the rest of the library, and math in general, use NWU axes convention.
Joysticks follow NED (North-East-Down) convention, where the positive X axis points ahead, the positive Y axis points right, and the positive Z axis points down. However, it’s important to note that axes values are rotations around the respective axes, not translations. When viewed with each axis pointing toward you, CCW is a positive value and CW is a negative value. Pushing forward on the joystick is a CW rotation around the Y axis, so you get a negative value. Pushing to the right is a CCW rotation around the X axis, so you get a positive value.
Nota
See the Coordinate System section for more detail about the axis conventions and coordinate systems.
Uso de la clase DifferentialDrive para controlar robots de accionamiento diferencial
Nota
WPILib provides separate Robot Drive classes for the most common drive train configurations (differential and mecanum). The DifferentialDrive class handles the differential drivetrain configuration. These drive bases typically have two or more in-line traction or omni wheels per side (e.g., 6WD or 8WD) and may also be known as «skid-steer», «tank drive», or «West Coast Drive» (WCD). The Kit of Parts drivetrain is an example of a differential drive. There are methods to control the drive with 3 different styles («Tank», «Arcade», or «Curvature»), explained in the article below.
DifferentialDrive es un método proporcionado para el control de transmisiones “skid-steer” o “West Coast”, como el chasis del Kit de piezas. Crear una instancia de una unidad diferencial es tan simple como esto:
public class Robot extends TimedRobot {
  private DifferentialDrive m_robotDrive;
  private final PWMSparkMax m_leftMotor = new PWMSparkMax(0);
  private final PWMSparkMax m_rightMotor = new PWMSparkMax(1);

  @Override
  public void robotInit() {
    // We need to invert one side of the drivetrain so that positive voltages
    // result in both sides moving forward. Depending on how your robot's
    // gearbox is constructed, you might have to invert the left side instead.
    m_rightMotor.setInverted(true);

    m_robotDrive = new DifferentialDrive(m_leftMotor::set, m_rightMotor::set);
  }
  frc::PWMSparkMax m_leftMotor{0};
  frc::PWMSparkMax m_rightMotor{1};
  frc::DifferentialDrive m_robotDrive{
      [&](double output) { m_leftMotor.Set(output); },
      [&](double output) { m_rightMotor.Set(output); }};
  void RobotInit() override {
    // We need to invert one side of the drivetrain so that positive voltages
    // result in both sides moving forward. Depending on how your robot's
    // gearbox is constructed, you might have to invert the left side instead.
    m_rightMotor.SetInverted(true);
  }
    def robotInit(self):
        """Robot initialization function"""

        leftMotor = wpilib.PWMSparkMax(0)
        rightMotor = wpilib.PWMSparkMax(1)
        self.robotDrive = wpilib.drive.DifferentialDrive(leftMotor, rightMotor)
        # We need to invert one side of the drivetrain so that positive voltages
        # result in both sides moving forward. Depending on how your robot's
        # gearbox is constructed, you might have to invert the left side instead.
        rightMotor.setInverted(True)
Multi-Motor DifferentialDrive
Many FRC® drivetrains have more than 1 motor on each side. Classes derived from PWMMotorController (Java / C++ / Python) have an addFollower method so that multiple follower motor controllers can be updated when the leader motor controller is commanded. CAN motor controllers have similar features, review the vendor’s documentation to see how to use them. The examples below show a 4 motor (2 per side) drivetrain. To extend to more motors, simply create the additional controllers and use additional addFollower calls.
Class variables (e.g. in Robot.java or Subsystem):
  // The motors on the left side of the drive.
  private final PWMSparkMax m_leftLeader = new PWMSparkMax(DriveConstants.kLeftMotor1Port);
  private final PWMSparkMax m_leftFollower = new PWMSparkMax(DriveConstants.kLeftMotor2Port);

  // The motors on the right side of the drive.
  private final PWMSparkMax m_rightLeader = new PWMSparkMax(DriveConstants.kRightMotor1Port);
  private final PWMSparkMax m_rightFollower = new PWMSparkMax(DriveConstants.kRightMotor2Port);
In Robot or Subsystem constructor:
    m_leftLeader.addFollower(m_leftFollower);
    m_rightLeader.addFollower(m_rightFollower);

    // We need to invert one side of the drivetrain so that positive voltages
    // result in both sides moving forward. Depending on how your robot's
    // gearbox is constructed, you might have to invert the left side instead.
    m_rightLeader.setInverted(true);
 private:
  // The motor controllers
  frc::PWMSparkMax m_left1;
  frc::PWMSparkMax m_left2;
  frc::PWMSparkMax m_right1;
  frc::PWMSparkMax m_right2;

  // The robot's drive
  frc::DifferentialDrive m_drive{[&](double output) { m_left1.Set(output); },
                                 [&](double output) { m_right1.Set(output); }};
In Robot or Subsystem constructor:
  m_left1.AddFollower(m_left2);
  m_right1.AddFollower(m_right2);

  // We need to invert one side of the drivetrain so that positive voltages
  // result in both sides moving forward. Depending on how your robot's
  // gearbox is constructed, you might have to invert the left side instead.
  m_right1.SetInverted(true);
def robotInit(self):
    leftLeader = wpilib.Spark(1)
    leftFollower = wpilib.Spark(2)
    leftLeader.addFollower(leftFollower)
    leftLeader.setInverted(
        True
    )  # if you want to invert the entire side you can do so here
    rightLeader = wpilib.Spark(3)
    rightFollower = wpilib.Spark(4)
    rightLeader.addFollower(rightFollower)
    self.drive = wpilib.drive.DifferentialDrive(leftLeader, rightLeader)
Modos de manejo
Nota
La clase DifferentialDrive contiene tres modos predeterminados diferentes para conducir sus motores del robot.
Tank Drive, que controla los lados izquierdo y derecho de forma independiente
Arcade Drive, que controla la velocidad de avance y giro
Curvature Drive, un subconjunto de Arcade Drive, que hace que su robot se maneje como un automóvil con giros de curvatura constante.
La clase DifferentialDrive contiene tres métodos predeterminados para controlar los robots de dirección deslizante o WCD. Tenga en cuenta que puede crear sus propios métodos para controlar la conducción del robot y hacer que llamen a tankDrive() con las entradas derivadas para los motores izquierdo y derecho.
El modo Tank Drive se usa para controlar cada lado del drivetrain de forma independiente (generalmente con un eje de joystick individual que controla cada uno). Este ejemplo muestra cómo usar el eje Y de dos palancas de mando separadas para ejecutar la transmisión en modo Tank. La construcción de los objetos ha sido omitida, para arriba drivetrain y aquí para Joystick.
El modo Arcade Drive se usa para controlar el drivetrain mediante la velocidad / aceleración y la velocidad de la rotación. Esto generalmente se usa con dos ejes de un solo joystick, o dividido en joysticks (a menudo en un solo gamepad) con el acelerador proveniente de una palanca y la rotación de otra. Este ejemplo muestra cómo usar un solo joystick con el modo Arcade. La construcción de los objetos ha sido omitida, para arriba para la construcción de drivetrain y aquí para la construcción de Joystick.
Al igual que Arcade Drive, el modo Curvature Drive se usa para controlar el drivetrain usando velocidad/aceleración y tasa de rotación. La diferencia es que la entrada de control de rotación controla el radio de curvatura en lugar de la tasa de cambio de rumbo, al igual que el volante de un automóvil. Este modo también admite girar en su lugar, que se habilita cuando el tercer parámetro boolean es verdadero.
public void teleopPeriodic() {
    // Tank drive with a given left and right rates
    myDrive.tankDrive(-leftStick.getY(), -rightStick.getY());
    // Arcade drive with a given forward and turn rate
    myDrive.arcadeDrive(-driveStick.getY(), -driveStick.getX());
    // Curvature drive with a given forward and turn rate, as well as a button for turning in-place.
    myDrive.curvatureDrive(-driveStick.getY(), -driveStick.getX(), driveStick.getButton(1));
}
void TeleopPeriodic() override {
    // Tank drive with a given left and right rates
    myDrive.TankDrive(-leftStick.GetY(), -rightStick.GetY());
    // Arcade drive with a given forward and turn rate
    myDrive.ArcadeDrive(-driveStick.GetY(), -driveStick.GetX());
    // Curvature drive with a given forward and turn rate, as well as a quick-turn button
    myDrive.CurvatureDrive(-driveStick.GetY(), -driveStick.GetX(), driveStick.GetButton(1));
}
def teleopPeriodic(self):
    # Tank drive with a given left and right rates
    self.myDrive.tankDrive(-self.leftStick.getY(), -self.rightStick.getY())
    # Arcade drive with a given forward and turn rate
    self.myDrive.arcadeDrive(-self.driveStick.getY(), -self.driveStick.getX())
    # Curvature drive with a given forward and turn rate, as well as a button for turning in-place.
    self.myDrive.curvatureDrive(-self.driveStick.getY(), -self.driveStick.getX(), self.driveStick.getButton(1))
Uso de la clase MecanumDrive para controlar los robots Mecanum Drive
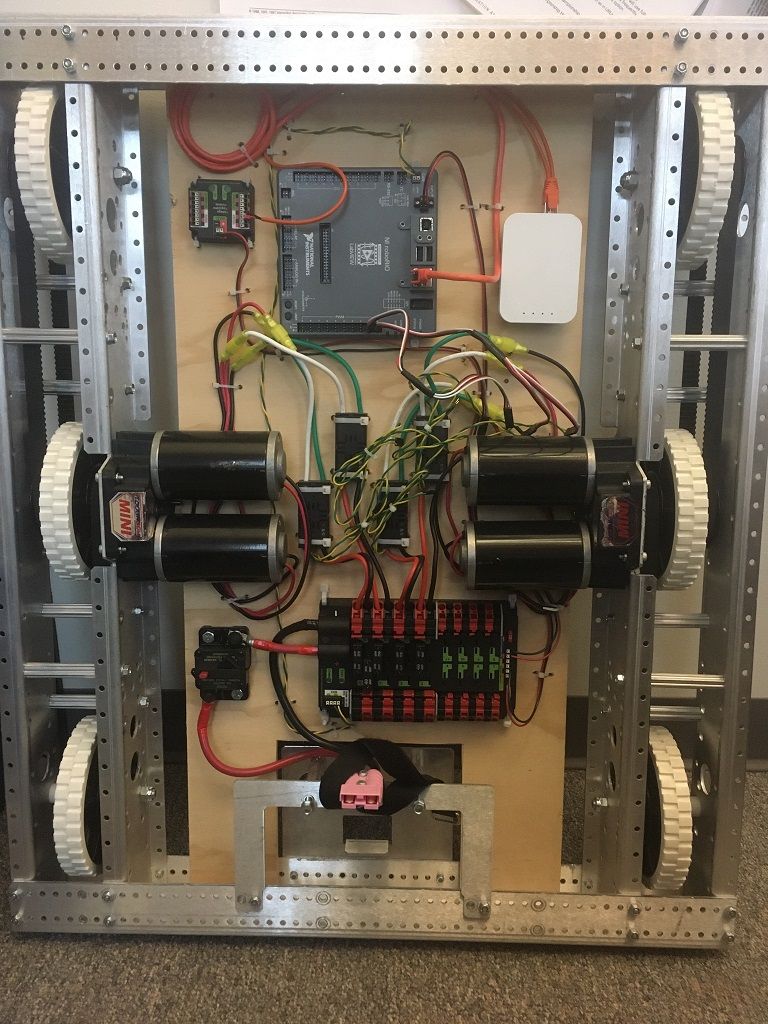
MecanumDrive es un método proporcionado para el control de transmisiones holonómicas con ruedas Mecanum, como el chasis del kit de piezas con el kit de actualización de la transmisión mecanum, como se muestra arriba. Crear una instancia de MecanumDrive es tan simple como esto:
  private static final int kFrontLeftChannel = 2;
  private static final int kRearLeftChannel = 3;
  private static final int kFrontRightChannel = 1;
  private static final int kRearRightChannel = 0;

  @Override
  public void robotInit() {
    PWMSparkMax frontLeft = new PWMSparkMax(kFrontLeftChannel);
    PWMSparkMax rearLeft = new PWMSparkMax(kRearLeftChannel);
    PWMSparkMax frontRight = new PWMSparkMax(kFrontRightChannel);
    PWMSparkMax rearRight = new PWMSparkMax(kRearRightChannel);
    // Invert the right side motors.
    // You may need to change or remove this to match your robot.
    frontRight.setInverted(true);
    rearRight.setInverted(true);

    m_robotDrive = new MecanumDrive(frontLeft::set, rearLeft::set, frontRight::set, rearRight::set);
  }
 private:
  static constexpr int kFrontLeftChannel = 0;
  static constexpr int kRearLeftChannel = 1;
  static constexpr int kFrontRightChannel = 2;
  static constexpr int kRearRightChannel = 3;

  frc::PWMSparkMax m_frontLeft{kFrontLeftChannel};
  frc::PWMSparkMax m_rearLeft{kRearLeftChannel};
  frc::PWMSparkMax m_frontRight{kFrontRightChannel};
  frc::PWMSparkMax m_rearRight{kRearRightChannel};
  frc::MecanumDrive m_robotDrive{
      [&](double output) { m_frontLeft.Set(output); },
      [&](double output) { m_rearLeft.Set(output); },
      [&](double output) { m_frontRight.Set(output); },
      [&](double output) { m_rearRight.Set(output); }};

  void RobotInit() override {
    // Invert the right side motors. You may need to change or remove this to
    // match your robot.
    m_frontRight.SetInverted(true);
    m_rearRight.SetInverted(true);
  }
    # Channels on the roboRIO that the motor controllers are plugged in to
    kFrontLeftChannel = 2
    kRearLeftChannel = 3
    kFrontRightChannel = 1
    kRearRightChannel = 0

    def robotInit(self):
        self.frontLeft = wpilib.PWMSparkMax(self.kFrontLeftChannel)
        self.rearLeft = wpilib.PWMSparkMax(self.kRearLeftChannel)
        self.frontRight = wpilib.PWMSparkMax(self.kFrontRightChannel)
        self.rearRight = wpilib.PWMSparkMax(self.kRearRightChannel)

        # invert the right side motors
        # you may need to change or remove this to match your robot
        self.frontRight.setInverted(True)
        self.rearRight.setInverted(True)

        self.robotDrive = wpilib.drive.MecanumDrive(
            self.frontLeft, self.rearLeft, self.frontRight, self.rearRight
        )

        self.stick = wpilib.Joystick(self.kJoystickChannel)
Modos de manejo mecanum
Nota
Las convenciones del eje de accionamiento son diferentes de las convenciones comunes del eje del joystick. Ver las convenciones del eje anteriores para más información.
La clase MecanumDrive contiene dos modos predeterminados diferentes para conducir los motores de su robot.
driveCartesian: los ángulos se miden en sentido horario desde el eje X positivo. La velocidad de los robots es independiente de su ángulo o velocidad de rotación.
drivePolar: los ángulos se miden en sentido antihorario desde el frente. La velocidad a que el robot conduce (traslación) es independiente de su ángulo o velocidad de rotación.
public void teleopPeriodic() {
    // Drive using the X, Y, and Z axes of the joystick.
    m_robotDrive.driveCartesian(-m_stick.getY(), -m_stick.getX(), -m_stick.getZ());
    // Drive at 45 degrees relative to the robot, at the speed given by the Y axis of the joystick, with no rotation.
    m_robotDrive.drivePolar(-m_stick.getY(), Rotation2d.fromDegrees(45), 0);
}
void TeleopPeriodic() override {
    // Drive using the X, Y, and Z axes of the joystick.
    m_robotDrive.driveCartesian(-m_stick.GetY(), -m_stick.GetX(), -m_stick.GetZ());
    // Drive at 45 degrees relative to the robot, at the speed given by the Y axis of the joystick, with no rotation.
    m_robotDrive.drivePolar(-m_stick.GetY(), 45_deg, 0);
}
def teleopPeriodic(self):
    # Drive using the X, Y, and Z axes of the joystick.
    self.robotDrive.driveCartesian(-self.stick.getY(), -self.stick.getX(), -self.stick.getZ())
    # Drive at 45 degrees relative to the robot, at the speed given by the Y axis of the joystick, with no rotation.
    self.robotDrive.drivePolar(-self.stick.getY(), Rotation2d.fromDegrees(45), 0)
Conducción con orientación del campo
A 4th parameter can be supplied to the driveCartesian(double ySpeed, double xSpeed, double zRotation, double gyroAngle) method, the angle returned from a Gyro sensor. This will adjust the rotation value supplied. This is particularly useful with mecanum drive since, for the purposes of steering, the robot really has no front, back, or sides. It can go in any direction. Adding the angle in degrees from a gyro object will cause the robot to move away from the drivers when the joystick is pushed forwards, and towards the drivers when it is pulled towards them, regardless of what direction the robot is facing.
El uso de la conducción orientada al campo a menudo hace que el robot sea mucho más fácil de conducir, especialmente en comparación con un sistema de accionamiento «orientado al robot» donde los controles se invierten cuando el robot se enfrenta a los conductores.
Solo recuerde obtener el ángulo giroscópico cada vez que se llame a driveCartesian().
Nota
A muchos equipos también les gusta ramificar las entradas de los mandos en el tiempo para promover una aceleración suave y reducir las sacudidas. Esto se puede conseguir con un Limitador de velocidad de giro.