Konturlarla Çalışma
Morfolojik işlemlerle gürültüyü eşikledikten ve kaldırdıktan sonra, artık OpenCV’nin findContours yöntemini kullanmaya hazırsınız. Bu yöntem, ikili görüntünüze göre konturlar oluşturmanıza olanak tanır.
Konturları Bulma ve Filtreleme
_, contours, _ = cv2.findContours(binary_img, cv2.RETR_EXTERNAL, cv2.CHAIN_APPROX_SIMPLE)
In cases where there is only one vision target, you can just take the largest contour and assume that is the target you are looking for. When there is more than one vision target, you can use size, shape, fullness, and other properties to filter unwanted contours out.
if len(contours) > 0:
   largest = contours[0]
   for contour in contours:
      if cv2.contourArea(contour) > cv2.contourArea(largest):
         largest = contour

   #
   # Contour processing code
   #
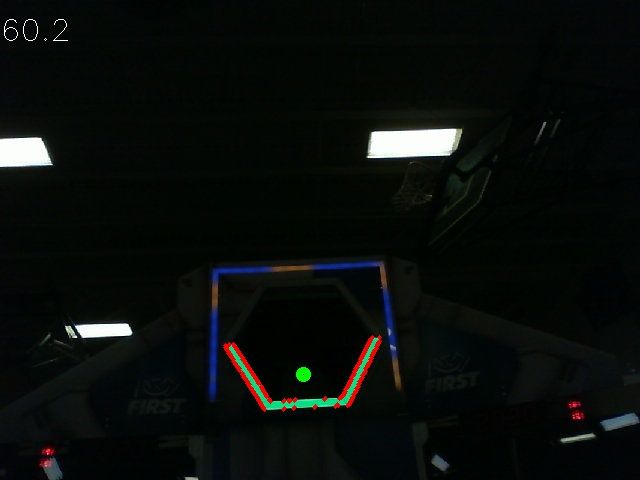
Yeni bulduğunuz konturu çizerseniz, şuna benzemelidir:

Konturlardan Bilgi Çıkarma
Artık istediğiniz kontur(ları) bulduğunuza göre, artık bununla ilgili merkez, köşeler ve dönüş gibi bilgiler almak istiyorsunuz.
Merkez
rect = cv2.minAreaRect(contour)
center, _, _ = rect
center_x, center_y = center
Kornerler
corners = cv2.convexHull(contour)
corners = cv2.approxPolyDP(corners, 0.1 * cv2.arcLength(contour), True)
Rotasyon
_, _, rotation = cv2.fitEllipse(contour)
Bu değerleri nasıl kullanabileceğiniz hakkında daha fazla bilgi için bkz Ölçümler
NetworkTables’da yayınlama
Bu özellikleri Driver Station ve RoboRIO’ya göndermek için NetworkTables’ı kullanabilirsiniz. Raspberry Pi’de veya RoboRIO’nun kendisinde ek işlemler yapılabilir.
import ntcore

nt = ntcore.NetworkTableInstance.getDefault().getTable('vision')

#
# Initialization code here
#

while True:

   #
   # Image processing code here
   #

   nt.putNumber('center_x', center_x)
   nt.putNumber('center_y', center_y)