Programming the Romi (LabVIEW)
Writing a LabVIEW program for the Romi is very similar to writing a program for a regular roboRIO based robot. In fact, all the same tools can be used with the Romi.
Creating a Romi Project
Creating a new program for a Romi is no different than creating a normal FRC |reg| program, similar to the Zero To Robot programming steps. Initially, you may wish to create a separate project for use on just the Romi as the Romi hardware may be connected to different ports than on your roboRIO robot.
The Romi Robot used PWM ports 0 and 1 for left and right side respectively.
Installing the WebSockets VI
One aspect where a Romi project differs from a regular FRC |reg| robot project is that the code is not deployed directly to the Romi. Instead, a Romi project runs on your development computer, and leverages the WPILib simulation framework to communicate with the Romi robot. WebSockets is the protocol that LabVIEW uses to converse with the Romi.
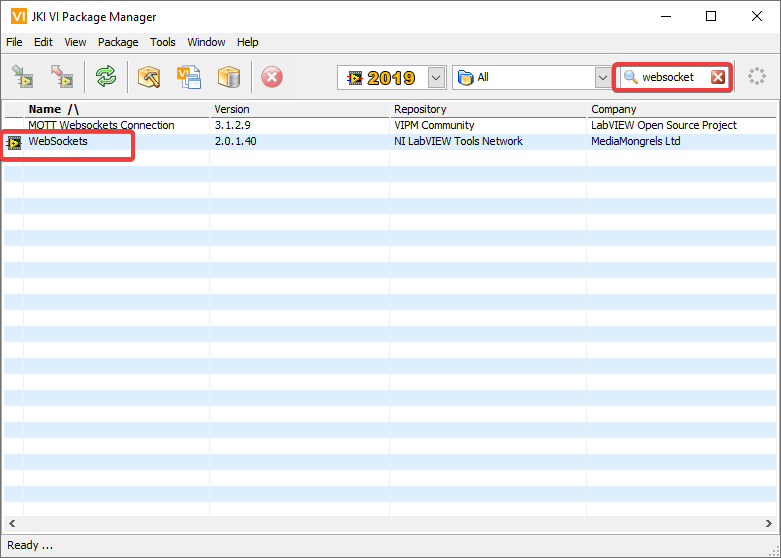
Open the VI Package Manager application. Type websockets into the search box in the top right. Select the VI by LabVIEW Tools Network.

Changing the Project Target
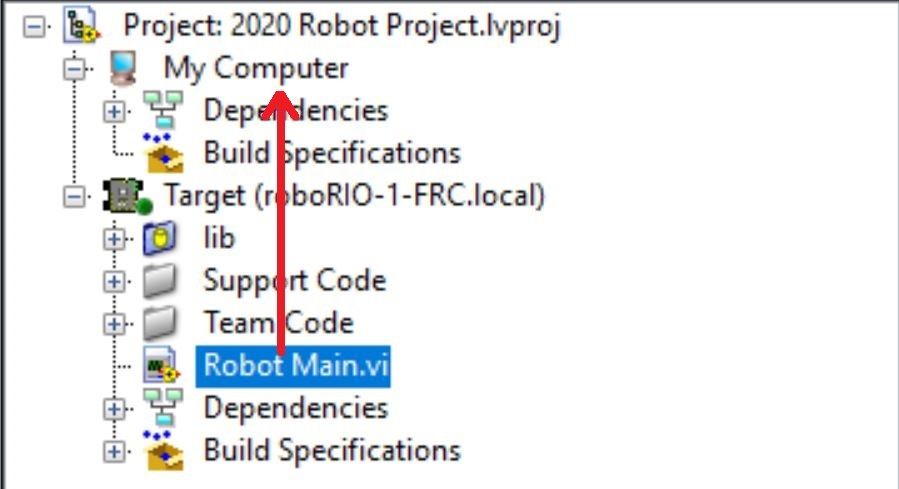
The primary step needed to run your LabVIEW program on the Romi is to change the target to the Desktop. To change the project target, locate the Robot Main VI in the Project Explorer and click and drag it from the Target section to the My Computer section.

Setting the Target IP
By default, your LabVIEW program will attempt to connect to a Romi with the IP address of 10.0.0.2. If you wish to use a different IP, you can specify it as an input to the Driver Station Start Communication VI inside Robot Main. Locate the pink input terminal for Simulation URL then right-click and select Create Constant to create a constant pre-filled with the default value. You can then modify the IP address portion of the text, taking care to leave the protocol section (at the beginning) and port and suffix (at the end) the same.

Running a Romi Program
To run a Romi program, first, ensure that your Romi is powered on. Once you connect to the WPILibPi-<number> network broadcast by the Romi, press the white Run arrow to start running the Romi program on your computer.
Your Romi code is now running! The program will automatically attempt to connect to either the IP you have specified, or the default if you have not specified an IP.
It is recommended to run the Driver Station software on the same computer as the LabVIEW code. Once your program successfully connects to the Driver Station, it will automatically notify the Driver Station that the code is running on the Desktop, allowing the Driver Station to connect without you changing any information inside the Driver Station. Next, you’ll need to point the Driver Station to your Romi. This is done by setting the team number to 127.0.0.1. You can then use the controls in the Driver Station to set the robot mode and enable/disable as normal.
הערה
If your robot code is unable to connect to the Romi, the Driver Station will also show no connectivity.
Using the Gyro or Encoder
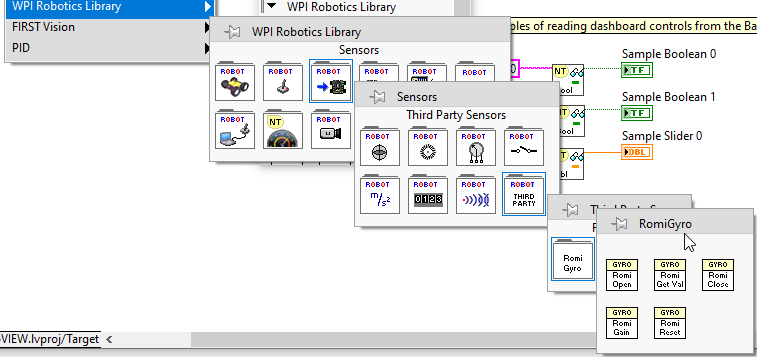
The gyro that is available on the Romi is available using the RomiGyro functions. This is located under
- WPI Robotics Library
   - Sensors
      - Third Party Libraries
         - RomiGyro

The encoders can be used using the standard encoder function. The DIO ports are:
Left (4, 5)
Right (6, 7)