Romi硬件和装配体
要开始使用Romi,您需要具备必要的硬件。
Romi Kit from Pololu – 订购可免运费
树莓派<https://www.amazon.com/gp/product/B07BFH96M3/>`__ - 3B+或4
8GB(及以上)的Micro - SD卡 <https://www.amazon.com/dp/B073K14CVB/>`__
Micro SD读卡器<https://www.amazon.com/gp/product/B0779V61XB/>`__ -如果你还没有的话
6 AA电池<https://www.amazon.com/gp/product/B07TW9T8JW/>`__ -最好是可充电的(别忘了充电器)
装配
Romi机器人套件是预先焊接的,只需要在使用前组装好。一旦你收集了所有的材料,你可以开始组装:
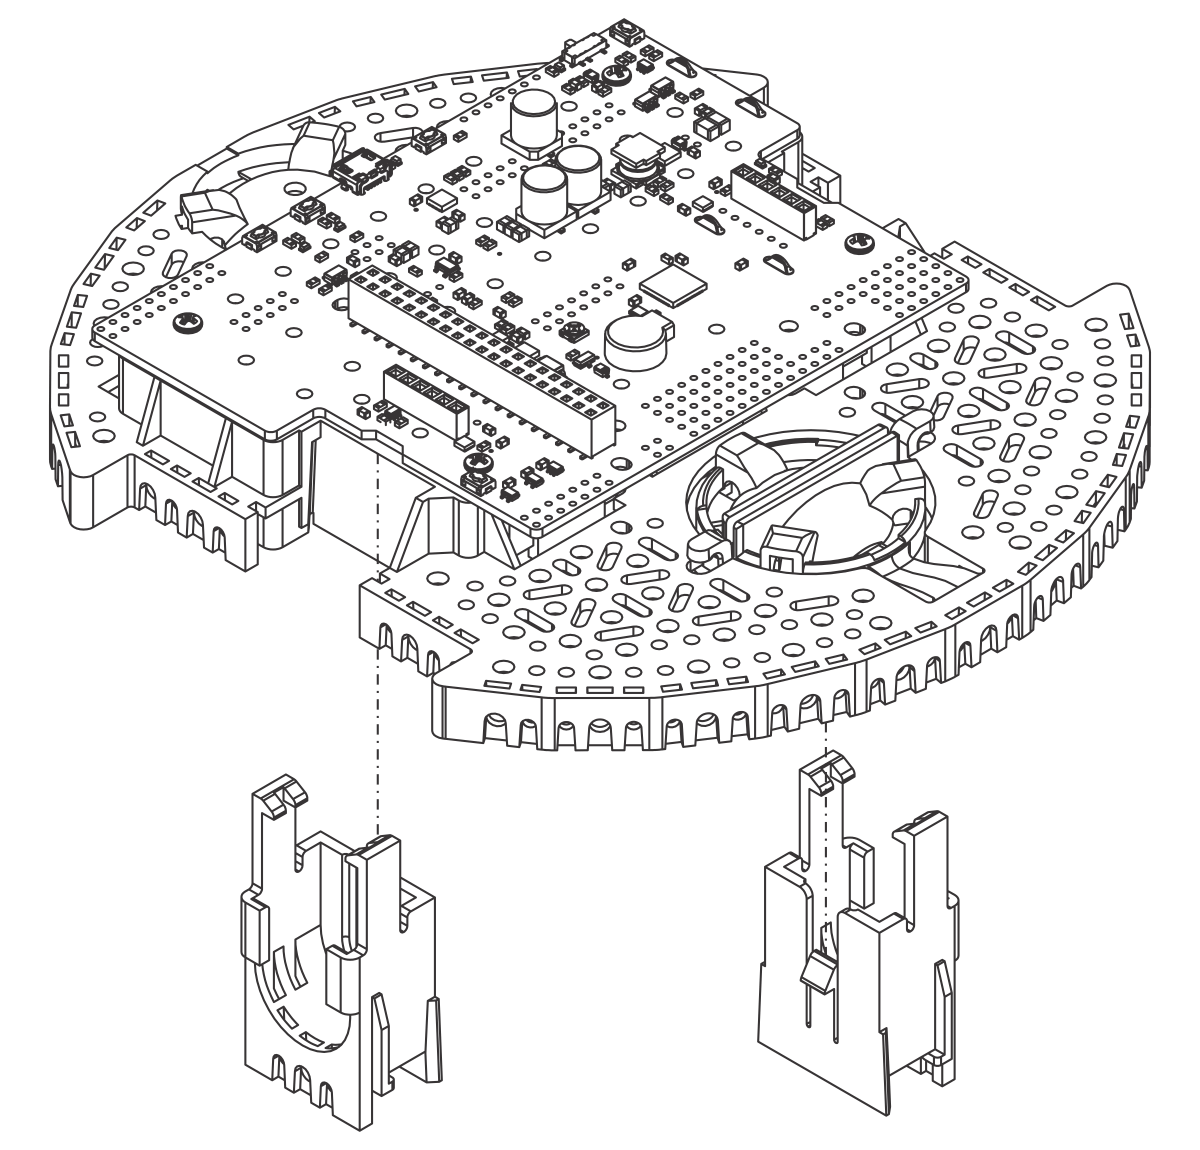
按照指示将电机夹与底盘对齐,并将其牢固地压入底盘,直到电机夹的底部与底盘底部持平(您可能会听到几声咔哒声)。
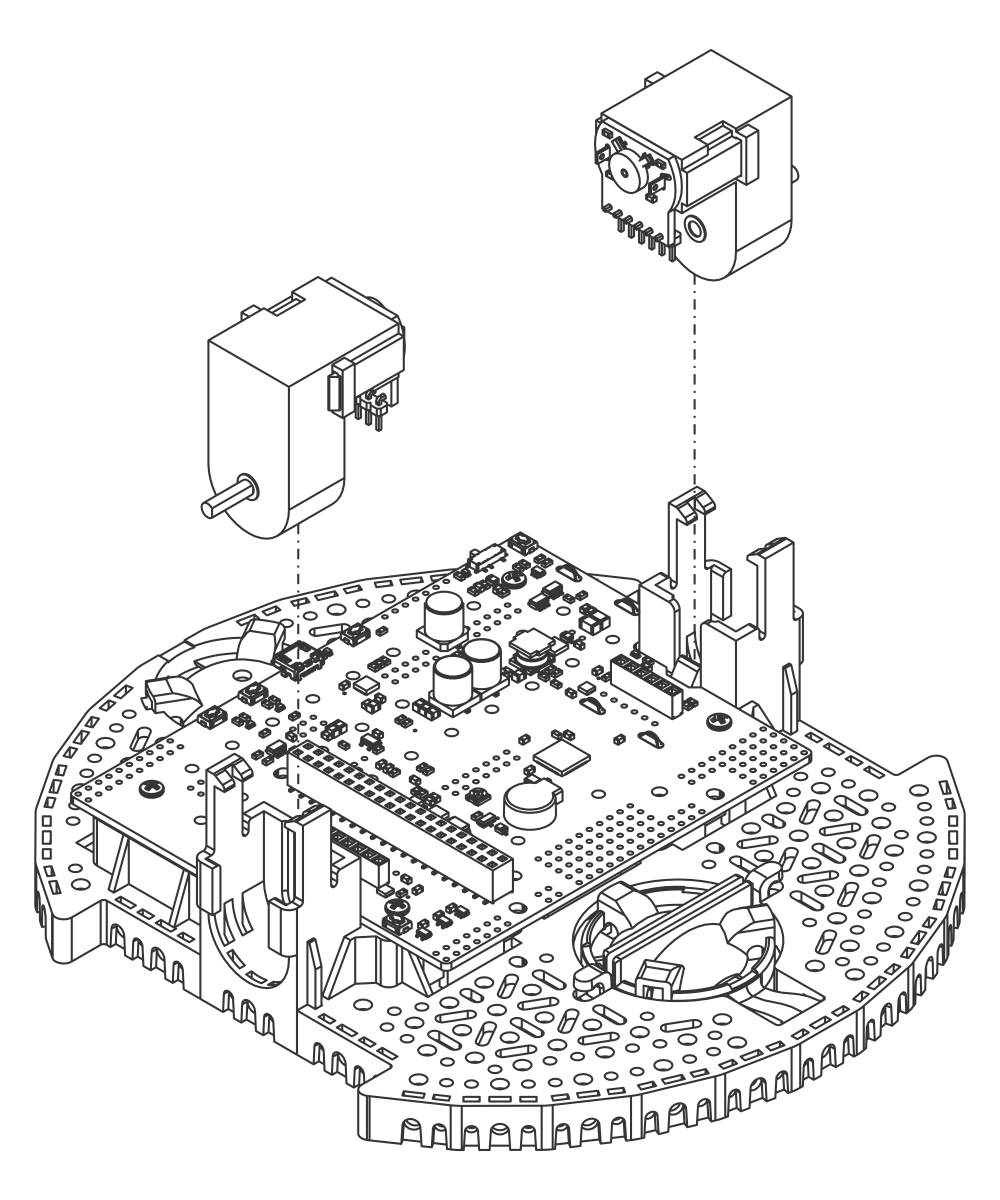
将微型塑料齿轮马达推入马达夹,直到它们卡住。注意,电机阻塞夹释放,因此,如果您稍后需要拆卸电机支架,您将首先需要拆卸电机。迷你塑料齿轮马达和有扩展的电机轴结合以得到正交编码器的位置反馈。
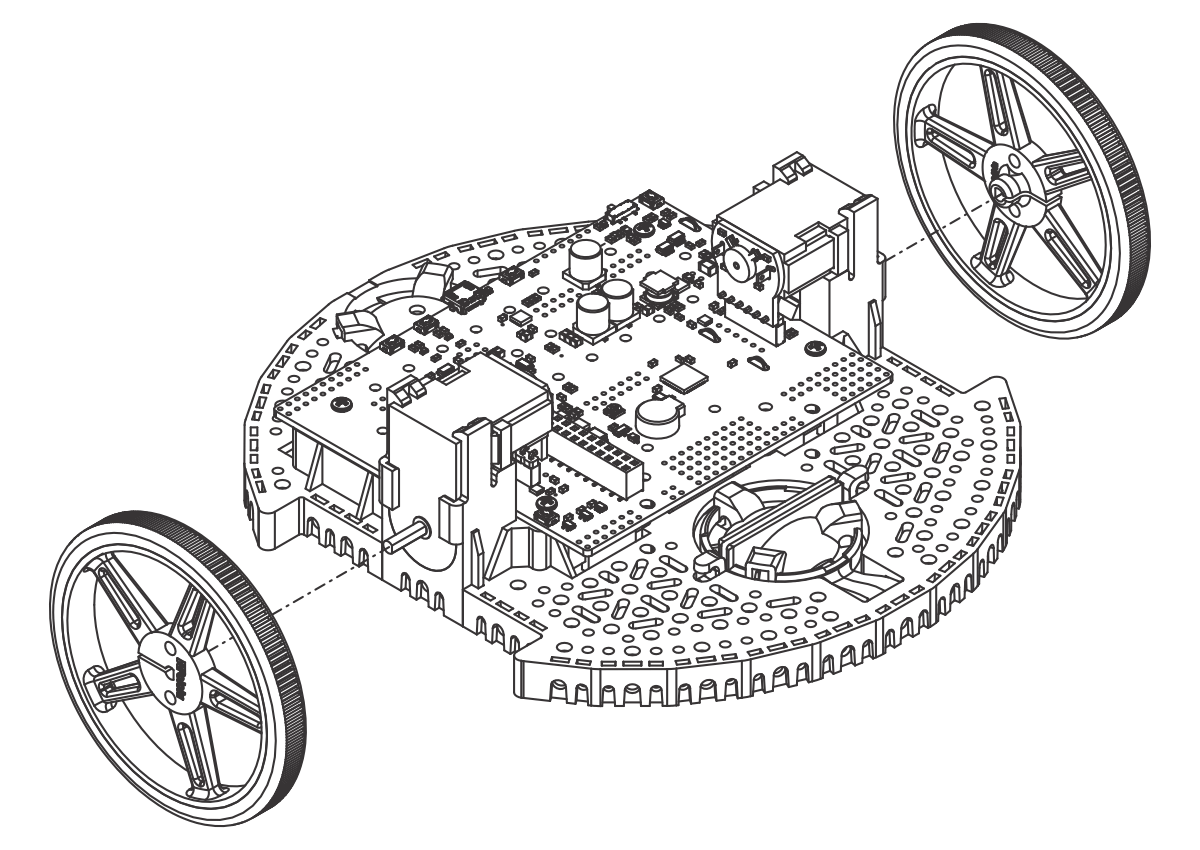
将轮组压在电机的输出轴上,直到电机轴与轮组的外表面齐平。通过使电机的D轴的平坦部分与车轮正确地排列来将轮组和底盘设置在同一个平坦的表面。然后,放下底盘,将电机轴压入车轮,直到它接触到表面。
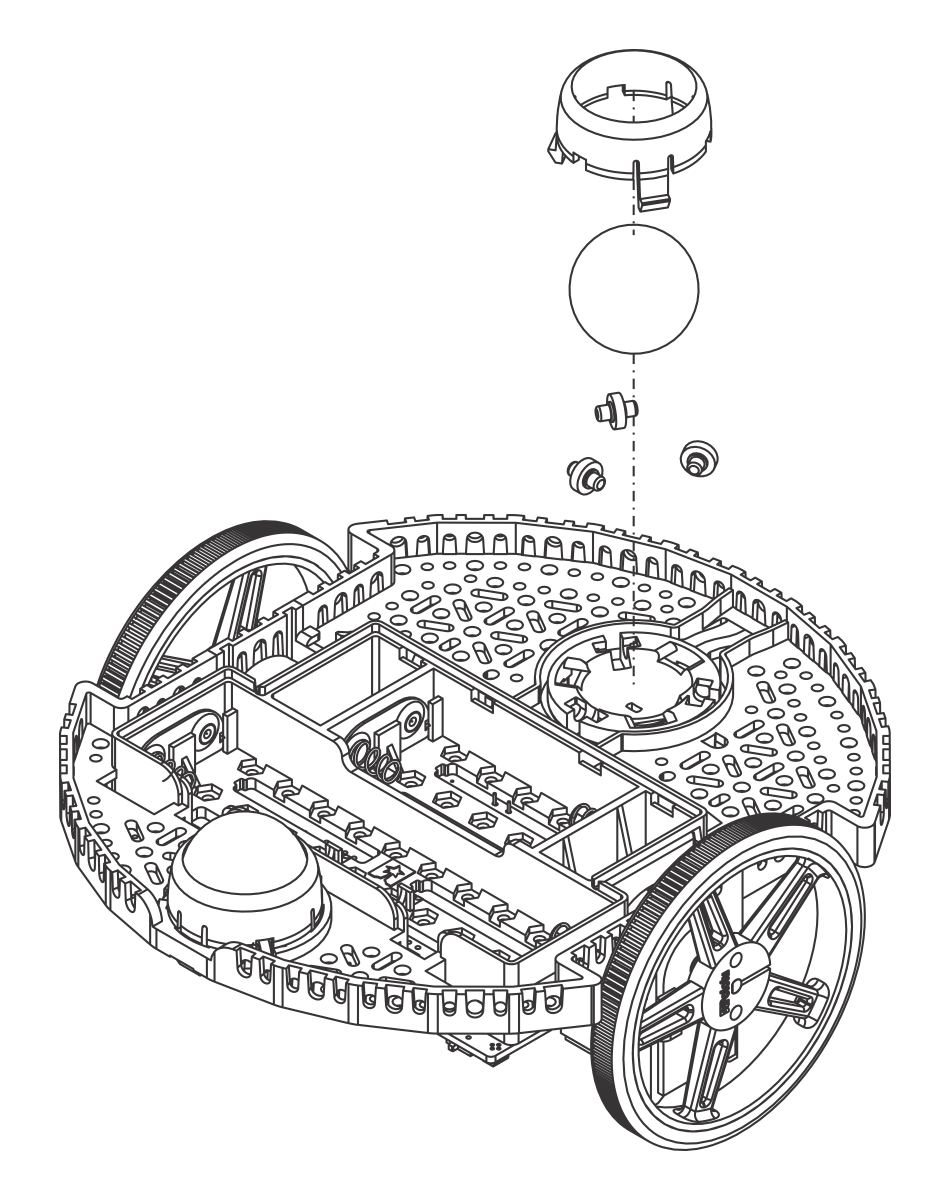
将底盘倒过来,将后滚珠脚轮的三个滚轮放入底盘的开口内。将1英寸塑料球放在三个滚轮的顶部。然后推滚珠脚轮保留夹并在球和进入底盘时滑入到他们各自的位置。
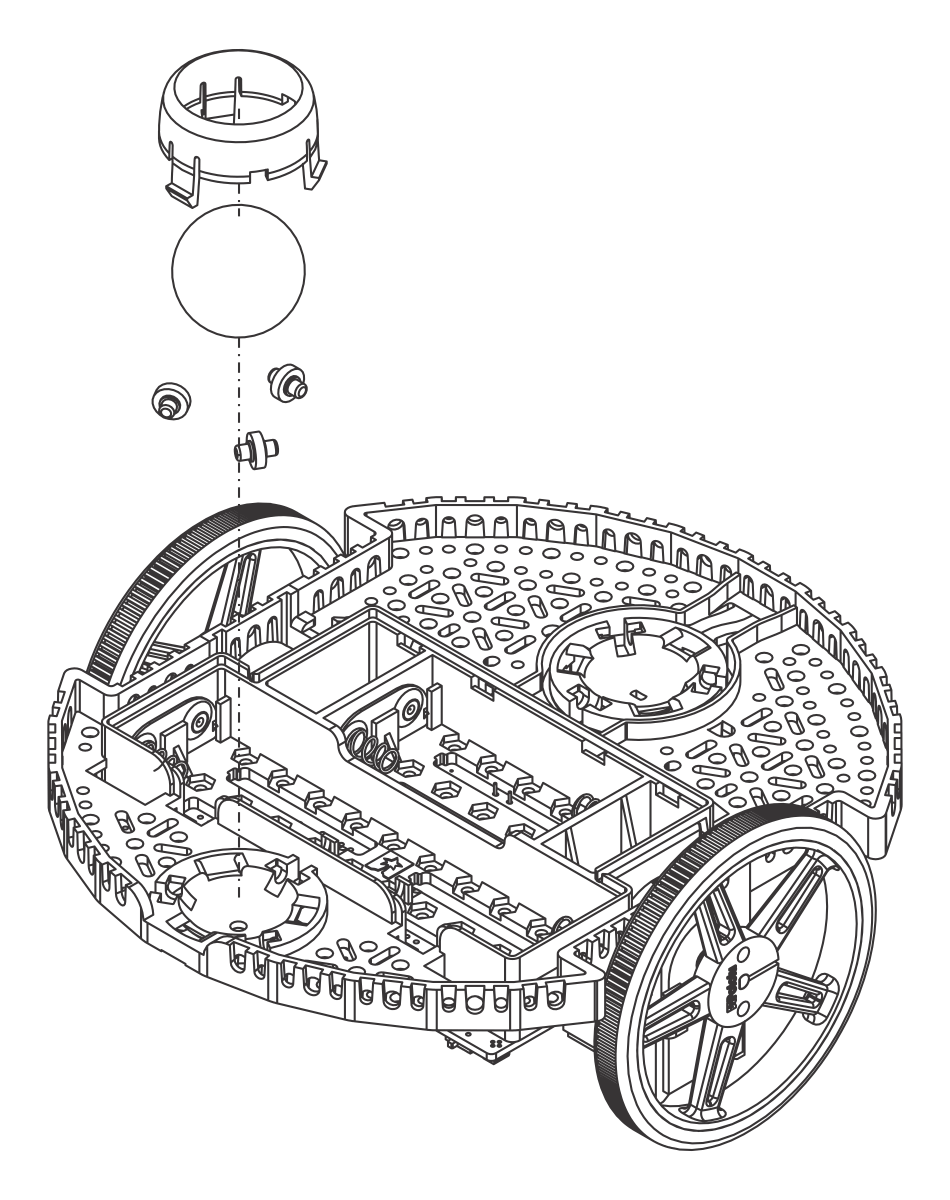
重复为前面的球的脚轮,所以有一个脚轮在前面和后面的机器人。
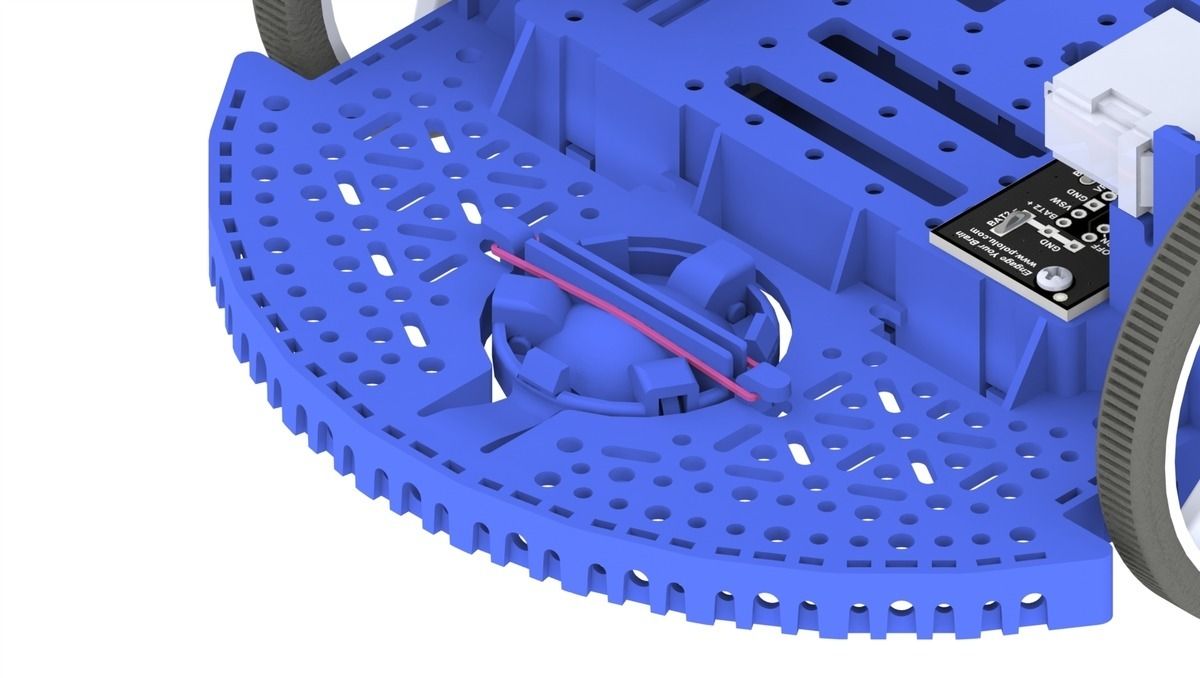
Optional: The front ball caster is supported by a flexible arm that acts as a suspension system. If you want to make it stiffer, you can wrap a rubber band around the two hooks located on either side of the ball caster on the top side of the chassis.
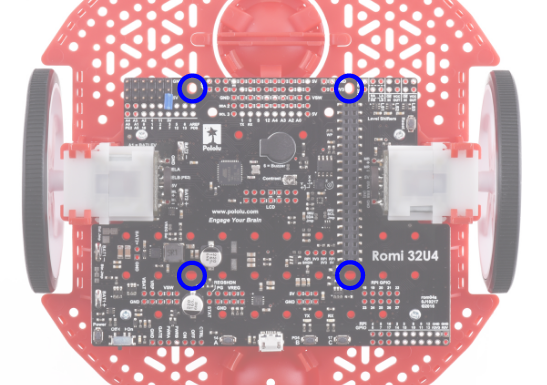
Install the standoffs to support the Raspberry Pi board. Two standoffs (thread side down) mount in the holes on the side of the Romi board closest to the “Romi 32U4” label as shown in the picture. The nuts for these standoffs are inside the battery compartment. The other two standoffs go into the holes on the opposite side of the board. To attach them, you will need a needle-nose pliers to hold the nut while you screw in the standoffs. The circled holes in the image below show where the standoffs should go.
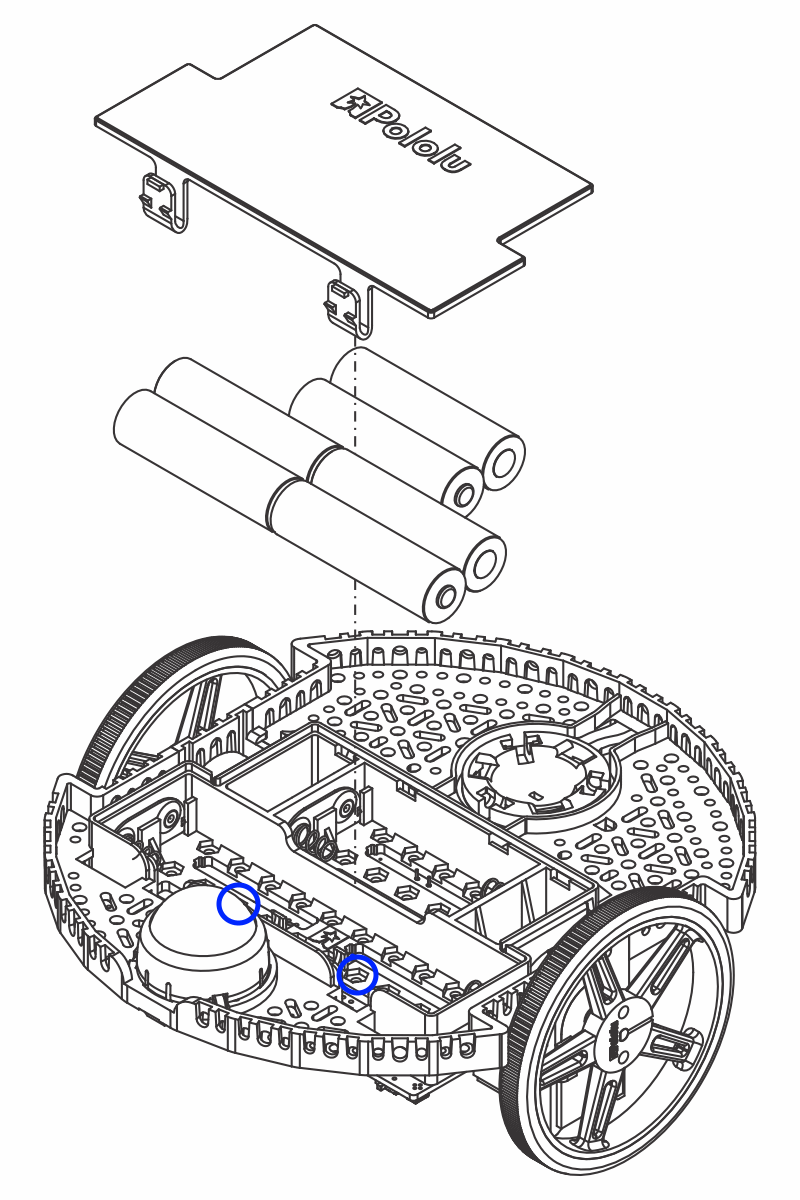
底盘工作需要4或6节AA电池(我们建议使用可充电AA镍氢电池)。电池的正确方向是由电池形状的孔在Romi底盘以及底盘本身的+和-指示器指示。
将树莓派板倒置,小心对准Pi上的2x20针连接器与Romi上的2x20针插座。用均匀的压力推,注意不要弯曲任何插销。插入后,使用所提供的螺丝将树莓派板固定到上一步安装的支架上。
备注
其中两个螺丝需要在电池隔间内的一个六角形孔中放置一个螺母。位置用上图中的蓝色圆圈表示。
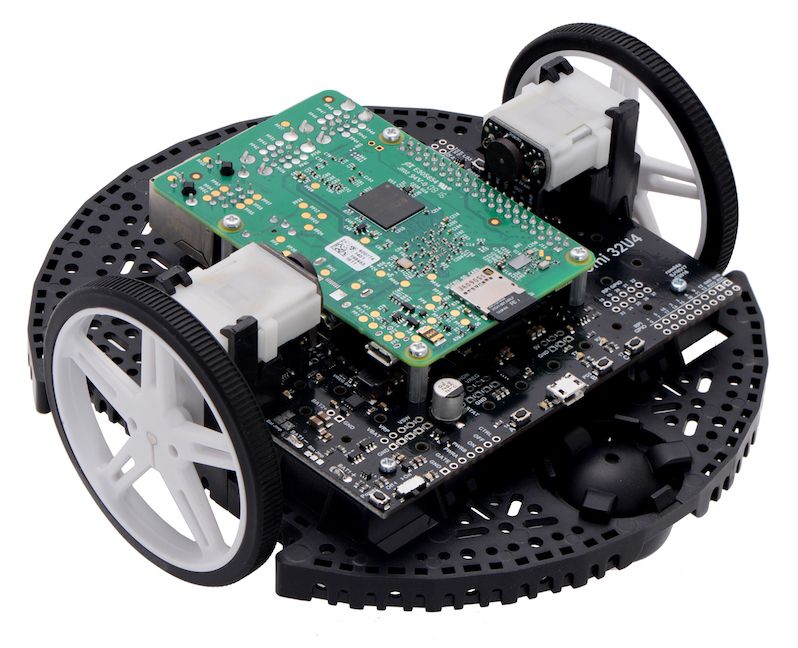
你的Romi底盘的组装现在完成了!