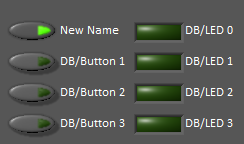
Using the LabVIEW Dashboard with C++, Java, or Python Code
The default LabVIEW Dashboard utilizes NetworkTables to pass values and is therefore compatible with C++, Java, and Python robot programs. This article covers the keys and value ranges to use to work with the Dashboard.
Drive Tab
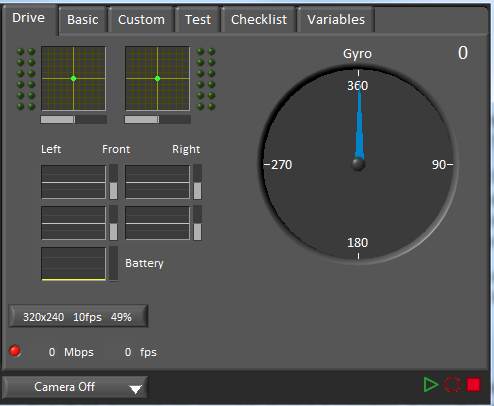
The Select Autonomous… dropdown can be used so show the available autonomous routines and choose one to run for the match.
SmartDashboard.putStringArray("Auto List", {"Drive Forwards", "Drive Backwards", "Shoot"});

// At the beginning of auto
String autoName = SmartDashboard.getString("Auto Selector", "Drive Forwards") // This would make "Drive Forwards the default auto
switch(autoName) {
   case "Drive Forwards":
   // auto here
   case "Drive Backwards":
   // auto here
   case "Shoot":
   // auto here
}
frc::SmartDashboard::PutStringArray("Auto List", {"Drive Forwards", "Drive Backwards", "Shoot"});

// At the beginning of auto
String autoName = SmartDashboard.GetString("Auto Selector", "Drive Forwards") // This would make "Drive Forwards the default auto
switch(autoName) {
   case "Drive Forwards":
   // auto here
   case "Drive Backwards":
   // auto here
   case "Shoot":
   // auto here
}
from wpilib import SmartDashboard

SmartDashboard.putStringArray("Auto List", ["Drive Forwards", "Drive Backwards", "Shoot"])

# At the beginning of auto
autoName = SmartDashboard.getString("Auto Selector", "Drive Forwards") # This would make "Drive Forwards the default auto
match autoName:
   case "Drive Forwards":
      # auto here
   case "Drive Backwards":
      # auto here
   case "Shoot":
      # auto here
Sending to the “Gyro” NetworkTables entry will populate the gyro here.
SmartDashboard.putNumber("Gyro", drivetrain.getHeading());
frc::SmartDashboard::PutNumber("Gyro", Drivetrain.GetHeading());
from wpilib import SmartDashboard

SmartDashboard.putNumber("Gyro", self.drivetrain.getHeading())
There are four outputs that show the motor power to the drivetrain. This is configured for 2 motors per side and a tank style drivetrain. This is done by setting “RobotDrive Motors” like the example below.
SmartDashboard.putNumberArray("RobotDrive Motors", {drivetrain.getLeftFront(), drivetrain.getRightFront(), drivetrain.getLeftBack(), drivetrain.getRightBack()});
frc::SmartDashboard::PutNumberArray("Gyro", {drivetrain.GetLeftFront(), drivetrain.GetRightFront(), drivetrain.GetLeftBack(), drivetrain.GetRightBack()});
from wpilib import SmartDashboard

SmartDashboard.putNumberArray("RobotDrive Motors", [self.drivetrain.getLeftFront(), self.drivetrain.getRightFront(), self.drivetrain.getLeftBack(), self.drivetrain.getRightBack()])
Basic Tab
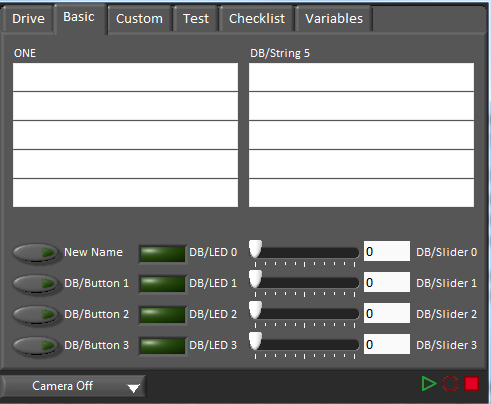
The Basic tab uses a number of keys in the a “DB” sub-table to send/receive Dashboard data. The LED’s are output only, the other fields are all bi-directional (send or receive).
Strings
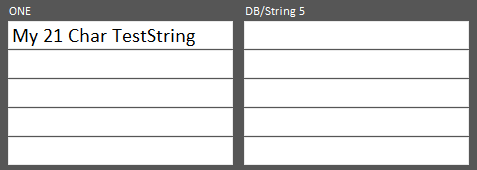
The strings are labeled top-to-bottom, left-to-right from “DB/String 0” to “DB/String 9”. Each String field can display at least 21 characters (exact number depends on what characters). To write to these strings:
SmartDashboard.putString("DB/String 0", "My 21 Char TestString");
frc::SmartDashboard::PutString("DB/String 0", "My 21 Char TestString");
from wpilib import SmartDashboard

SmartDashboard.putString("DB/String 0", "My 21 Char TestString")
To read string data entered on the Dashboard:
String dashData = SmartDashboard.getString("DB/String 0", "myDefaultData");
std::string dashData = frc::SmartDashboard::GetString("DB/String 0", "myDefaultData");
from wpilib import SmartDashboard

dashData = SmartDashboard.getString("DB/String 0", "myDefaultData")
Sliders
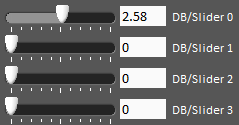
The Sliders are bi-directional analog (double) controls/indicators with a range from 0 to 5. To write to these indicators:
SmartDashboard.putNumber("DB/Slider 0", 2.58);
frc::SmartDashboard::PutNumber("DB/Slider 0", 2.58);
from wpilib import SmartDashboard

SmartDashboard.putNumber("DB/Slider 0", 2.58)
To read values from the Dashboard into the robot program: (default value of 0.0)
double dashData = SmartDashboard.getNumber("DB/Slider 0", 0.0);
double dashData = frc::SmartDashboard::GetNumber("DB/Slider 0", 0.0);
from wpilib import SmartDashboard

dashData = SmartDashboard.getNumber("DB/Slider 0", 0.0)
