WPILib Installation Guide
This guide is intended for Java and C++ teams. LabVIEW teams can skip to Installing LabVIEW for FRC (LabVIEW only). Python teams can skip to Python Installation Guide. Additionally, the below tutorial shows Windows 10, but the steps are identical for all operating systems. Notes differentiating operating systems will be shown.
Prerequisites
- Supported Operating Systems and Architectures:
Windows 10 & 11, 64 bit only. 32 bit and Arm are not supported
Ubuntu 22.04, 64 bit. Other Linux distributions with glibc >= 2.34 may work, but are unsupported
macOS 11 or higher, both Intel and Arm for Java. C++ requires macOS 12 or higher with Xcode 14.
Warning
The following OSes are no longer supported: macOS 10.15, Ubuntu 18.04 & 20.04, Windows 7, Windows 8.1, and any 32-bit Windows.
WPILib is designed to install to different folders for different years, so that it is not necessary to uninstall a previous version before installing this year’s WPILib.
Downloading
WPILib Installer
Release Notes
This is an update release of WPILib for the 2024 season. This release has a number of quality-of-life bugfixes.
Upgrading from earlier 2024 releases is easy: simply download and run the new installer and it will update your current installation. If you already have the 2024 WPILib vscode installed, it will detect it and you can simply click "next" for that installation step. After installation, vscode will prompt you when opening your robot project whether you want to upgrade it to this version. Note that using the installer is required to get the new version of desktop tools such as Shuffleboard. This release is compatible with both 2024_v2 releases of the RoboRIO image. Mac note: if upgrading from 2024.1.1, it is necessary to manually remove the 2024.1.1 version of AdvantageScope before running the installer in order for the new version to be installed.
Note: After updating to 2024.3.2, the deploy process will deploy an updated JRE to your robot on first deploy. This means the first deploy will take a little longer than usual.
The documentation for WPILib is located at https://docs.wpilib.org/ (if you have trouble accessing this location, https://frcdocs.wpi.edu/en/stable/ is an alternate location with the same content).
If you're new to FRC, start with Getting Started.
System Requirements: WPILib requires 64-bit Windows 10 or 11, Ubuntu 22.04, or macOS 12 or higher. C++ teams should note that Visual Studio 2022 17.9 is required for desktop builds. Mac users will need to have the Xcode Command Line Tools installed before running the installer. This can be done by running xcode-select --install in the Terminal.
If you're returning from a previous season, check out what's new for 2024. You will need a new RoboRIO image for 2024; this is available via the FRC 2024 Game Tools. Follow the WPILib installation guide to install WPILib.
If you're starting from a 2023 robot project, you will need to import your project to create a 2024 project. The import process is important, as it will make a few automated corrections for some breaking changes that happened in 2024. It is also necessary to import vendor libraries again, since last year’s vendor libraries must be updated to be compatible with this year’s projects.
A complete list of known issues with this release can be found here.
WPILib is developed by a small team of volunteers and the FIRST community.
Downloads
For 2024, we have changed the location for WPILib downloads due to GitHub file size limitations. Please use the links below to download the installer package for your platform.
- WPILib 2024.3.2 - Windows (2.2 GB)
- WPILib 2024.3.2 - Mac (Arm) (1.9 GB)
- WPILib 2024.3.2 - Mac (Intel) (2.1 GB)
- WPILib 2024.3.2 - Linux (x64) (2.5 GB)
- WPILib 2024.3.2 - Linux (arm64) (2.3 GB)
What's Changed since 2024.3.1
Several changes were made to address reports of robot code not immediately restarting following an uncaught exception or native crash:
- "wpi::Now() not initialized" error is now fatal and immediately crashes by @ThadHouse in https://github.com/wpilibsuite/allwpilib/pull/6417
- An uncaught Java exception now immediately exits by @PeterJohnson in https://github.com/wpilibsuite/allwpilib/pull/6420
- JRE updated to not report memory allocation info, as this can hang by @PeterJohnson in https://github.com/wpilibsuite/frc-openjdk-roborio/pull/15
- JRE error log reporting timeout shortened from 120 seconds to 2 seconds by @PeterJohnson in https://github.com/wpilibsuite/frc-openjdk-roborio/pull/16
SysId
- Fix position feedback latency compensation by @brettle in https://github.com/wpilibsuite/allwpilib/pull/6392
- Fix arm characterization crash by @calcmogul in https://github.com/wpilibsuite/allwpilib/pull/6422
- Fix crash on negative feedforward gains by @calcmogul in https://github.com/wpilibsuite/allwpilib/pull/6425
- Fix wrong position Kd with unnormalized time by @brettle in https://github.com/wpilibsuite/allwpilib/pull/6433
Tools
- AdvantageScope updated to 3.2.1 by @jwbonner in https://github.com/wpilibsuite/WPILibInstaller-Avalonia/pull/403
Math
- Add structured data support for DifferentialDriveWheelPositions by @DeltaDizzy in https://github.com/wpilibsuite/allwpilib/pull/6412
- LinearSystemId: Don't throw if Kv = 0 by @calcmogul in https://github.com/wpilibsuite/allwpilib/pull/6424
Simulation GUI
- Use shift key to enable docking features by @PeterJohnson in https://github.com/wpilibsuite/allwpilib/pull/6429
Documentation
- [wpiunits] Fix Distance class javadocs to state the correct dimension by @DeltaDizzy in https://github.com/wpilibsuite/allwpilib/pull/6363
- Add docs for features not supported on PDH (NFC) by @sciencewhiz in https://github.com/wpilibsuite/allwpilib/pull/6436
Examples
- Remove unused private variables by @calcmogul in https://github.com/wpilibsuite/allwpilib/pull/6403
Full Changelog: https://github.com/wpilibsuite/allwpilib/compare/v2024.3.1...v2024.3.2
MD5 Hashes
9a6bae26d00083398ebdb430b5133591  WPILib_Linux-2024.3.2.tar.gz
36c77d22fa3600c840944637c244d06b  WPILib_LinuxArm64-2024.3.2.tar.gz
9d54e02fb6c049558ddb4520249beb46  WPILib_Windows-2024.3.2.iso
e6eee31dd4fb3b10676ed3841c0f7634  WPILib_macOS-Intel-2024.3.2.dmg
9e326f2ecf90db7549ecd4ffbb840999  WPILib_macOS-Arm64-2024.3.2.dmg
SHA256 Hashes
2e3d669c4100acf64808069848c8218d5e66204304986114e726ef5c564a3de7  WPILib_Linux-2024.3.2.tar.gz
ad776cc4ce7267bec05ed4f6fe3698cd1a2291460a2ab220fe2936d8582b4777  WPILib_LinuxArm64-2024.3.2.tar.gz
ff73a846153016e588f73dd147790bf4a496019d65efa3daf2b06faef2f822bc  WPILib_Windows-2024.3.2.iso
ca551ee4e44ed1135b5caa0d70920ce29fd06f260099cb85da976081e66a7aac  WPILib_macOS-Intel-2024.3.2.dmg
1af409d3d05debb20120ab494f5d21f482ce270768f41221db2714c97e8db135  WPILib_macOS-Arm64-2024.3.2.dmg
You can download the latest release of the installer from GitHub.
Once on the GitHub releases page, scroll to the Downloads section.
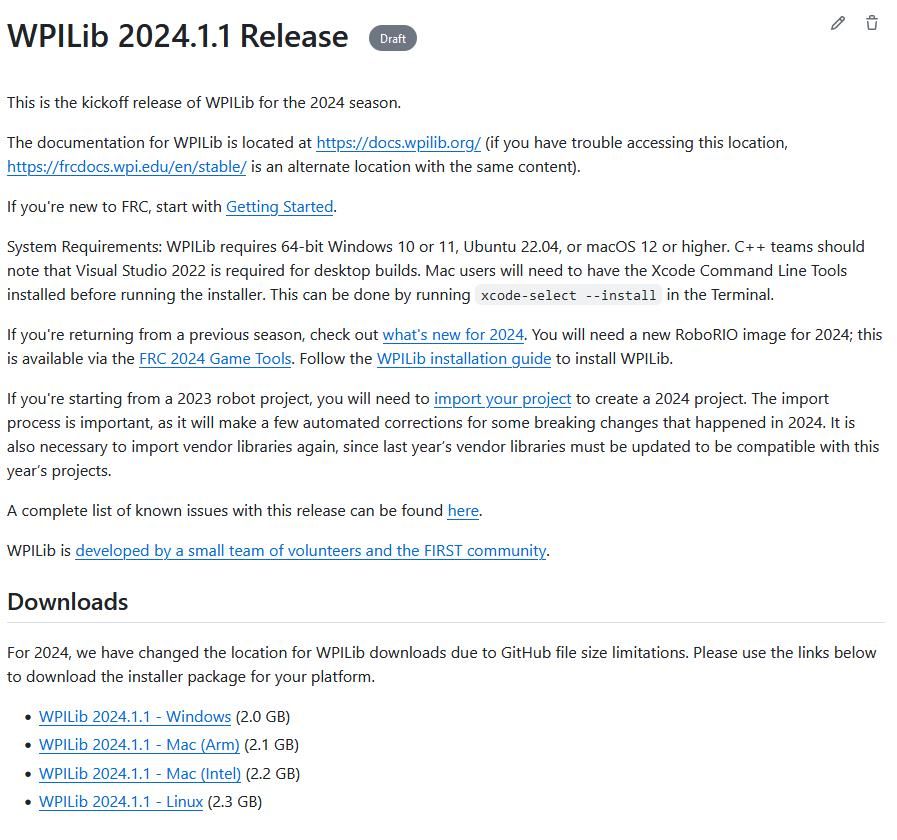
Then click on the correct binary for your OS and architecture to begin the download.
Extracting the Installer
When you download the WPILib installer, it is distributed as a disk image file .iso for Windows, .tar.gz for Linux, and distributed as a DMG for MacOS.
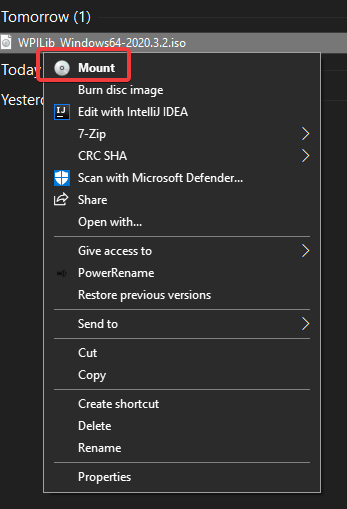
Windows 10+ users can right click on the downloaded disk image and select Mount to open it. Then launch WPILibInstaller.exe.
Note
Other installed programs may associate with iso files and the mount option may not appear. If that software does not give the option to mount or extract the iso file, then follow the directions below.
You can use 7-zip to extract the disk image by right-clicking, selecting 7-Zip and selecting Extract to…. Windows 11 users may need to select Show more options at the bottom of the context menu.
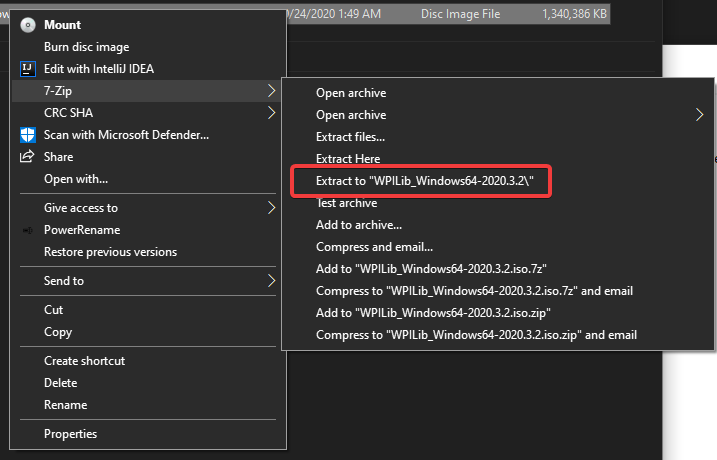
After opening the .iso file, launch the installer by opening WPILibInstaller.exe.
Note
After launching the installer, Windows may display a window titled “Windows protected your PC”. Click More info, then select Run anyway to run the installer.
For this release, macOS users will need to have the Xcode Command Line Tools installed before running the installer; we are working on removing this requirement in a future release. This can be done by running xcode-select --install in the Terminal.
Important
When upgrading from a 2024 beta release or 2024.1.1, it’s necessary to manually delete AdvantageScope before running the installer. Navigate to ~/wpilib/2024/tools and delete AdvantageScope.
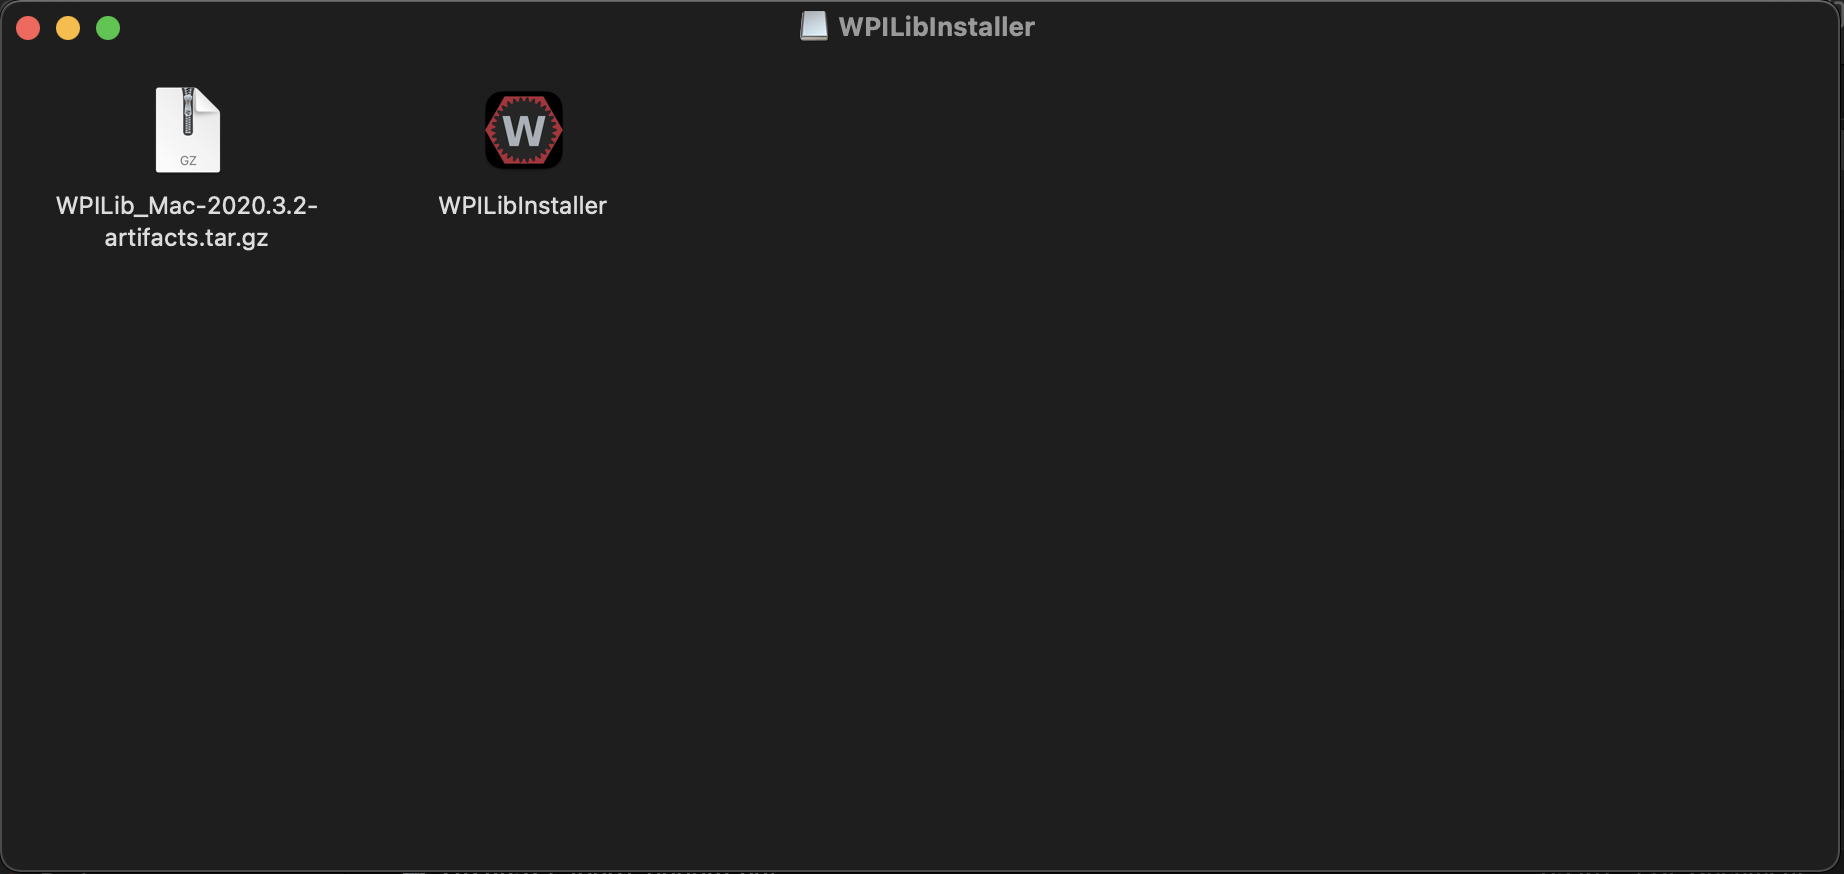
macOS users can double click on the downloaded DMG and then select WPILibInstaller to launch the application.
Linux users should extract the downloaded .tar.gz and then launch WPILibInstaller. Ubuntu treats executables in the file explorer as shared libraries, so double-clicking won’t run them. Run the following commands in a terminal instead with <version> replaced with the version you’re installing.
$ tar -xf WPILib_Linux-<version>.tar.gz
$ cd WPILib_Linux-<version>/
$ ./WPILibInstaller
Running the Installer
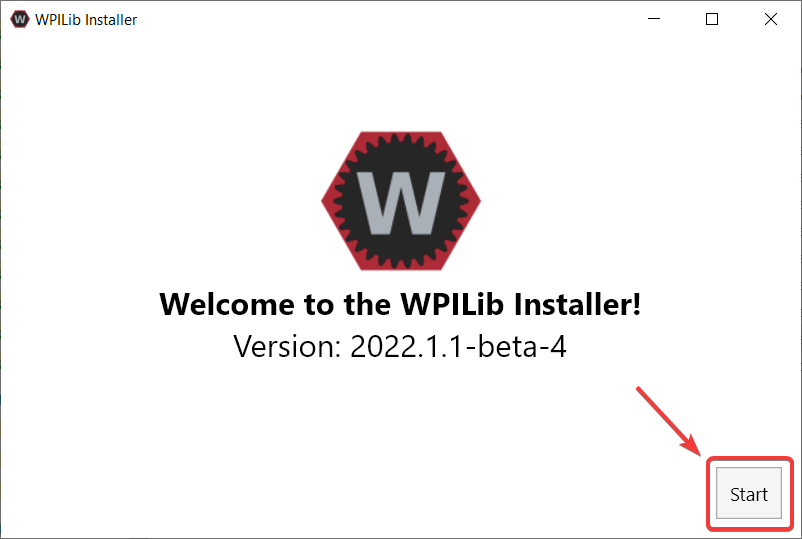
Upon opening the installer, you’ll be presented with the below screen. Go ahead and press Start.
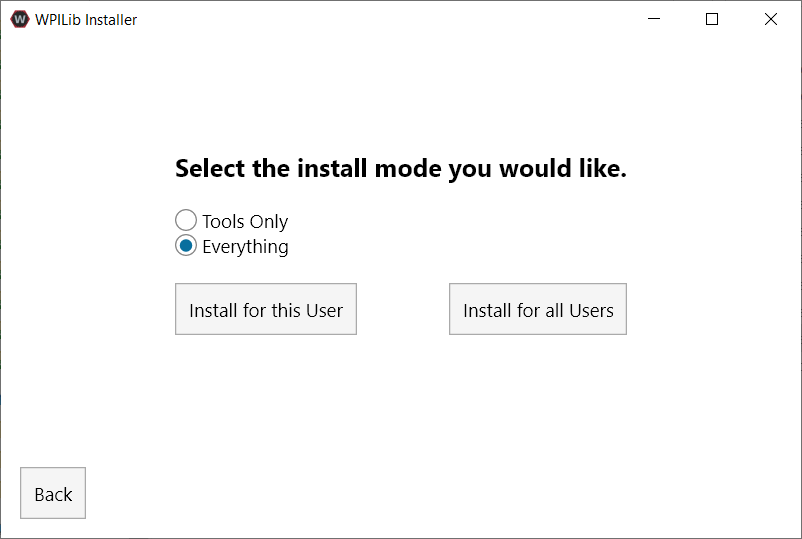
This showcases a list of options included with the WPILib installation.
Tools Only installs just the WPILib tools (Pathweaver, Shuffleboard, RobotBuilder, SysId, Glass, and OutlineViewer) and JDK.
Everything installs the full development environment (VS Code, extensions, all dependencies), WPILib tools, and JDK.
You will notice two buttons, Install for this User and Install for all Users. Install for this User only installs it on the current user account, and does not require administrator privileges. However, Install for all Users installs the tools for all system accounts and will require administrator access. Install for all Users is not an option for macOS and Linux.
Note
If you select Install for all Users, Windows will prompt for administrator access through UAC during installation.
Select the option that is appropriate for you, and you’ll presented with the following installation screen.
This next screen involves downloading VS Code. Unfortunately, due to licensing reasons, VS Code can not be bundled with the installer.
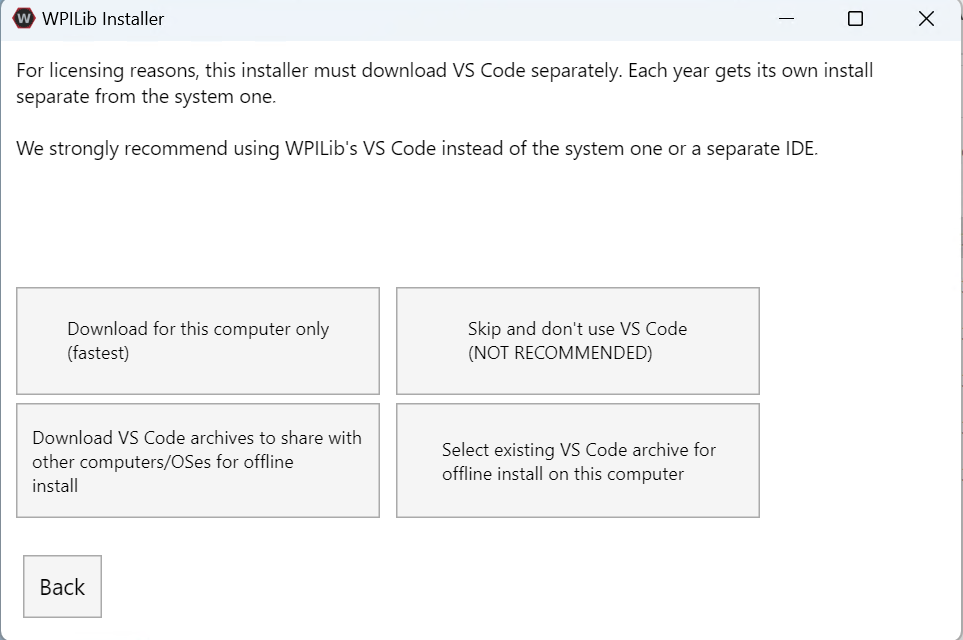
Download for this computer only
This downloads VS Code only for the current platform, which is also the smallest download.
Skip and don’t use VS Code
Skips installing VS Code. Useful for advanced installations or configurations. Generally not recommended.
Select existing VS Code archive for offline install on this computer
Selecting this option will bring up a prompt allowing you to select a pre-existing zip file of VS Code that has been downloaded by the installer previously. This option does not let you select an already installed copy of VS Code on your machine.
Create VS Code archives to share with other computers/OSes for offline install
This option downloads and saves a copy of VS Code for all platforms, which is useful for sharing the copy of the installer.
Go ahead and select Download for this computer only. This will begin the download process and can take a bit depending on internet connectivity (it’s ~100MB). Once the download is done, select Next. You should be presented with a screen that looks similar to the one below.
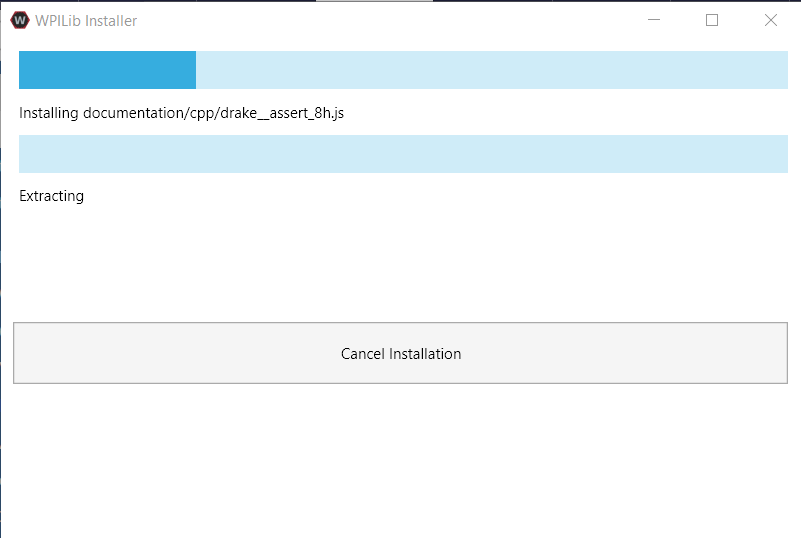
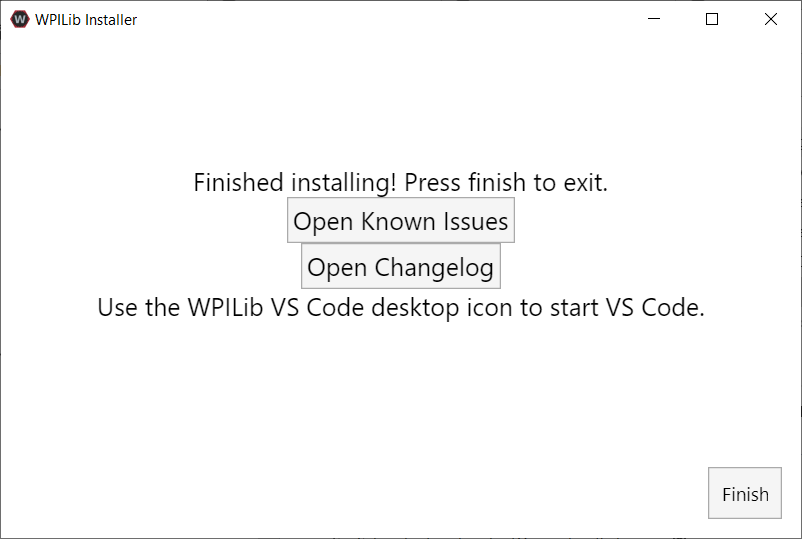
After installation is complete, you will be presented with the finished screen.
Important
WPILib installs a separate version of VS Code. It does not use an already existing installation. Each year has it’s own copy of the tools appended with the year. IE: WPILib VS Code 2022. Please launch the WPILib VS Code and not a system installed copy!
Congratulations, the WPILib development environment and tooling is now installed on your computer! Press Finish to exit the installer.
Post-Installation
Some operating systems require some final action to complete installation.
After installation, the installer opens the WPILib VS Code folder. Drag the VS Code application to the dock. Eject WPILibInstaller image from the desktop.
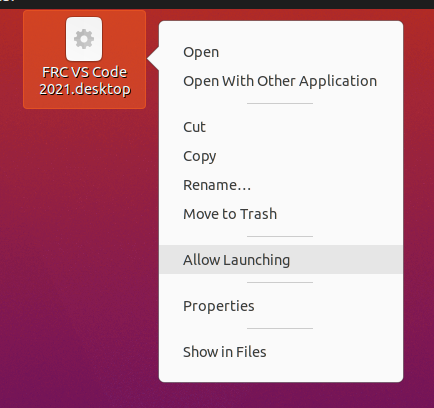
Some versions of Linux (e.g. Ubuntu 20.04) require you to give the desktop shortcut the ability to launch. Right click on the desktop icon and select Allow Launching.
Note
Installing desktop tools and rebooting will create a folder on the desktop called YYYY WPILib Tools, where YYYY is the current year. Desktop tool shortcuts are not available on Linux and macOS.
Additional C++ Installation for Simulation
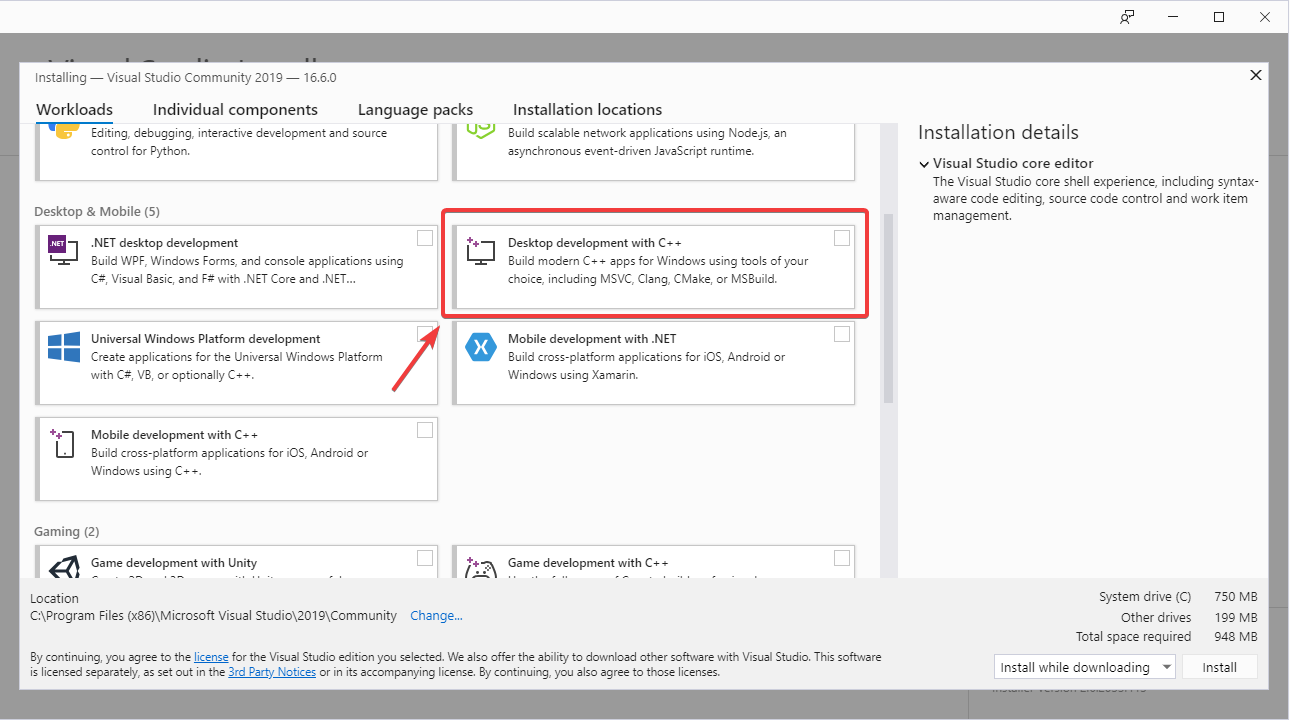
C++ robot simulation requires that a native compiler to be installed. For Windows, this would be Visual Studio 2022 version 17.9 or later (not VS Code), macOS requires Xcode 14 or later, and Linux (Ubuntu) requires the build-essential package.
Ensure the Desktop Development with C++ option is checked in the Visual Studio installer for simulation support.
What is Installed?
The Offline Installer installs the following components:
Visual Studio Code - The supported IDE for 2019 and later robot code development. The offline installer sets up a separate copy of VS Code for WPILib development, even if you already have VS Code on your machine. This is done because some of the settings that make the WPILib setup work may break existing workflows if you use VS Code for other projects.
C++ Compiler - The toolchains for building C++ code for the roboRIO
Gradle - The specific version of Gradle used for building/deploying C++ or Java robot code
Java JDK/JRE - A specific version of the Java JDK/JRE that is used to build Java robot code and to run any of the Java based Tools (Dashboards, etc.). This exists side by side with any existing JDK installs and does not overwrite the JAVA_HOME variable
WPILib Tools - SmartDashboard, Shuffleboard, RobotBuilder, OutlineViewer, PathWeaver, Glass, SysId, Data Log Tool, roboRIO Team Number Setter, AdvantageScope
WPILib Dependencies - OpenCV, etc.
VS Code Extensions - WPILib and Java/C++/Python extensions for robot code development in VS Code
Documentation - Offline copies of this frc-docs documentation and Java/C++/Python APIs
Uninstalling
WPILib is designed to install to different folders for different years, so that it is not necessary to uninstall a previous version before installing this year’s WPILib. However, the following instructions can be used to uninstall WPILib if desired.
Delete the appropriate wpilib folder (
c:\Users\Public\wpilib\YYYYwhereYYYYis the year to uninstall)Delete the desktop icons at
C:\Users\Public\Public Desktop
Delete the appropriate wpilib folder (
~/wpilib/YYYYwhereYYYYis the year to uninstall)
Delete the appropriate wpilib folder (
~/wpilib/YYYYwhereYYYYis the year to uninstall). egrm -rf ~/wpilib/YYYY
Troubleshooting
In case the installer fails, please open an issue on the installer repository. A link is available here. The installer should give a message on the cause of the error, please include this in the description of your issue.