Creating a Robot Program
Once everything is installed, we’re ready to create a robot program. WPILib comes with several templates for robot programs. Use of these templates is highly recommended for new users; however, advanced users are free to write their own robot code from scratch.
Choosing a Base Class
To start a project using one of the WPILib robot program templates, users must first choose a base class for their robot. Users subclass these base classes to create their primary Robot class, which controls the main flow of the robot program. There are three choices available for the base class:
TimedRobot
The TimedRobot class is the the base class recommended for most users. It provides control of the robot program through a collection of init() and periodic() methods, which are called by WPILib during specific robot states (e.g. autonomous or teleoperated). The TimedRobot class also provides an example of retrieving autonomous routines through SendableChooser (Java/ C++
Note
A TimedRobot Skeleton template is available that removes some informative comments and the autonomous example. You can use this if you’re already familiar with TimedRobot. The example shown below is of TimedRobot Skeleton.
import edu.wpi.first.wpilibj.TimedRobot;

public class Robot extends TimedRobot {

    @Override
    public void robotInit() {
        // This is called once when the robot code initializes
    }

    @Override
    public void robotPeriodic() {
        // This is called every period regardless of mode
    }

    @Override
    public void autonomousInit() {
        // This is called once when the robot first enters autonomous mode
    }

    @Override
    public void autonomousPeriodic() {
        // This is called periodically while the robot is in autonomous mode
    }

    @Override
    public void teleopInit() {
        // This is called once when the robot first enters teleoperated mode
    }

    @Override
    public void teleopPeriodic() {
        // This is called periodically while the robot is in teleopreated mode
    }

    @Override
    public void testInit() {
        // This is called once when the robot enters test mode
    }

    @Override
    public void testPeriodic() {
        // This is called periodically while the robot is in test mode
    }

}
#include <frc/TimedRobot.h>

class Robot : public frc::TimedRobot {
    public:
        void RobotInit() override; // This is called once when the robot code initializes
        void RobotPeriodic() override; // This is called every period regardless of mode
        void AutonomousInit() override; // This is called once when the robot first enters autonomous mode
        void AutonomousPeriodic() override; // This is called periodically while the robot is in autonomous mode
        void TeleopInit() override; // This is called once when the robot first enters teleoperated mode
        void TeleopPeriodic() override; // This is called periodically while the robot is in teleopreated mode
        void TestInit() override; // This is called once when the robot enters test mode
        void TestPeriodic() override; // This is called periodically while the robot is in test mode
};
Periodic methods are called every 20 ms by default. This can be changed by calling the superclass constructor with the new desired update rate.
Danger
Changing your robot rate can cause some unintended behavior (loop overruns). Teams can also use Notifiers to schedule methods at a custom rate.
public Robot() {
  super(0.03); // Periodic methods will now be called every 30 ms.
}
Robot() : frc::TimedRobot(30_ms) {}
RobotBase
The RobotBase class is the most minimal base-class offered, and is generally not recommended for direct use. No robot control flow is handled for the user; everything must be written from scratch inside the startCompetition() method. The template by default showcases how to process the different operation modes (teleop, auto, etc).
Note
A RobotBase Skeleton template is available that offers a blank startCompetition() method.
Command Robot
Teams using Command Robot or Old Command Robot should see the Command-Based Programming Tutorial or [Old] Command Based Programming.
Romi
Teams using a Romi should use the Romi - Timed or Romi - Command Bot template.
Romi - Timed
The Romi - Timed template provides a RomiDrivetrain class that exposes an arcadeDrive(double xaxisSpeed, double zaxisRotate) method. It’s up to the user to feed this arcadeDrive function.
This class also provides functions for retrieving and resetting the Romi’s onboard encoders.
Romi - Command Bot
The Romi - Command Bot template provides a RomiDrivetrain subsystem that exposes an arcadeDrive(double xaxisSpeed, double zaxisRotate) method. It’s up to the user to feed this arcadeDrive function.
This subsystem also provides functions for retrieving and resetting the Romi’s onboard encoders.
Not Using a Base Class
If desired, users can omit a base class entirely and simply write their program in a main() method, as they would for any other program. This is highly discouraged - users should not “reinvent the wheel” when writing their robot code - but it is supported for those who wish to have absolute control over their program flow.
Warning
Users should not modify the main() method of a robot program unless they are absolutely sure of what they are doing.
Creating a New WPILib Project
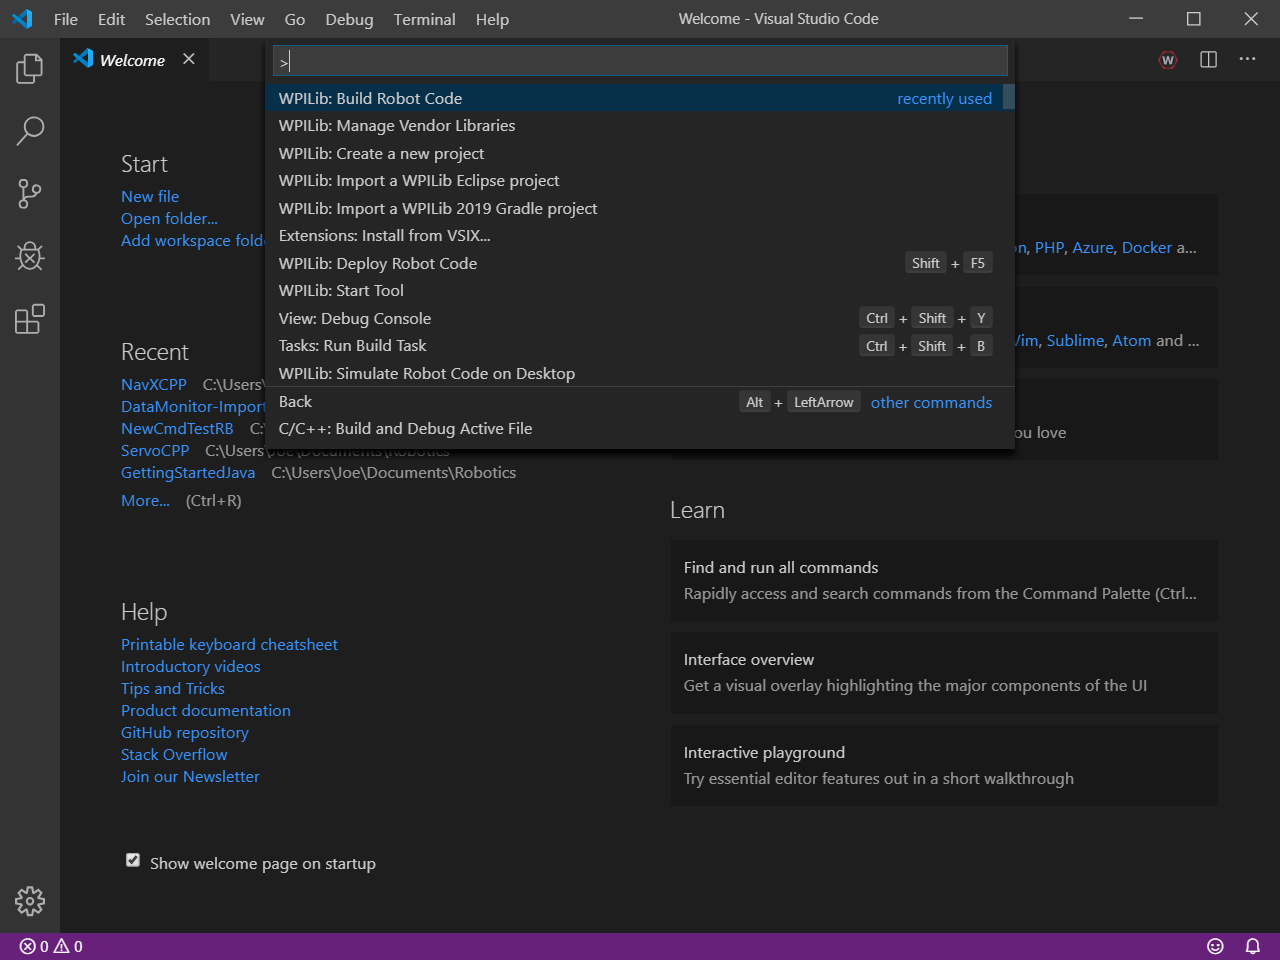
Once we’ve decided on a base class, we can create our new robot project. Bring up the Visual Studio Code command palette with Ctrl+Shift+P:
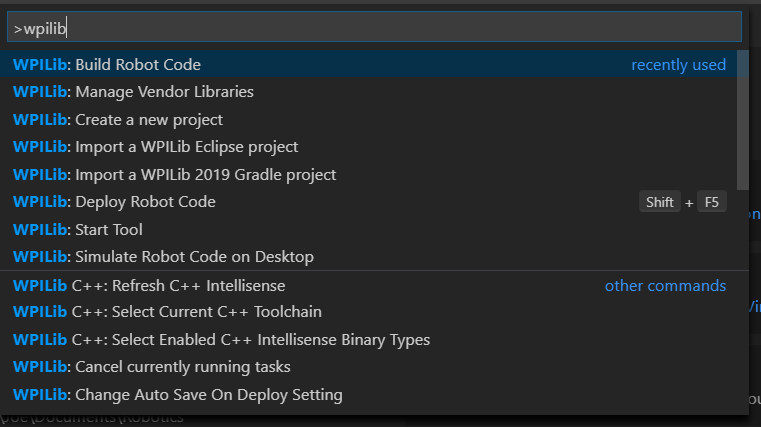
Then, type “WPILib” into the prompt. Since all WPILib commands start with “WPILib,” this will bring up the list of WPILib-specific VS Code commands:
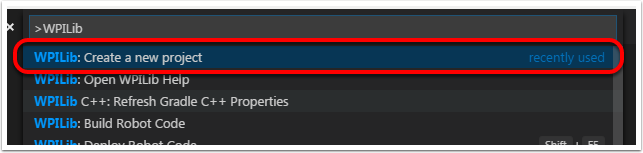
Now, select the Create a new project command:
This will bring up the “New Project Creator Window:”
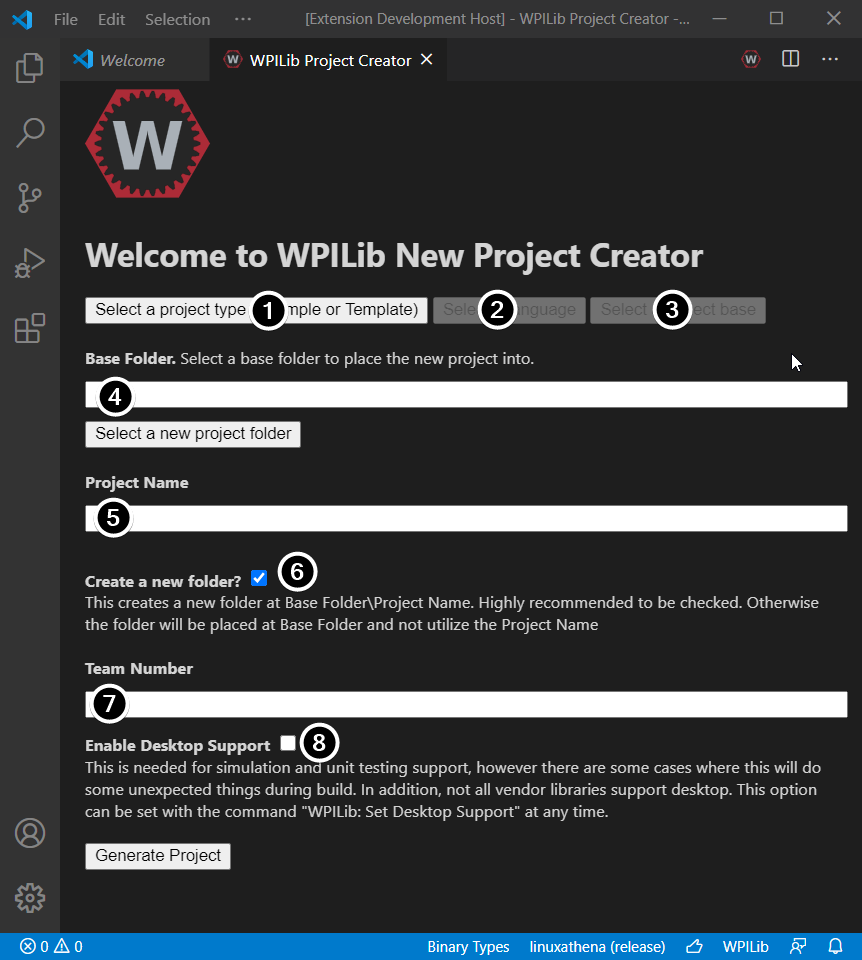
The elements of the New Project Creator Window are explained below:
Project Type: The kind of project we wish to create. This can be an example project, or one of the project templates provided by WPILib. Templates exist for each of the robot base classes. Additionally, a template exists for Command-based projects, which are built on the
TimedRobotbase class but include a number of additional features - this type of robot program is highly recommended for new teams.Language: This is the language (C++ or Java) that will be used for this project.
Base Folder: If this is a template project, this specifies the type of template that will be used.
Project Location: This determines the folder in which the robot project will be located.
Project Name: The name of the robot project. This also specifies the name that the project folder will be given if the Create New Folder box is checked.
Create a New Folder: If this is checked, a new folder will be created to hold the project within the previously-specified folder. If it is not checked, the project will be located directly in the previously-specified folder. An error will be thrown if the folder is not empty and this is not checked.
Team Number: The team number for the project, which will be used for package names within the project and to locate the robot when deploying code.
Enable Desktop Support: Enables unit test and simulation. While WPILib supports this, third party software libraries may not. If libraries do not support desktop, then your code may not compile or may crash. It should be left unchecked unless unit testing or simulation is needed and all libraries support it.
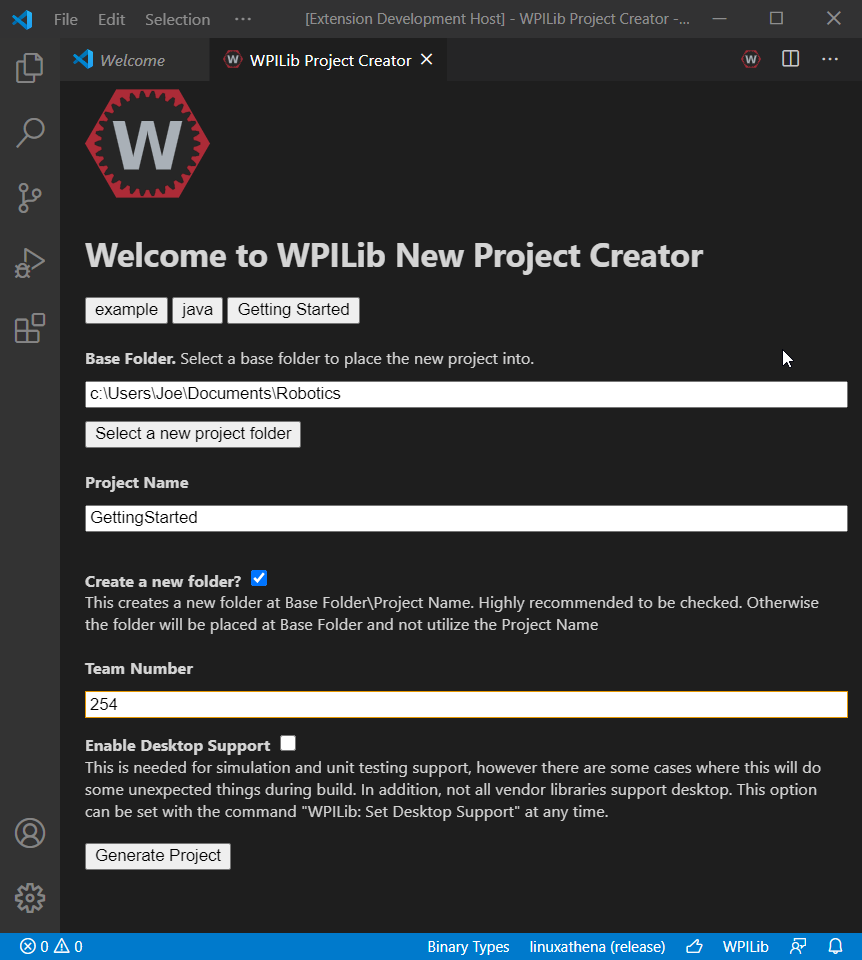
Once all the above have been configured, click “Generate Project” and the robot project will be created.
Note
Any errors in project generation will appear in the bottom right-hand corner of the screen.
An example after all options are selected is shown below.
Opening The New Project
After successfully creating your project, VS Code will give the option of opening the project as shown below. We can choose to do that now or later by typing Ctrl+K then Ctrl+O (or just Command+O on macOS) and select the folder where we saved our project.
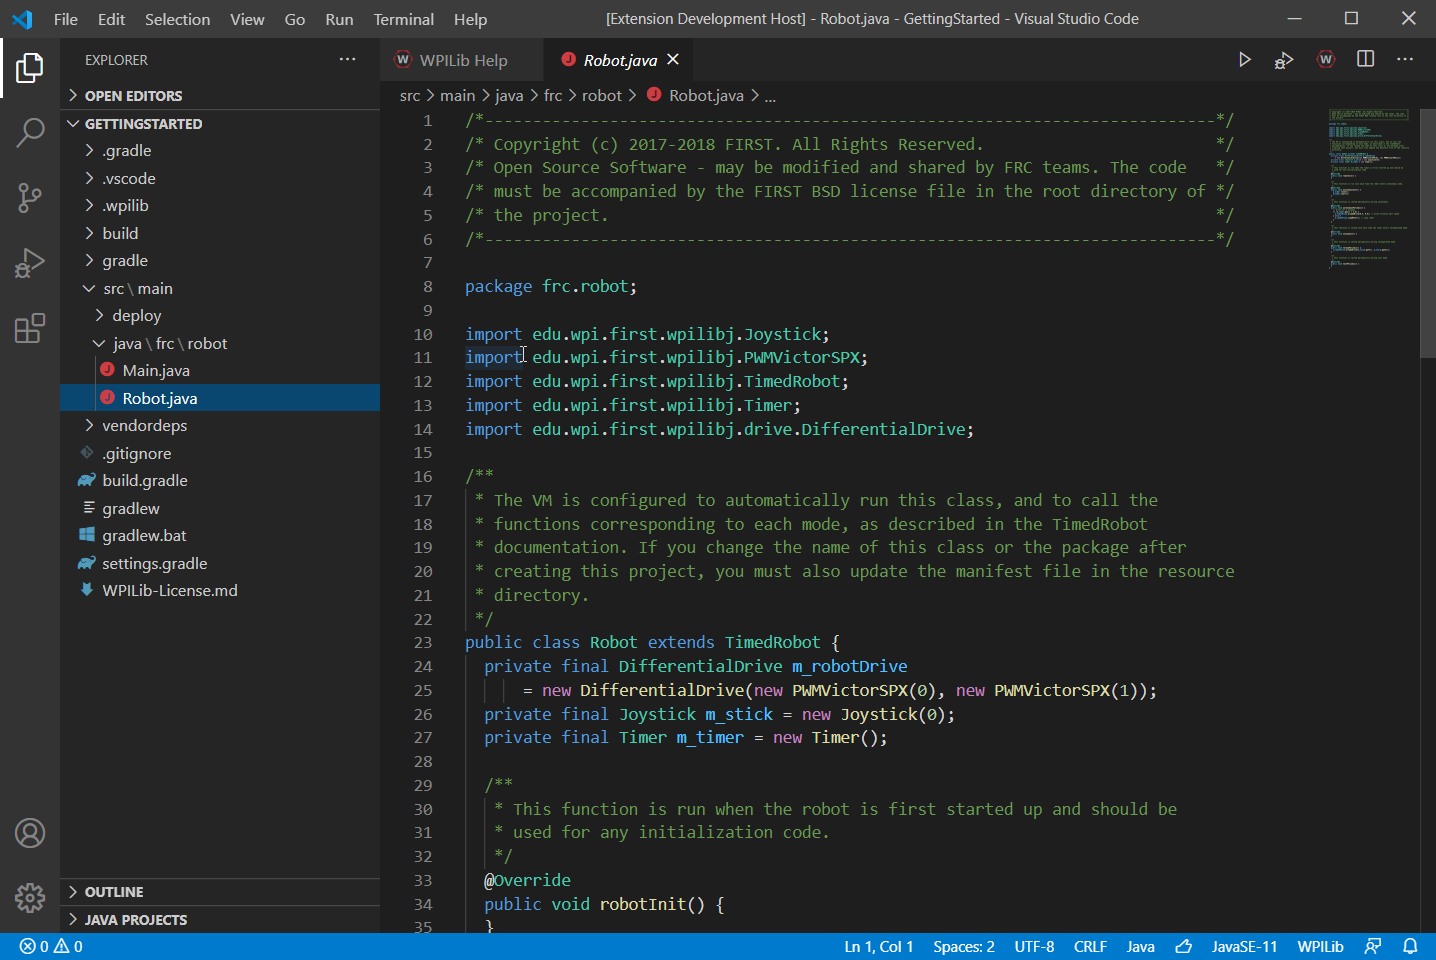
Once opened we will see the project hierarchy on the left. Double clicking on the file will open that file in the editor.
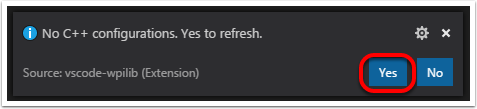
C++ Configurations (C++ Only)
For C++ projects, there is one more step to set up IntelliSense. Whenever we open a project, we should get a pop-up in the bottom right corner asking to refresh C++ configurations. Click “Yes” to set up IntelliSense.