Programming the Romi
Writing a program for the Romi is very similar to writing a program for a regular FRC robot. In fact, all the same tools (Visual Studio Code, Driver Station, SmartDashboard, etc) can be used with the Romi.
Creating a Romi Program
Creating a new program for a Romi is no different than creating a normal FRC program, similar to the Zero To Robot programming steps.
WPILib comes with several templates for Romi projects, including ones based on TimedRobot, and a Command-Based project template. Additionally, an example project is also provided which showcases some of the built-in functionality of the Romi. This article will walk through creating a project from this example.
Note
In order to program the Romi using C++, a compatible C++ desktop compiler must be installed. See Robot Simulation - Additional C++ Dependency.
Creating a New WPILib Romi Project
Bring up the Visual Studio Code command palette with Ctrl+Shift+P, and type “New project” into the prompt. Select the “Create a new project” command:

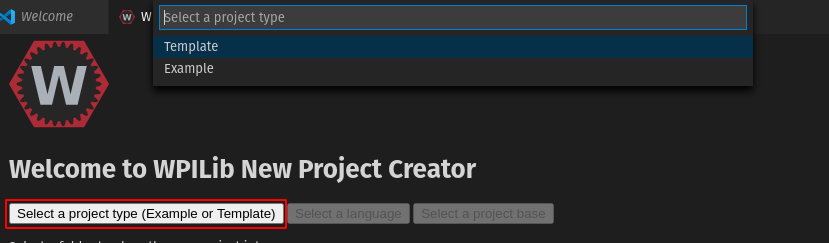
This will bring up the “New Project Creator Window”. From here, click on “Select a project type (Example or Template), and pick “Example” from the prompt that appears:
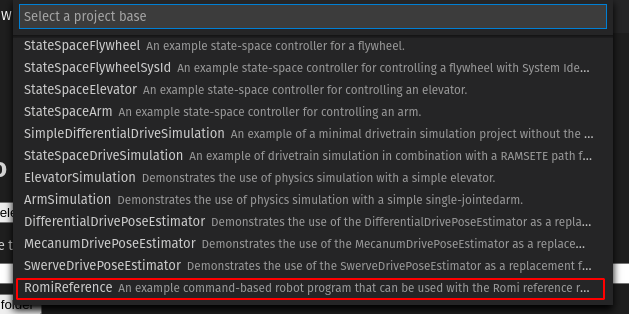
Next, a list of examples will appear. Scroll through the list to find the “RomiReference” example:
Fill out the rest of the fields in the “New Project Creator” and click “Generate Project” to create the new robot project.
Running a Romi Program
Once the robot project is generated, it is essentially ready to run. The project has a pre-built Drivetrain class and associated default command that lets you drive the Romi around using a gamepad.
One aspect where a Romi project differs from a regular FRC robot project is that the code is not deployed directly to the Romi. Instead, a Romi project runs on your development computer, and leverages the WPILib simulation framework to communicate with the Romi robot.
To run a Romi program, first, ensure that your Romi is powered on. Once you connect to the WPILibPi-<number> network broadcast by the Romi, press F5 to start running the Romi program on your computer.
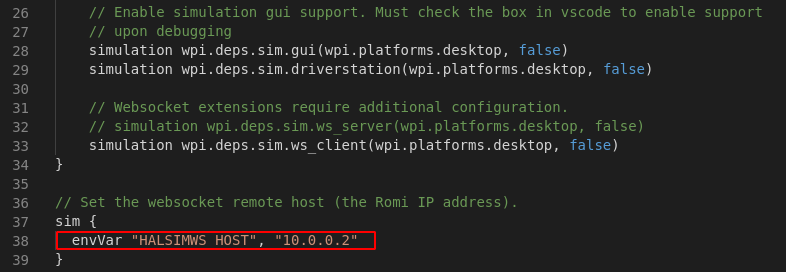
If you changed the Romi network settings (for example, to connect it to your own WiFi network), you can change the IP address that your program uses to connect to the Romi. To do this, open the “build.gradle” file and update the envVar line to the appropriate IP address.
If all goes well, you should see a line in the console output that reads “HALSimWS: WebSocket Connected”:
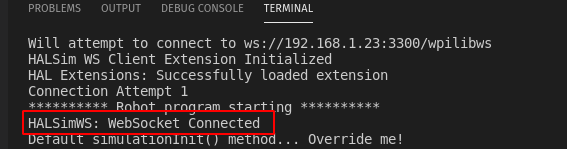
Your Romi code is now running!
Note
By default, the Romi templates and examples are set up so that positive drive values correspond to the Romi moving forward. Since forward movement on a Joystick produces negative values, you will need to invert the values in appropriate places (e.g. the xSpeed parameter to arcadeDrive on a DifferentialDrive object).