Using PIDSubsystem to Control Actuators
More advanced subsystems will use sensors for feedback to get guaranteed results for operations like setting elevator heights or wrist angles. The PIDSubsystem has a built-in PIDController to automatically set the correct setpoints for these types of mechanisms.
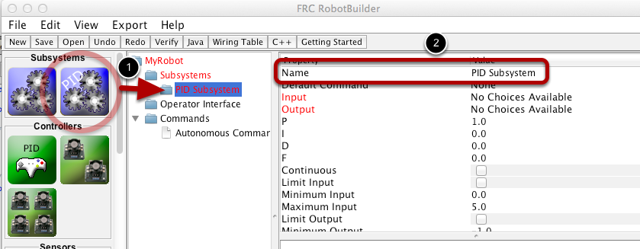
Create a PIDSubsystem
Creating a subsystem that uses feedback to control the position or speed of a mechanism is very easy.
Drag a PIDSubsystem from the palette to the Subsystems folder in the robot description
Rename the PID Subsystem to a more meaningful name for the subsystem
Notice that some of the parts of the robot description have turned red. This indicates that these components (the PIDSubsystem) haven’t been completed and need to be filled in. The properties that are either missing or incorrect are shown in red.
Adding Sensors and Actuators to the PIDSubsystem

Add the missing components for the PIDSubsystem
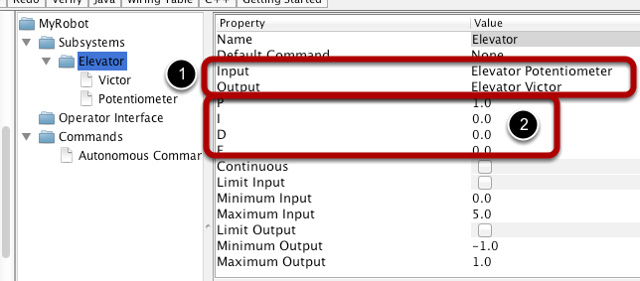
Drag in the actuator (a speed controller) to the particular subsystem - in this case the Elevator
Drag the sensor that will be used for feedback to the subsystem, in this case the sensor is a potentiometer that might give elevator height feedback.
Fill in the PIDSubsystem Parameters
There a number of parameters for the PIDSubsystem but only a few need to be filled in for most cases
The Input and Output components will have been filled in automatically from the previous step when the actuator and sensor were dragged into the PIDSubsystem
The P, I, and D values need to be filled in to get the desired sensitivity and stability of the component