Creating a Pathweaver Project
PathWeaver is the tool used to draw the paths for a robot to follow. The paths for a single program are stored in a PathWeaver project.
Starting PathWeaver
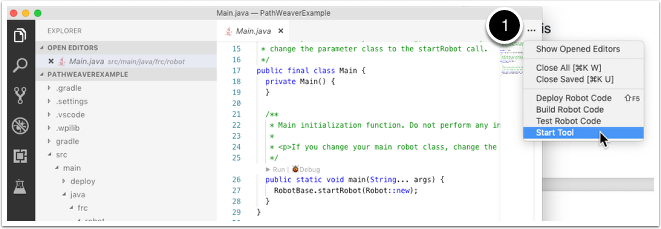
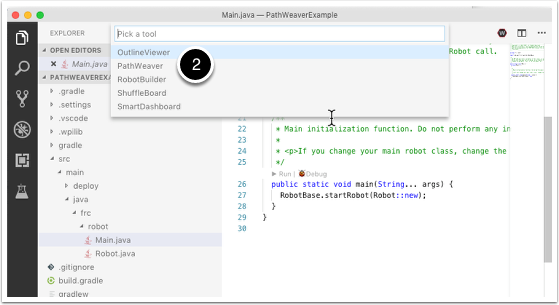
PathWeaver is started by clicking on the ellipsis icon in the top right of the corner of the Visual Studio Code interface. You must select a source file from the WPILib project to see the icon. Then click on “Start tool” and then click on “PathWeaver” as shown below.
Creating the Project
To create a PathWeaver project, click on “Create project” and then fill out the project creation form. Notice that hovering over any of the fields in the form will display more information about what is required.
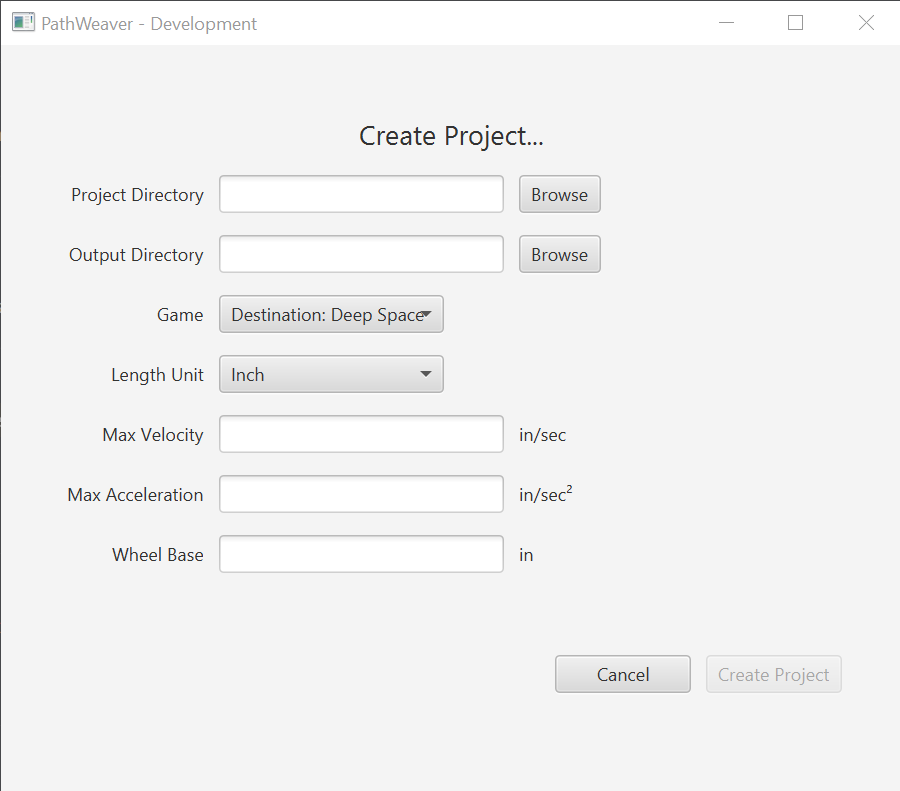
Project Directory: This is normally the top level project directory that contains the build.gradle and src files for your robot program. Choosing this directory is the expected way to use PathWeaver and will cause it to locate all the output files in the correct directories for automatic path deployment to your robot.
Output directory: The directory where the paths are stored for deployment to your robot. If you specified the top level project folder of our robot project in the previous step (as recommended) filling in the project directory is optional.
Game: The game (which FRC game is being used) will cause the correct field image overlay to be used. You can also create your own field images and the procedure will be described later in this series.
Length Unit: The units to be used in describing your robot and for the field measurements when visualizing trajectories using PathWeaver. It’s best to use units of meters, as this is what is recommended when following WPILib trajectories.
Max Velocity: The max speed of the robot for trajectory tracking. This does not need to be the maximum attainable speed of the robot, but just the max speed that you want to run trajectories at.
Max Acceleration: The max acceleration of the robot for trajectory tracking. This does not need to be the maximum attainable acceleration of the robot, but just the max acceleration that you want to run trajectories at.
Wheel Base: The distance between the left and right wheels of your robot. This is used to ensure that no wheel on a differential drive will go over the specified max velocity around turns.
PathWeaver User Interface
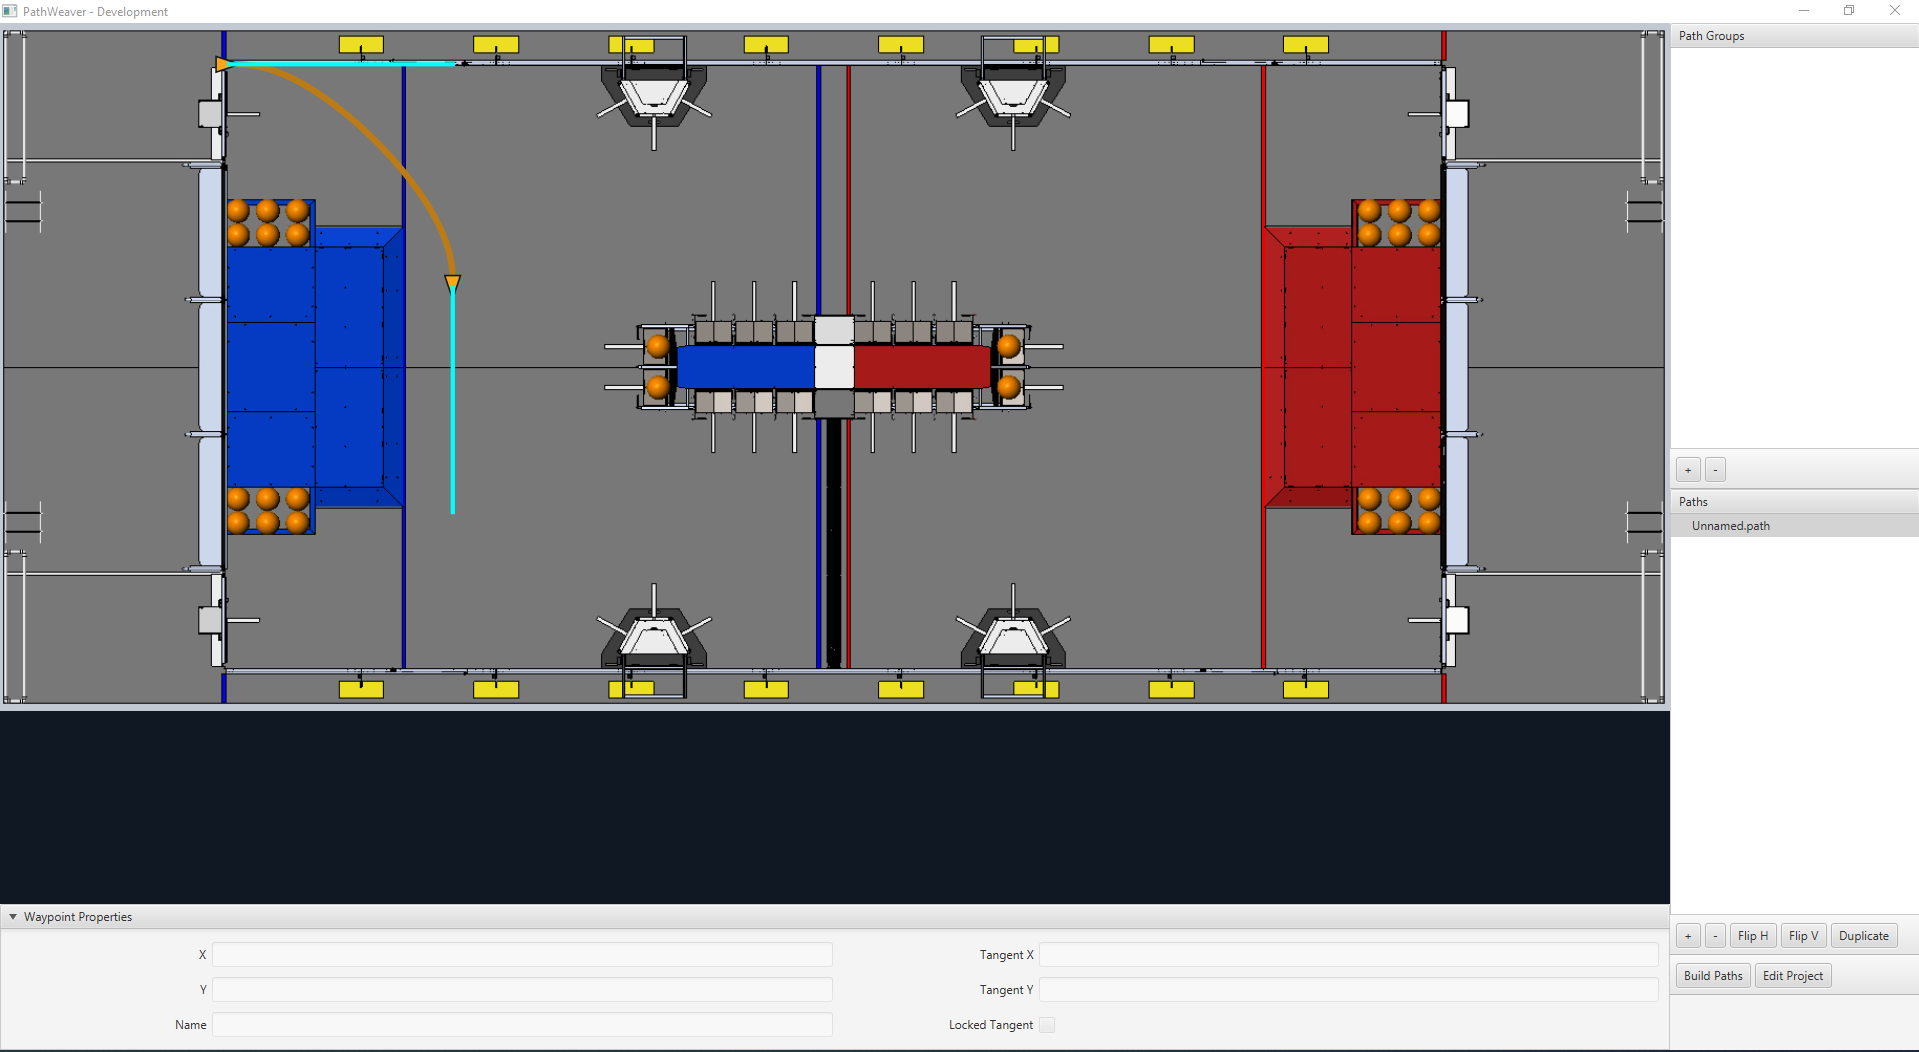
The PathWeaver user interface consists of the following:
The field area in the top left corner, which takes up most of the PathWeaver window. Trajectories are drawn on this part of the program.
The properties of the currently selected waypoint are displayed in the bottom pane. These properties include the X and Y, along with the tangents at each point.
A group of paths (or an “autonomous” mode) is displayed on the upper right side of the window. This is a convenient way of seeing all of the trajectories in a single auto mode.
The individual paths that a robot might follow are displayed in the lower right side of the window.
The “Build Paths” button will export the trajectories in a JSON format. These JSON files can be used from the robot code to follow the trajectory.
The “Edit Project” button allows you to edit the project properties.