Troubleshooting Dashboard Connectivity
We have received a number of reports of Dashboard connectivity issues from events. This document will help explain how to recognize if the Dashboard is not connected to your robot, steps to troubleshoot this condition and a code modification you can make.
LabVIEW Dashboard
This section discusses connectivity between the robot and LabVIEW dashboard
Recognizing LabVIEW Dashboard Connectivity
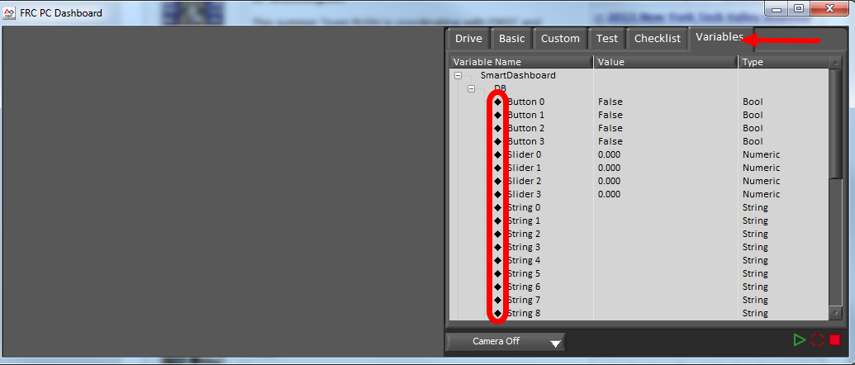
If you have an indicator on your dashboard that you expect to be changing it may be fairly trivial to recognize if the Dashboard is connected. If not, there is a way to check without making any changes to your robot code. On the Variables tab of the Dashboard, the variables are shown with a black diamond when they are not synced with the robot. Once the Dashboard connects to the robot and these variables are synced, the diamond will disappear.
Troubleshooting LabVIEW Dashboard Connectivity
If the Dashboard does not connect to the Robot (after the Driver Station has connected to the robot) the recommended troubleshooting steps are:
Close the Driver Station and Dashboard, then re-open the Driver Station (which should launch the Dashboard).
If that doesn’t work, restart the Robot Code using the Restart Robot Code button on the Diagnostics tab of the Driver Station
Improving Reliability of a Custom Dashboard
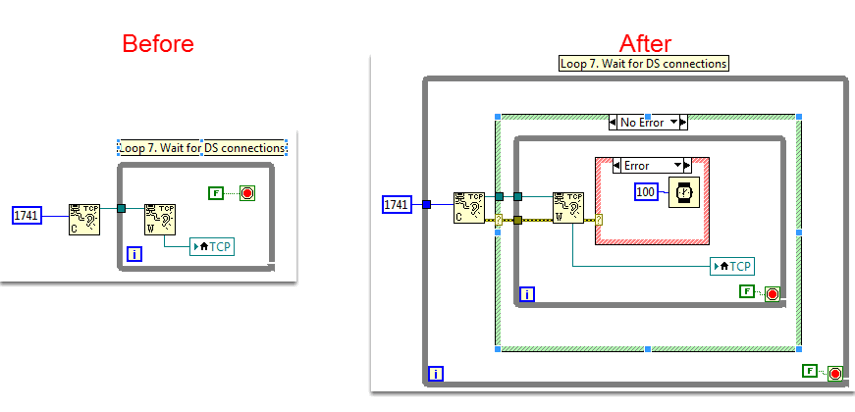
If you have created a custom LabVIEW dashboard there is a tweak you can make to the code to improve reliability of the initial connection. Locate the loop labeled Loop 7 in the Dashboard Main VI. Modify the loop according to the image above by adding a loop around the listener, 2 case statements, a Wait block and error wiring.
SmartDashboard
This section discusses connectivity between the robot and Java SmartDashboard
Recognizing SmartDashboard Connectivity
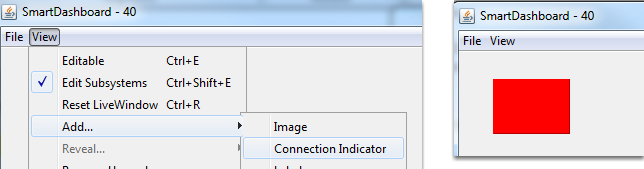
The typical way to recognize connectivity with the Java SmartDashboard is to add a Connection Indicator widget and to make sure your code is writing at least one key during initialization or disabled to trigger the connection indicator. The connection indicator can be moved or re-sized if the Editable checkbox is checked.
Troubleshooting SmartDashboard Connectivity
If the Dashboard does not connect to the Robot (after the Driver Station has connected to the robot) the recommended troubleshooting steps are:
Restart the SmartDashboard (there is no need to restart the Driver Station software for the Java SmartDashboard)
If that doesn’t work, restart the Robot Code using the Restart Robot Code button on the Diagnostics tab of the Driver Station
If it still doesn’t connect verify that the Team Number is set properly in the Dashboard and that your Robot Code writes a SmartDashboard value during initialization or disabled