Imaging your roboRIO
Warning
Before imaging your roboRIO, you must have completed installation of the FRC Game Tools. You also must have the roboRIO power properly wired to the Power Distribution Panel. Make sure the power wires to the roboRIO are secure and that the connector is secure firmly to the roboRIO (4 total screws to check).
Important
The first time a roboRIO 2 is imaged (or if the microSD card is replaced with a new card), the microSD card must be imaged with a computer and SD burner application using roboRIO 2.0 microSD card imaging process; imaging the roboRIO 2 directly using the roboRIO Imaging Tool is not supported.
Configuring the roboRIO
The roboRIO Imaging Tool will be used to image your roboRIO with the latest software.
USB Connection
Connect a USB cable from the roboRIO USB Device port to the PC. This requires a USB Type A male (standard PC end) to Type B male cable (square with 2 cut corners), most commonly found as a printer USB cable.
Note
The roboRIO should only be imaged via the USB connection. It is not recommended to attempt imaging using the Ethernet connection.
Driver Installation
The device driver should install automatically. If you see a “New Device” pop-up in the bottom right of the screen, wait for the driver install to complete before continuing.
Launching the Imaging Tool

The roboRIO imaging tool and latest image are installed with the NI FRC® Game Tools. Launch the imaging tool by double clicking on the shortcut on the Desktop. If you have difficulties imaging your roboRIO, you may need to try right-clicking on the icon and selecting Run as Administrator instead.
Note
The roboRIO imaging tool is also located at C:\Program Files (x86)\National Instruments\LabVIEW YYYY\project\roboRIO Tool where YYYY is the current year - 1. If it’s 2020, the directory would be LabVIEW 2019.
roboRIO Imaging Tool
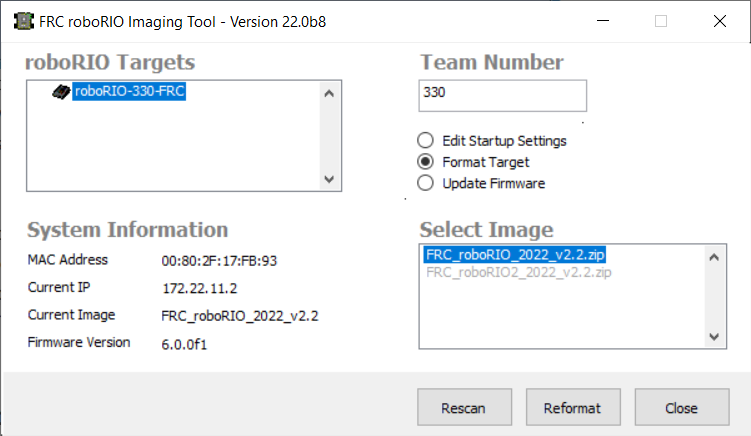
After launching, the roboRIO Imaging Tool will scan for available roboRIOs and indicate any found in the top left box. The bottom left box will show information and settings for the roboRIO currently selected. The right hand pane contains controls for modifying the roboRIO settings:
Edit Startup Settings - This option is used when you want to configure the startup settings of the roboRIO (the settings in the right pane), without imaging the roboRIO.
Format Target - This option is used when you want to load a new image on the roboRIO (or reflash the existing image). This is the most common option.
Update Firmware - This option is used to update the roboRIO firmware. For this season, the imaging tool will require roboRIO firmware to be version 5.0 or greater.
Updating Firmware
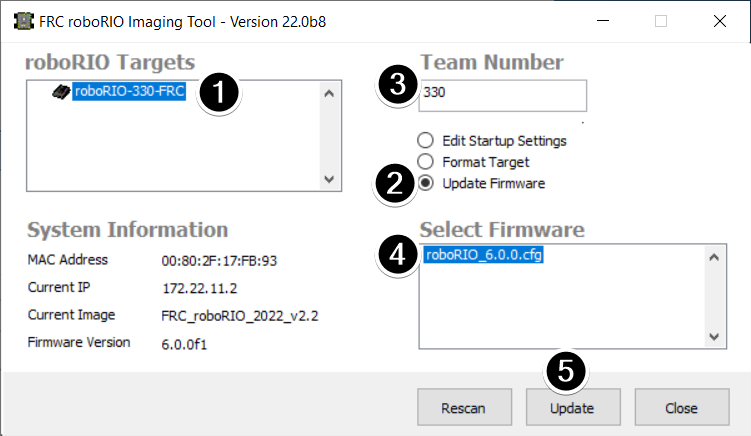
roboRIO firmware must be at least v5.0 to work with the 2019 or later image. If your roboRIO is at least version 5.0 (as shown in the bottom left of the imaging tool) you do not need to update.
To update roboRIO firmware:
Make sure your roboRIO is selected in the top left pane.
Select Update Firmware in the top right pane
Enter a team number in the Team Number box
Select the latest firmware file in the bottom right
Click the Update button
Imaging the roboRIO
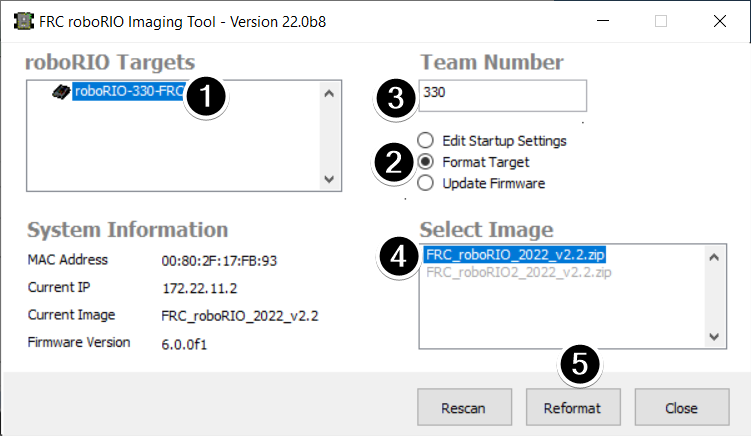
Make sure the roboRIO is selected in the top left pane
Select Format Target in the right pane
Enter your team number in the box
Select the latest image version in the box.
Click Reformat to begin the imaging process.
Imaging Progress
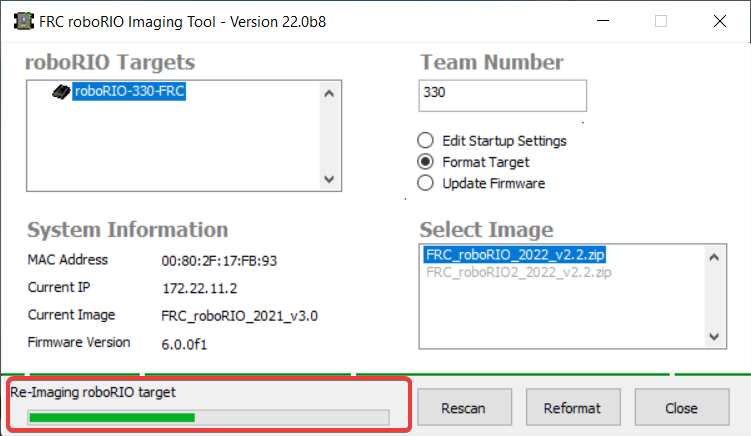
The imaging process will take approximately 3-10 minutes. A progress bar in the bottom left of the window will indicate progress.
Imaging Complete
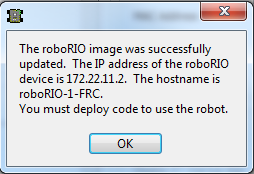
When the imaging completes you should see the dialog above. Click Ok, then click the Close button at the bottom right to close the imaging tool. Reboot the roboRIO using the Reset button to have the new team number take effect.
Troubleshooting
If you are unable to image your roboRIO, troubleshooting steps include:
Try running the roboRIO Imaging Tool as Administrator by right-clicking on the Desktop icon to launch it.
Try accessing the roboRIO webpage with a web-browser at
http://172.22.11.2/and/or verify that the NI network adapter appears in your list of Network Adapters in the Control Panel. If not, try re-installing the NI FRC Game Tools or try a different PC.Make sure your firewall is turned off.
Some teams have experienced an issue where imaging fails if the device name of the computer you’re using has a dash (
-) in it. Try renaming the computer (or using a different PC).Try booting the roboRIO into Safe Mode by pressing and holding the reset button for at least 5 seconds.
Try a different USB Cable
Try a different PC
Try imaging a roboRIO 2.0 using the roboRIO 2.0 microSD card imaging process